
WooCommerce FAQs

I get an Error when connecting WooCommerce to CustomCat and now my Store Status is Connection Initiated, how do I fix it?
Store Status is Connection Initiated
If you successfully integrated your Woo Store to CustomCat, Store Status should read “Active”. If you get an error the Store Status will read “Connection Initiated” which means that the API connection failed. Here is a list of the most common errors during integration and how you can begin to troubleshoot.
- Consumer Key is invalid or missing. See FAQ below for the solution.
- Invalid Signature – Consumer Secret is invalid or Webhook is missing. See FAQ below for the solution.
- Invalid timestamp – the clock on your server is off.
- The API key provided does not have write permissions – enable write permissions.
- REST API is disabled on your WP Site – you need to enable Rest API in WooCommerce Settings.
- Your WP security plugin has blocked our requests to connect to your site due to security reasons – You will need to configure your security plugin to white list CustomCat IPs (email us at [email protected] for the current IP Addresses). OR disable the security plugin for everything under /wc-api. You can also ask your hosting provider to do this.
The following errors occur due to problems with the Shop URL provided. The Shop URL should just be the URL of your WordPress website’s homepage. Just copy/paste from your web browser.
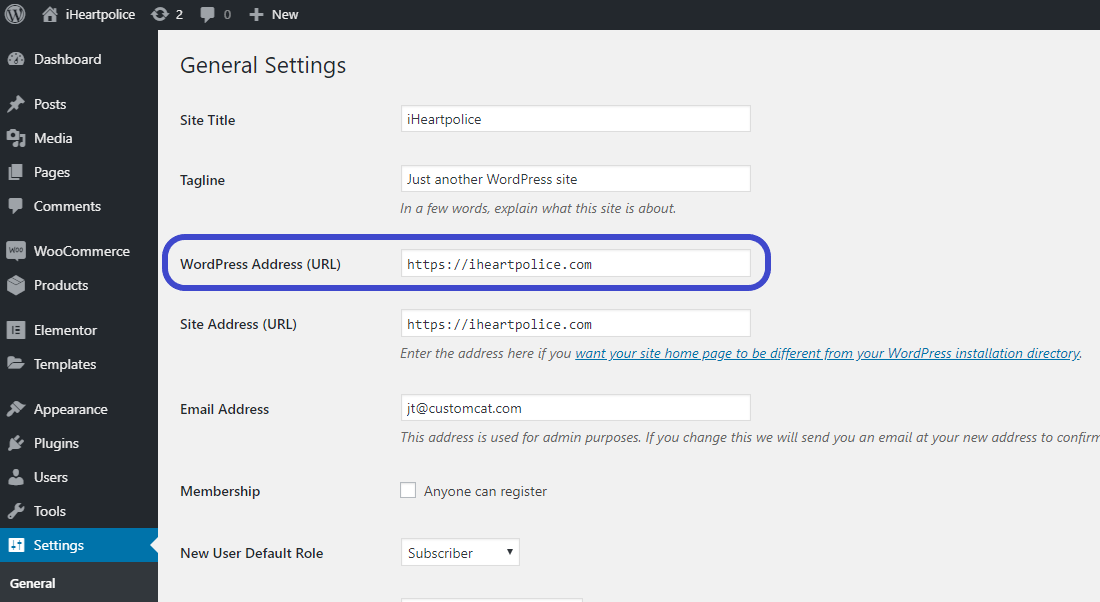
- Shop URL does not match the WP Site URL.
- Could not resolve host – invalid domain name in the URL.
- Connection Time Out – We could not connect to your server – Your server may be down. You may have entered HTTPS URL but your server only supports HTTP.
- HTTP Error 414 – URL too long – Server configuration does not support long URLs. You can ask your server admin to increase the max URL length. It may also be caused by WordPress Security Plugins that can cause exceptionally long URLs.
You can now check if the WooCommerce API is working by opening http://YOUR-WORDPRESS-URL/wc-api/v3/ in the browser. If the response contains JSON code with store information, then the API works, otherwise, the permalinks are not enabled correctly.
What do I do if my consumer key is invalid or missing?
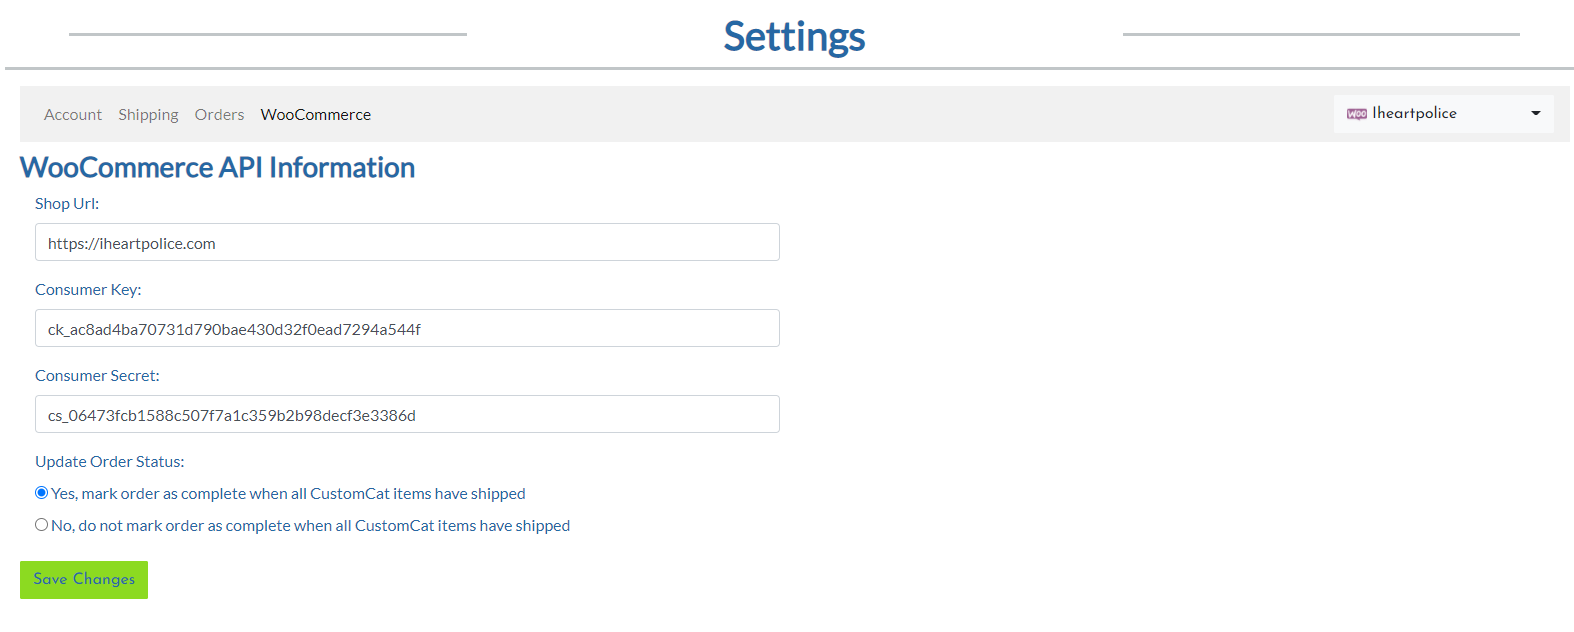
Check Consumer Key and Consumer Secret in your WP Admin under WooCommerce > Settings > Advanced> REST API/ Webhooks match CustomCat under Stores > Settings > WooCommerce.
If your consumer key is missing, the best course of action is to generate a new API Key for CustomCat in your WP Admin.
The WooCommerce REST API works on a key system to control access. Once you generate your new API keys, you will need to copy and paste these keys into your CustomCat account WooCommerce settings so that they match what is listed in WP Admin.
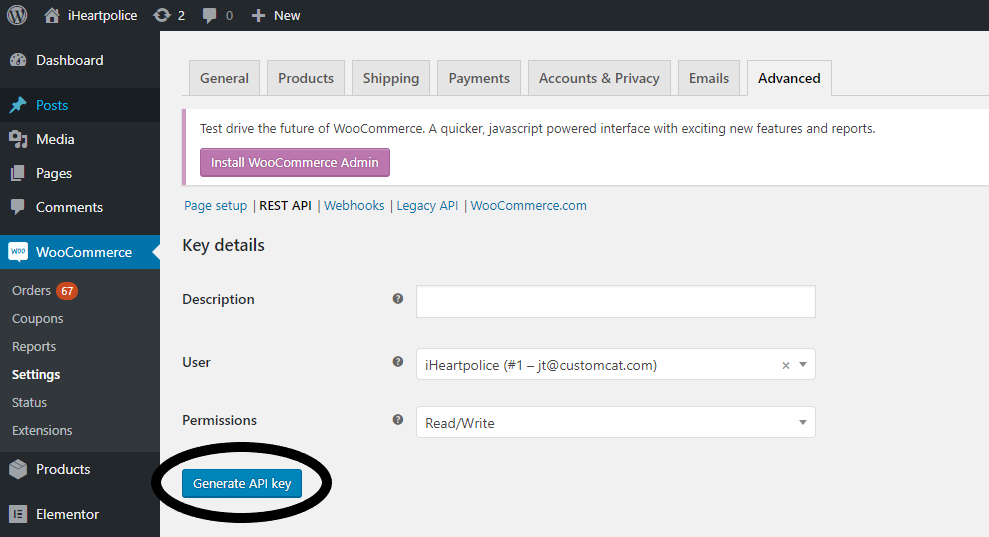
- Visit the WooCommerce > Settings > Advanced tab and click REST API.
Then click Add Key.

2. Enter a description and choose the user you created in the steps above. Then set permissions to Read/Write.
- Click the Generate API Key button, and your Consumer Key and Consumer Secret will be created.
Keep this window open — you won’t be able to access the key again if you navigate away or close the window.
In a new window, login to your CustomCat account and store Settings > WooCommerce. Copy and paste the Consumer Key and Consumer Secret into the fields on this page.
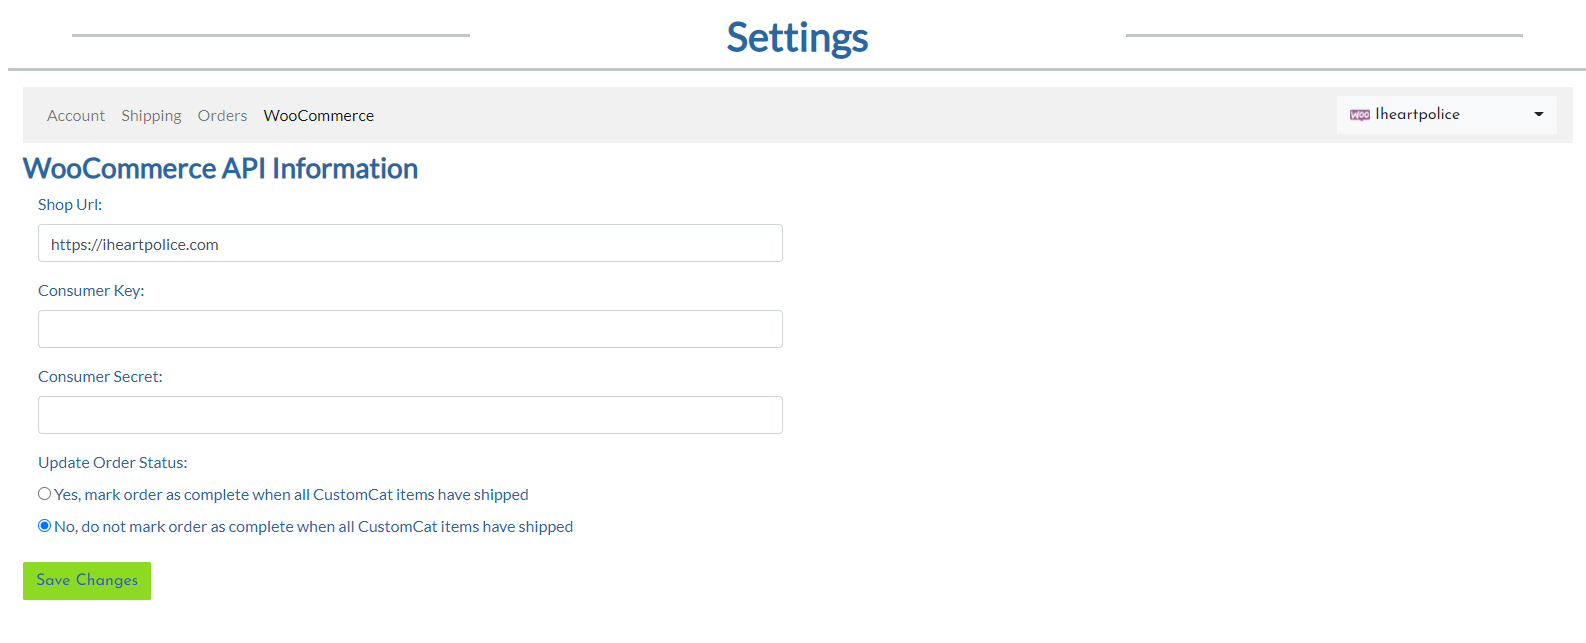
- Hit Save changes.
What do I do if my CustomCat order webhook is missing in my WooCommerce settings?
A: You would need to restore/create the webhook in WooCommerce.
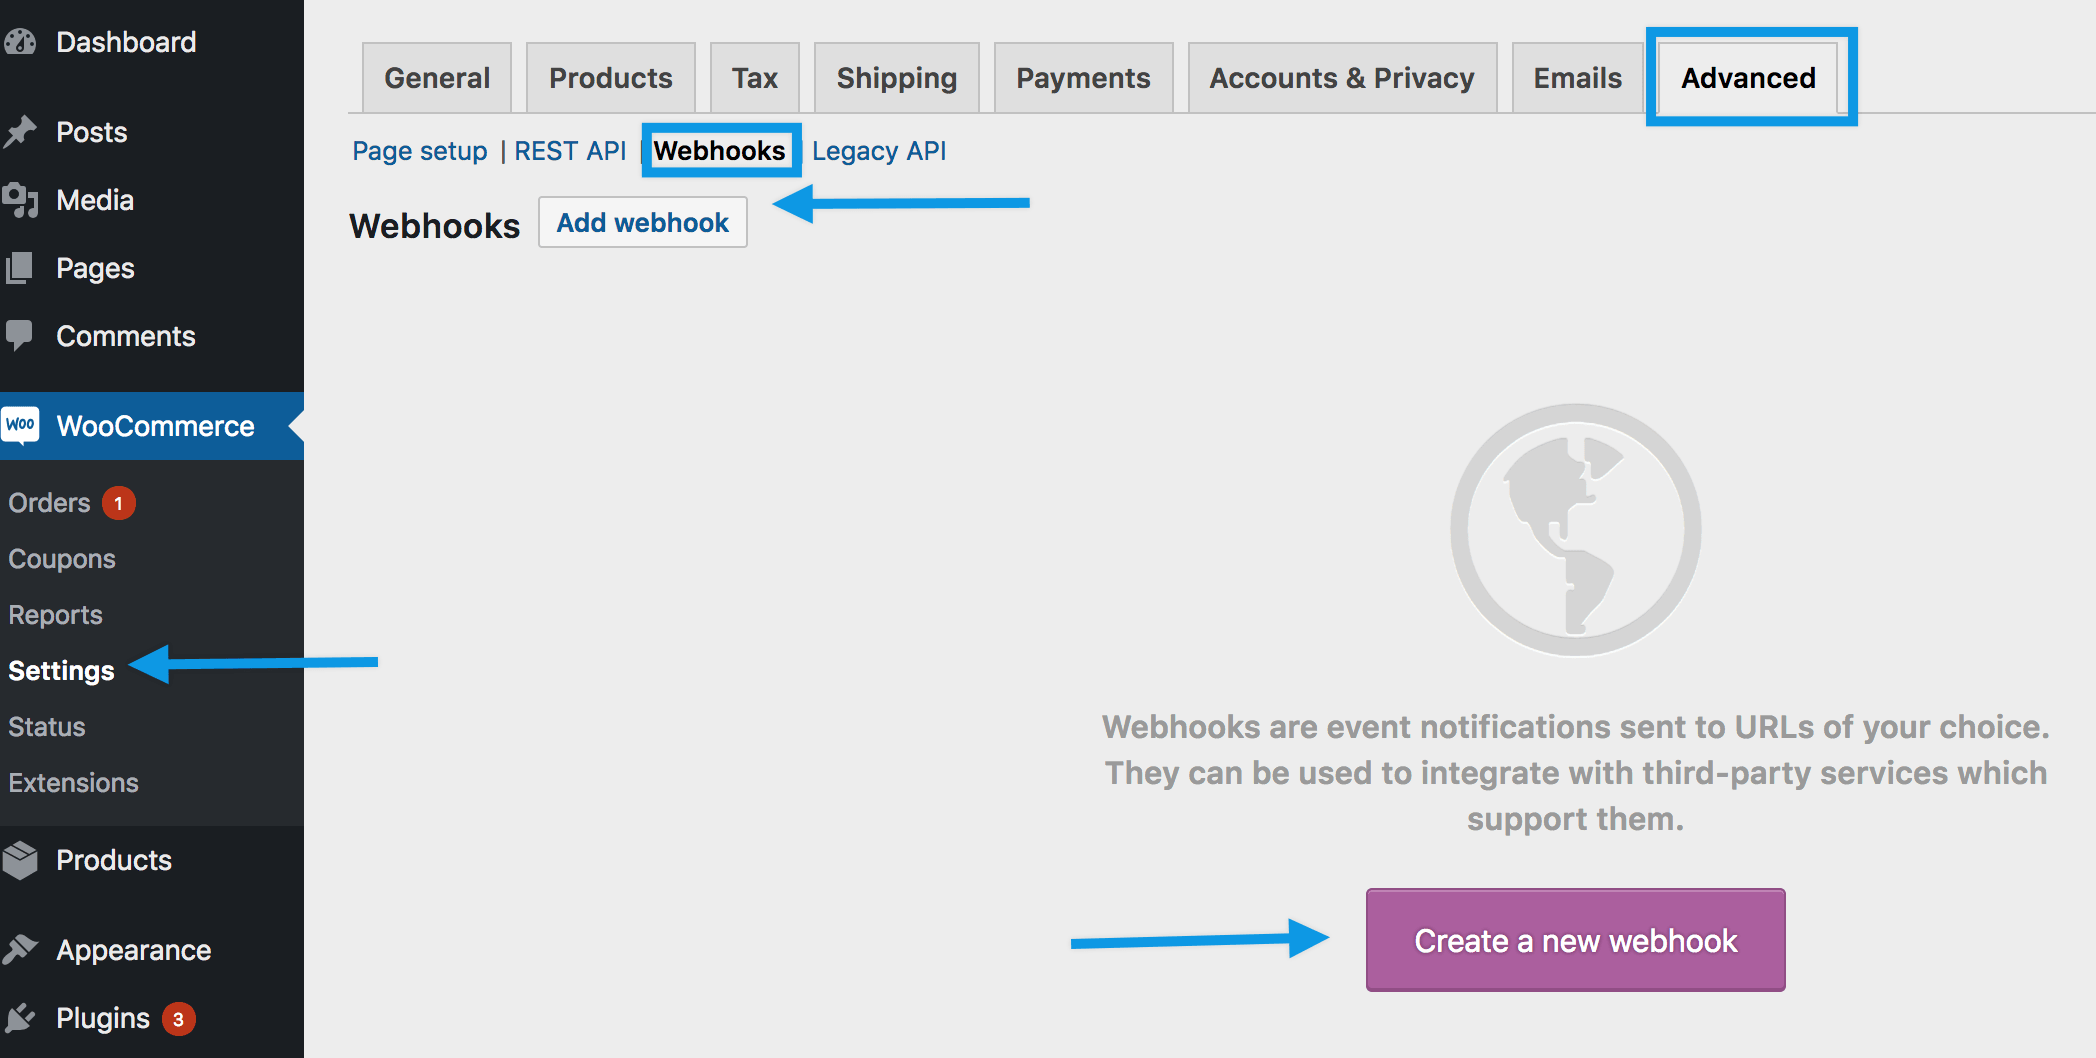
1) Go to: WooCommerce > Settings > Advanced > Webhooks.
Note: Webhooks were formerly found under WooCommerce > Settings > API prior to WooCommerce 3.4.
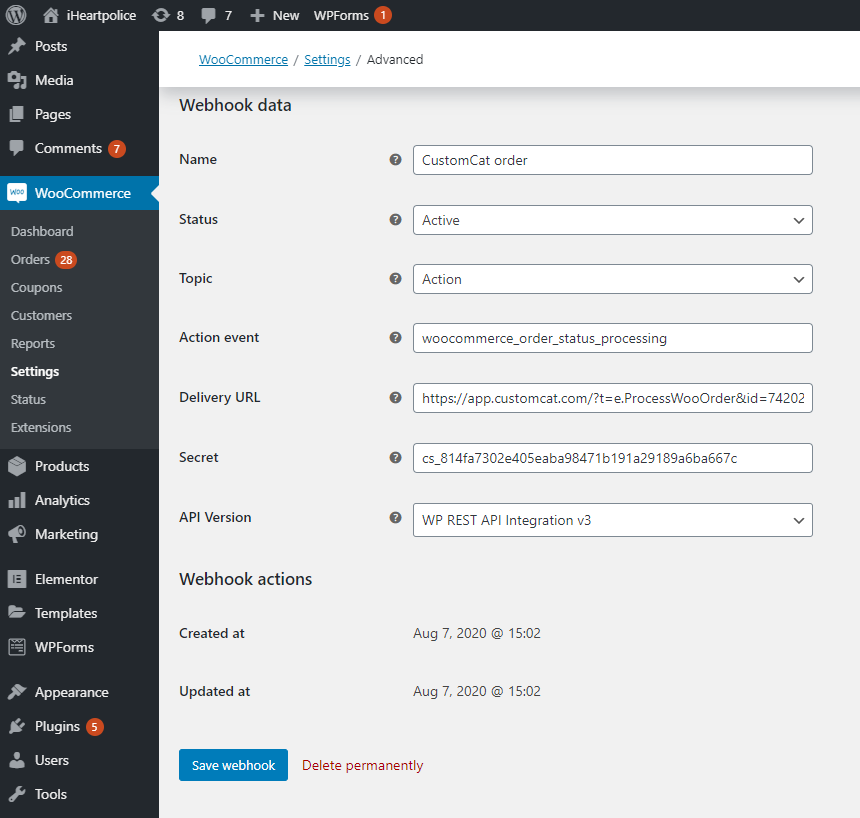
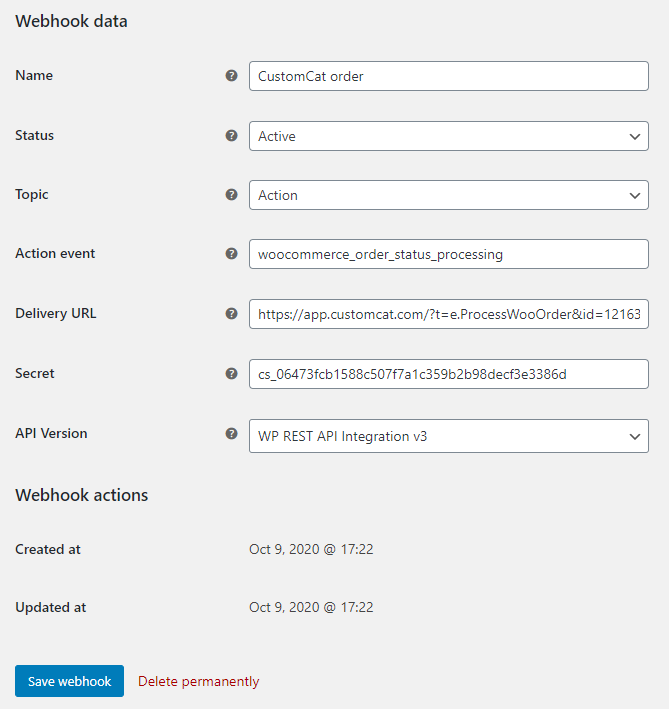
2) Click Create a new webhook (first incident) or Add webhook. The Webhook Data box appears.
- Name: The name is auto-generated as “Webhook created on [date and time of creation]” as a standard to facilitate creation. Change the name to “CustomCat Order”.
- Status: Set to Active.
- Topic: Add action event: woocommerce_order_status_processing
- Delivery URL: URL where the webhook payload is delivered.
Add the Delivery URL Template listed below:
https://app.customcat.com/?t=e.ProcessWooOrder&id=121632
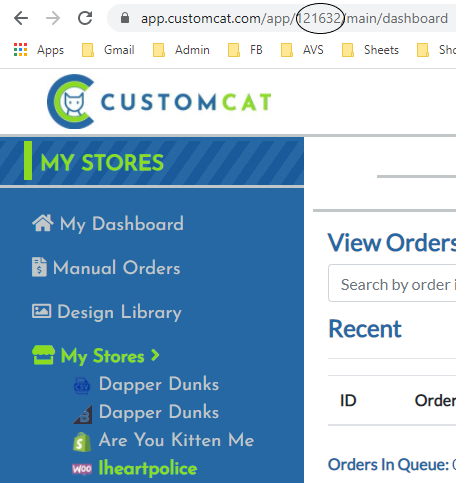
The last 4 digits of your delivery URL points to your store Id (unique per store), which can be located in your CustomCat account. To retrieve your store ID, please do the following:
- Login to your CustomCat account.
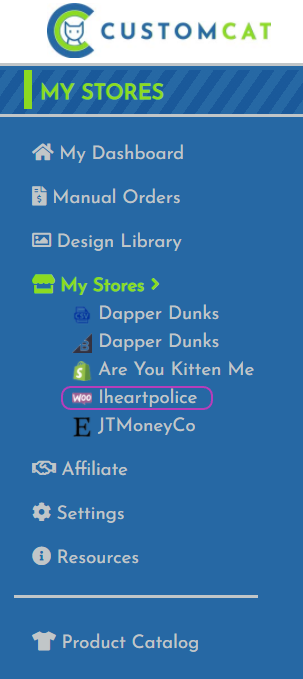
- In the left navigation, go to My Stores > and Select your store.
(located in CustomCat dashboard: use this URL https://app.customcat.com/?t=e.ProcessWooOrder&id=121632> Add your shop ID ( Set of numbers that show between “app” and “main” that is in your CustomCat dashboard to the end of the delivery URL.
Your Delivery URL should look similar to the following:
https://app.customcat.com/?t=e.ProcessWooOrder&id=121632
- Secret: Copy/paste your consumer key from your CustomCat account. Login to CustomCat.com >> Store Settings >> WooCommerce >> Copy/paste the consumer secret from your CustomCat account into the secret field on the Webhook page.
- API Version: WP Rest API Integration v3 > Save Webhook.
How long does it take for a new WooCommerce order to appear in CustomCat?
Orders are batched into our system every 2 hours, on the odd half-hour EST. CustomCat only picks up orders with the status as ”processing” to ensure only paid orders are processed on our end.
What are some WooCommerce hosting providers I can use?
Here are the options you could choose recommended by current CustomCat/WooCommerce users:
- SiteGround – good for simple stores. Pricing starts at $3.95/month
- Bluehost – cloud-based storage built for developers. Starting at $5/month
- DigitalOcean – cloud-based storage built for developers. Starting at $5/month
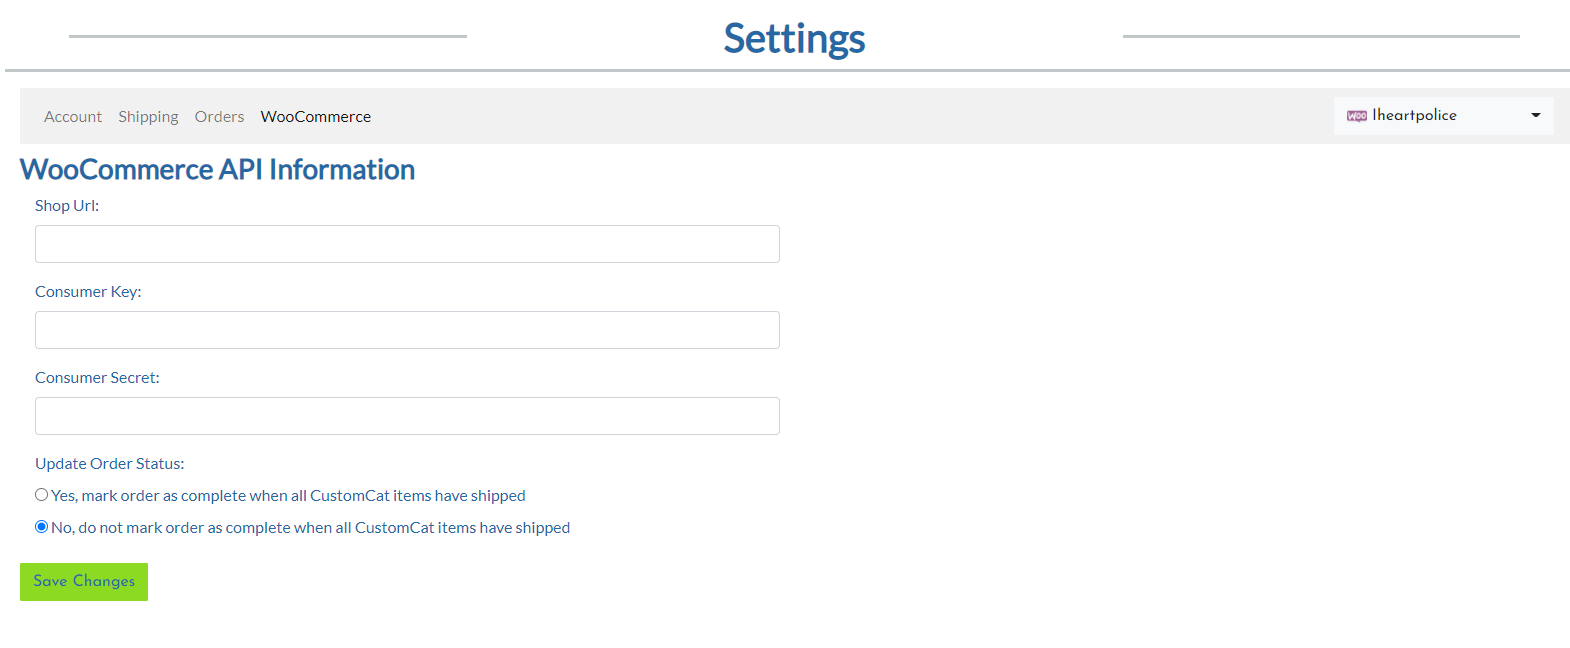
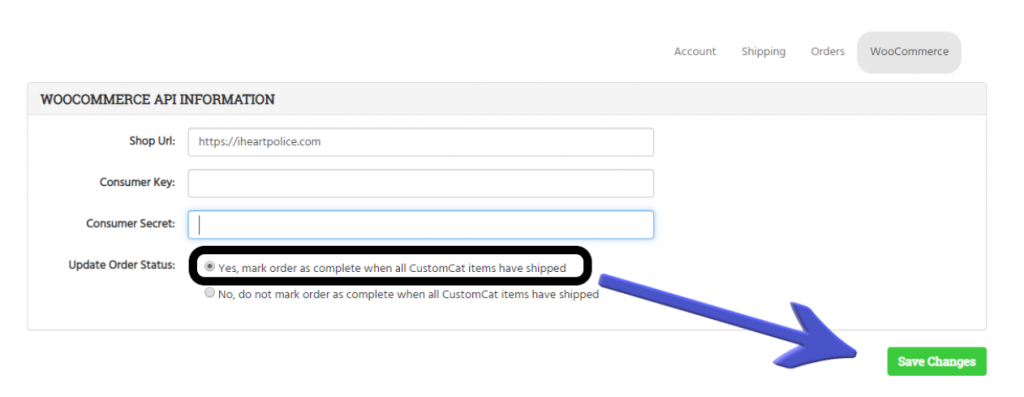
How come my WooCommerce orders are not marked as “completed”?
Login to CustomCat.com >> Account Settings >> WooCommerce and make sure you have the circle checked off as “Yes, mark order as complete when all CustomCat items have shipped”.
Make sure to Save Changes.
How do you manually combine different colored designs in the CustomCat app in WooCommerce?
There is no easy way to manually combine products with different design colors, it’s a little bit of a manual process but you can still do it.
You would need to create the 2 design/product combinations separately in your CustomCat app and then manually combine them by copying one over as new variants on the other’s product page in WooCommerce. You need to make sure you use the same exact SKU as in the product listing. The SKU will consist of 1 set of letters and 4 sets of #s – for example: cc-22-113-45853-252
The first set (cc) lets our system know CustomCat is the designated vendor for a variant, 2nd set (22) is the Product, 3rd set (113) is the color, 4th set (45853) is the Design ID, and 5th set (252) is the size. You would need to take all these SKUs and add them as variants in the other product’s listing.
Let’s go over an example together!
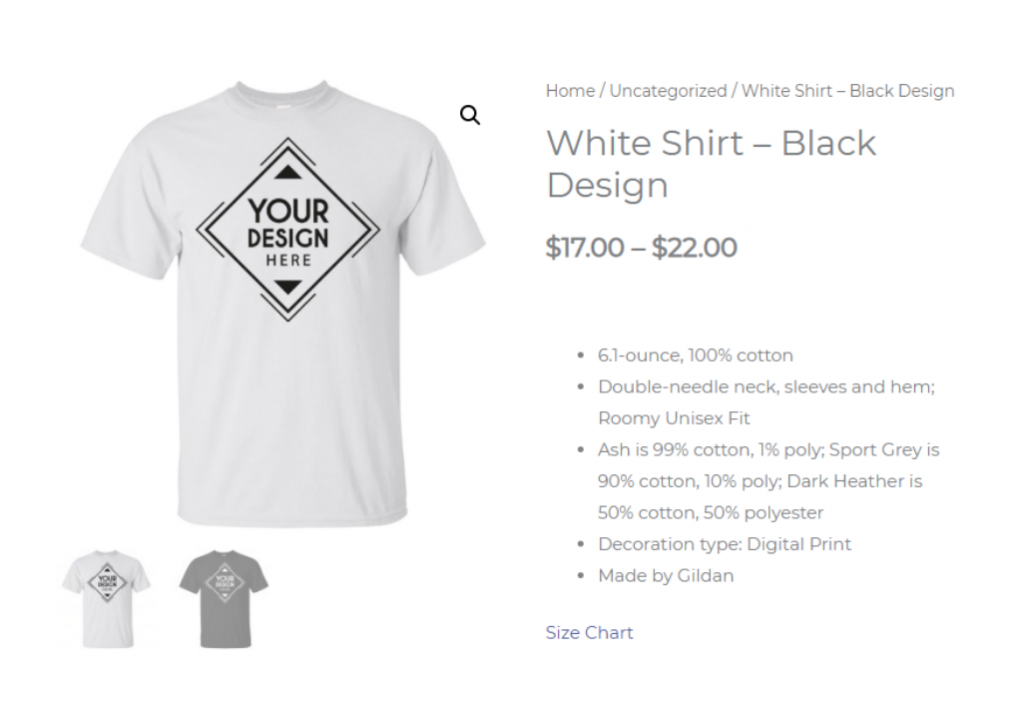
Let’s say I wanted to combine a white design on a black t-shirt with a black design on a white t-shirt. The first step is to create the product separately in your CustomCat app. It would be wise to have two tabs open with both products in WooCommerce to easily combine them into 1 product listing.
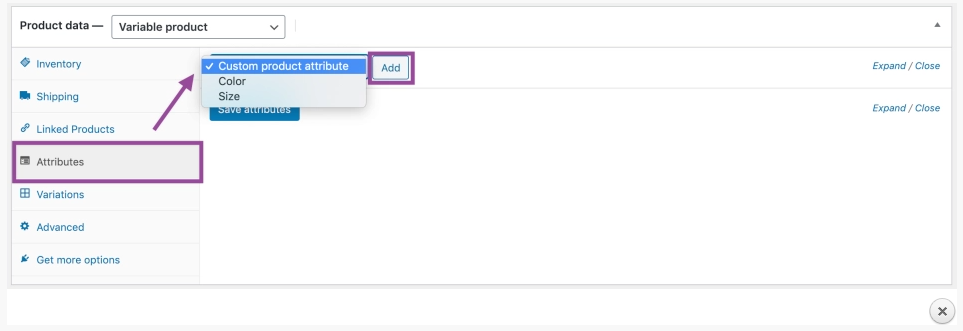
Once you have created both products, the next step is to add a custom attribute (color/sizes) to use for a specific product. Please view the steps below:
Step 1: Add attributes to use for variations.
- Select Custom Product Attribute, and Add.
- Name the attribute (e.g. Color)
- Set values separated by a vertical pipe (e.g., Black | White)
- Enable the Used for Variations checkbox.
- Save attributes.
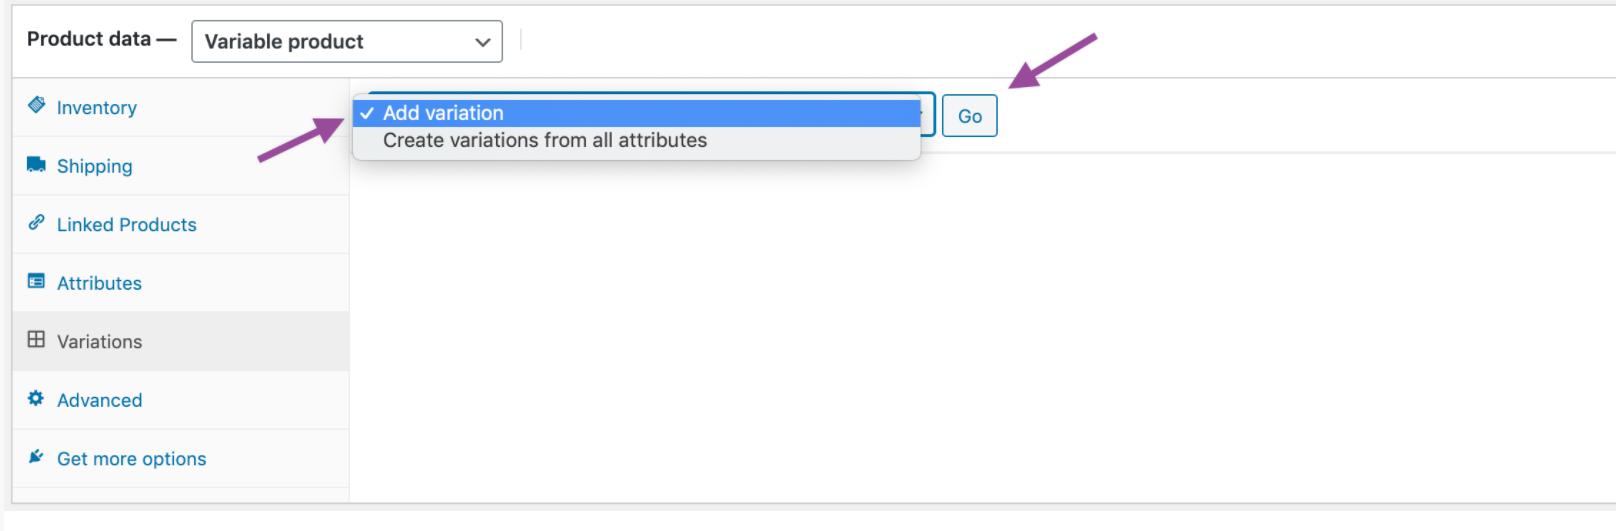
Step 2: Add variations – To add a variation, go to the Variations section in the Product Data meta box.
Manually Adding a Variation
1. Select Add Variation from the dropdown menu, and click Go

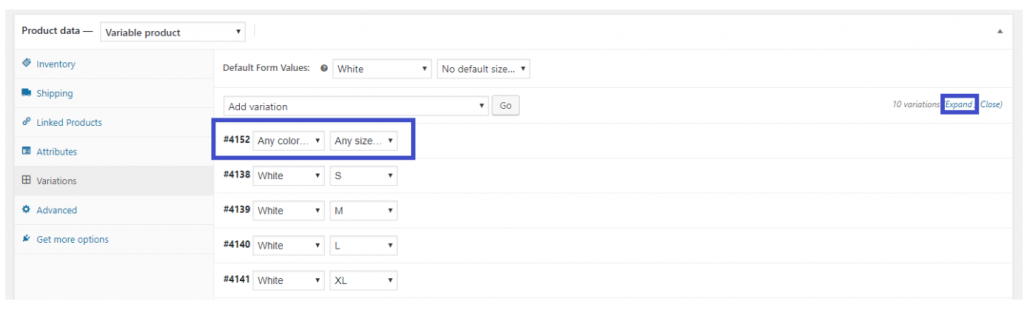
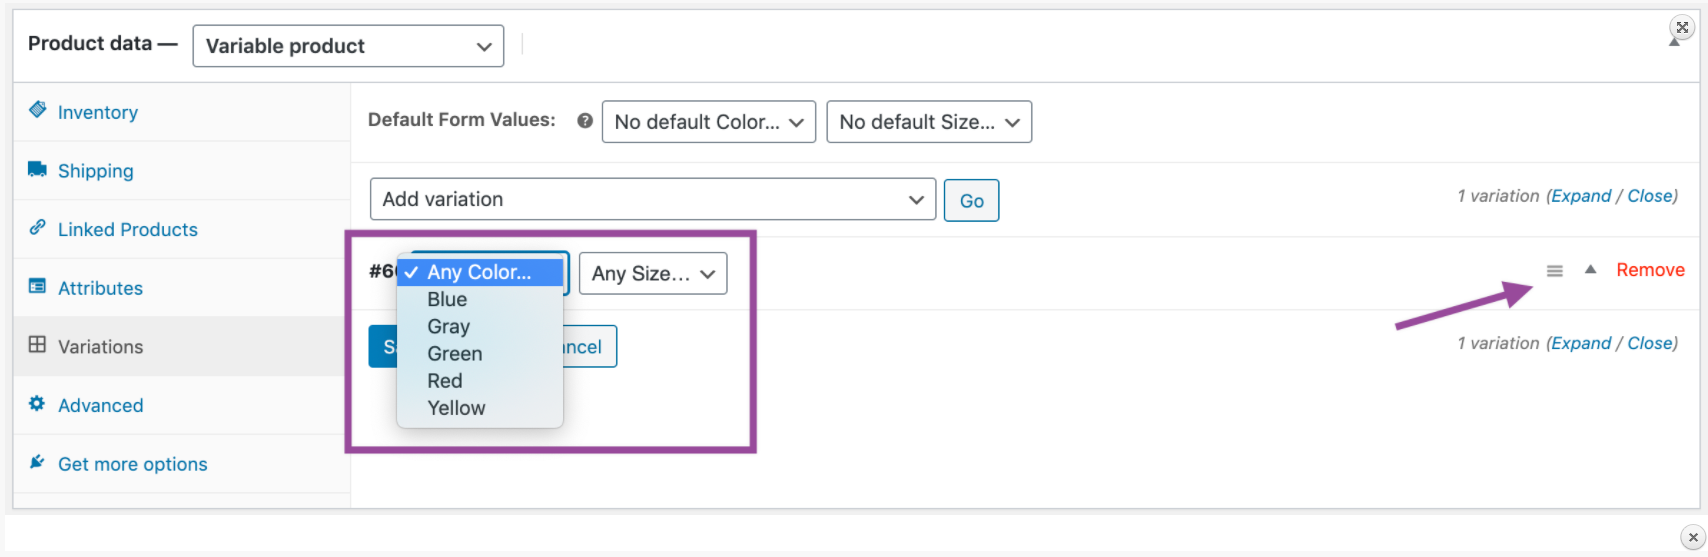
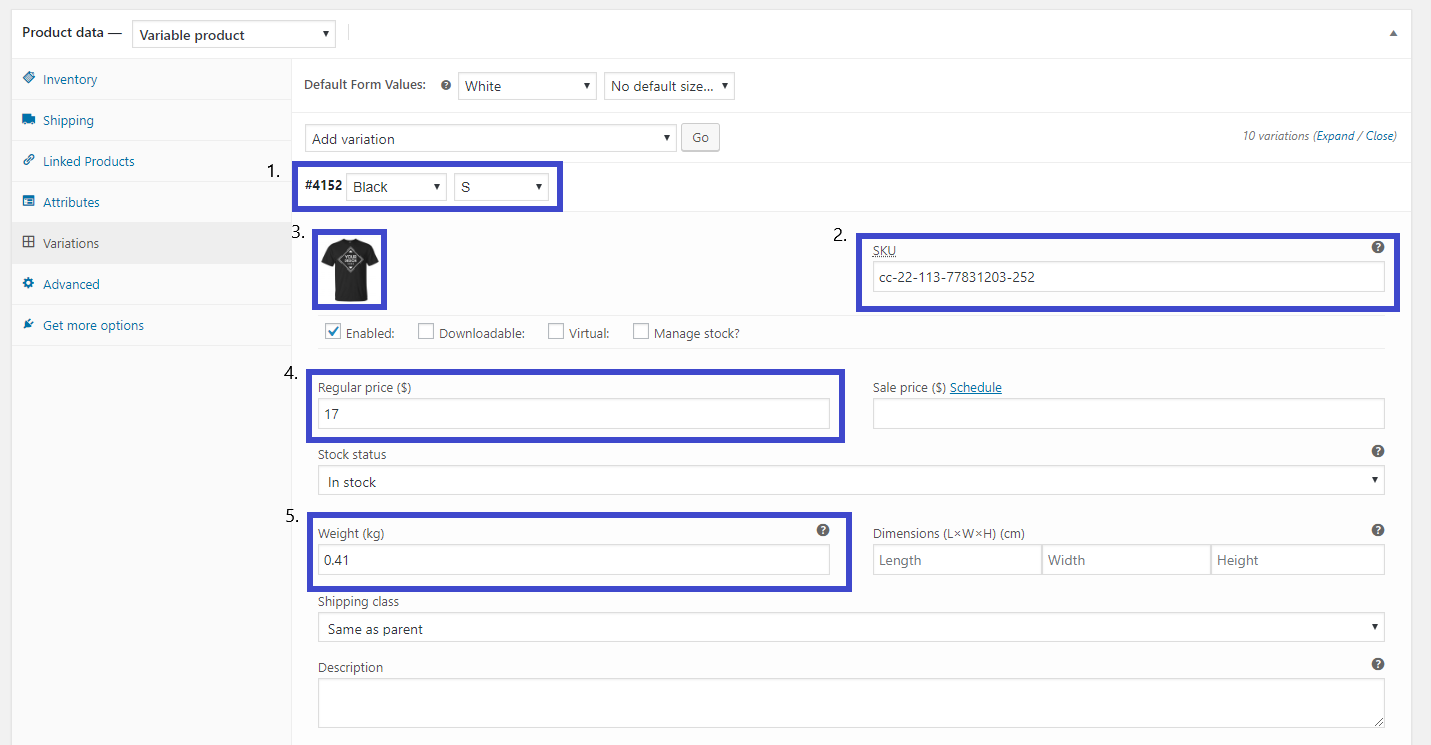
2. Select attributes for your variation. To change additional data, click the expand icon to expand the variation.
3. Copy/paste the product data each variation you want to combine. Including the (1) Color/Size combination, (2) SKU, (3) Image, (4) Price, and (5) Weight.
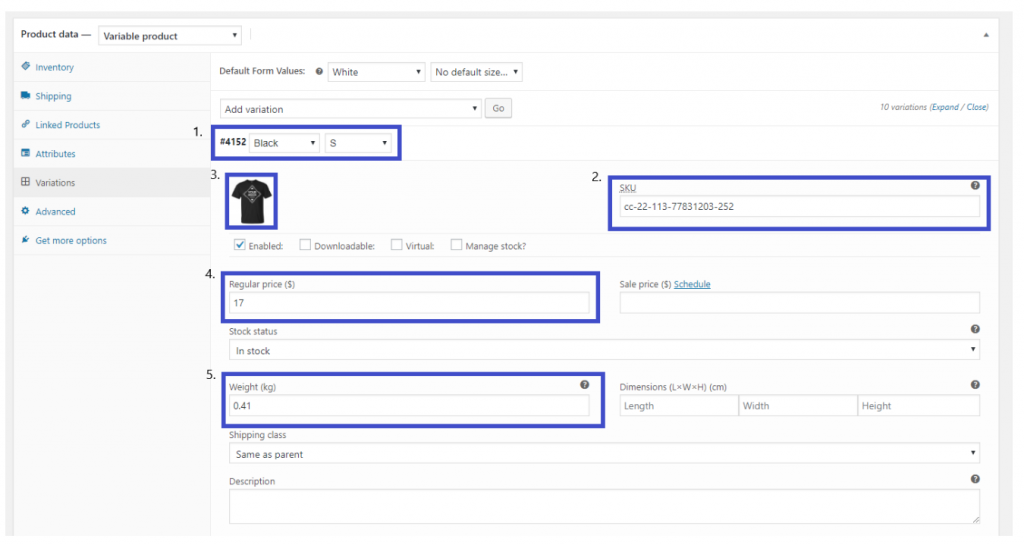
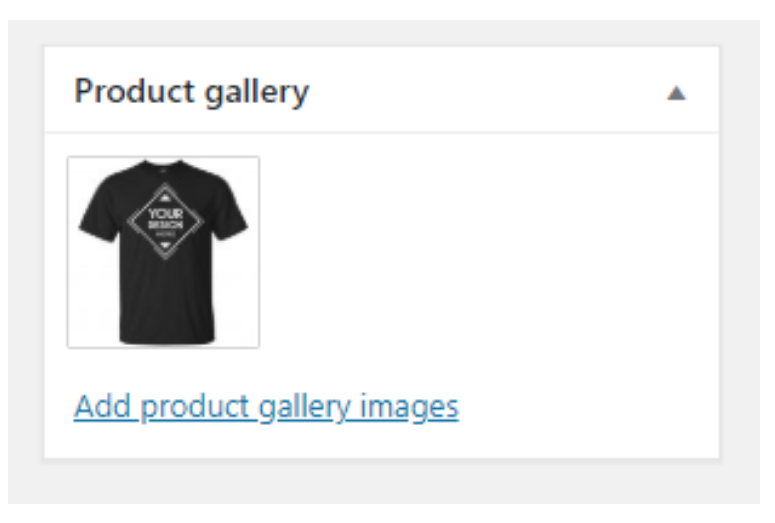
4. Add the black t-shirt mockup in the product gallery.
Once you have completed to copy/pasted each variable combination into one product listing, be sure to delete the product you no longer need in WooCommerce before saving the product listing you combined.
If you don’t, you will receive an error called “Invalid or duplicated SKU” and will have to start from the beginning.
5. Click Update.
How do I set up the product personalization feature for WooCommerce?
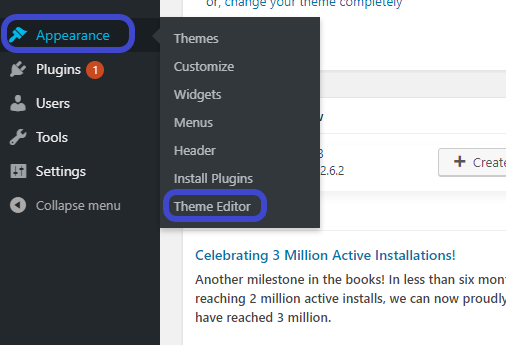
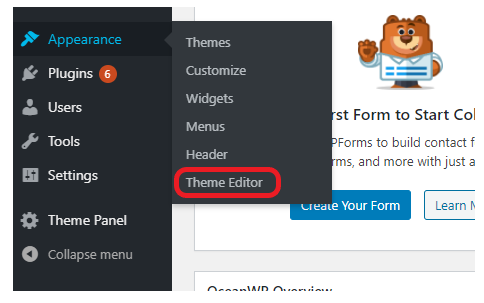
Step 1: Locate the functions.php for your theme by logging in your WordPress dashboard and go to Appearance > Theme Editor as shown here:
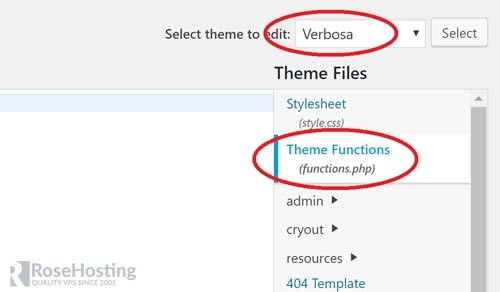
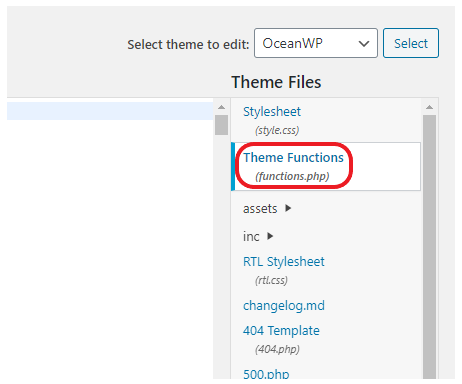
This will bring you to a page where you can edit your theme files. These files are listed on the right-hand side. Your current theme is selected by default. Locate the file labeled “Theme Functions” and click it as shown here:
Step 2: Add the following code. If you change or upgrade your theme, please make sure the new code is in the current functions.php file of the upgraded or new theme.
add_filter('woocommerce_add_cart_item_data','customcat_add_item_data',10,3);

function customcat_add_item_data($cart_item_data, $product_id, $variation_id) {

if(isset($_REQUEST['your_design'])) {

$cart_item_data['your_design'] = wp_strip_all_tags($_REQUEST['your_design']);

}

return $cart_item_data;

}

add_filter('woocommerce_get_item_data','customcat_add_item_meta',10,2);

function customcat_add_item_meta($item_data, $cart_item) {

if(array_key_exists('your_design', $cart_item)) {

$custom_details = $cart_item['your_design'];

$item_data[] = array( 'key' => 'Your Design', 'value' => '<a href="' . $custom_details . '" target="_blank" />

<img src="' . $custom_details . '"/></a>' );

}

return $item_data;

}

add_action('woocommerce_checkout_create_order_line_item', 'customcat_add_custom_order_line_item_meta',10,4);

function customcat_add_custom_order_line_item_meta($item, $cart_item_key, $values, $order) {

if(array_key_exists('your_design', $values)) {

$item->add_meta_data('your_design',$values['your_design']);

}

}

add_action('wp_enqueue_scripts', 'customcat_enqueue_scripts',10,5);

function customcat_enqueue_scripts() {

global $product;

if (is_product()) {

$product = wc_get_product();

$short_descr = $product->get_short_description();

if (strpos($short_descr, 'cc-overlay') != false) {

wp_register_script('custom_cat_script_1', 'https://cdn.customcat.com/images/theme/CustomCat/js/ccCustomize.min.js', array( 'jquery'), NULL, true);

wp_enqueue_script('custom_cat_script_1');

wp_register_script('custom_cat_script_2', 'https://app.customcat.com/js/customize_woo.js' , array('jquery'), NULL, true);

wp_enqueue_script('custom_cat_script_2');

}

}

}
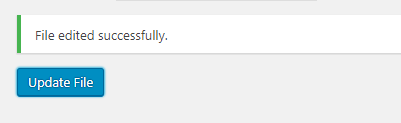
Step 3: Select update file.
What if the customize button on my cart page is displaying customize versus add to cart for non-personalized products?
To fix this error, click on the product to edit in WooCommerce and navigate to the Product short description box. Click the “Text” button.
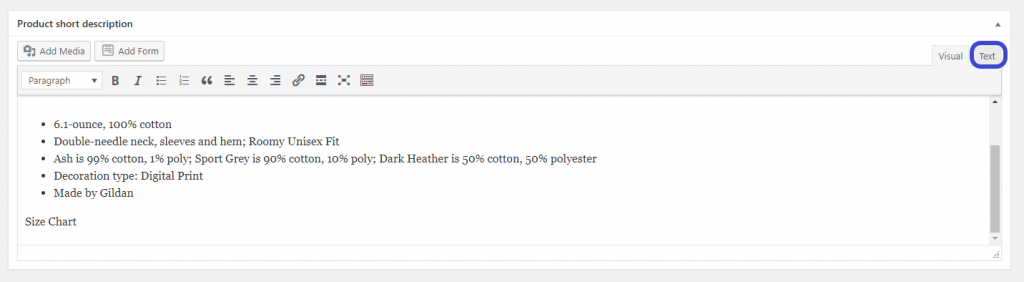
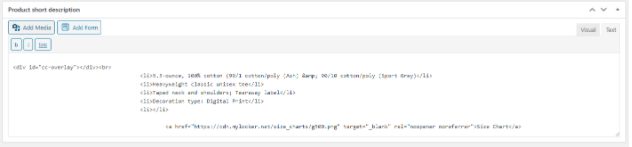
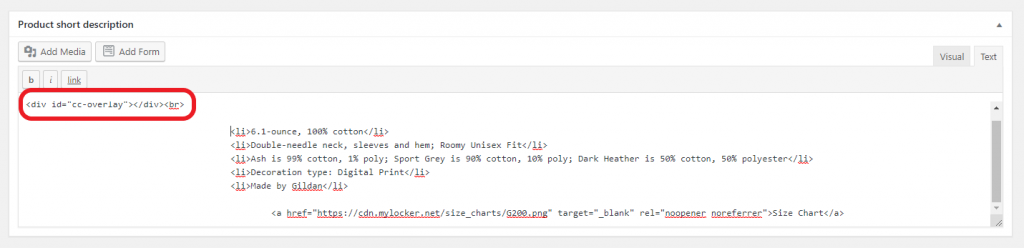
Remove the following code circled in red as shown here:
“<div id=”cc-overlay”></div><br>”
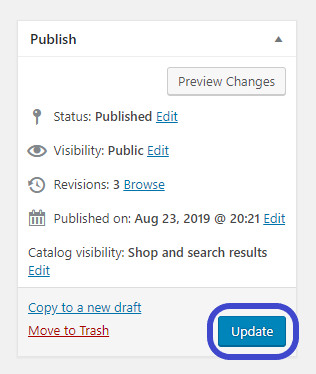
Final Step: Update your product page by selecting the “update” button.
If you have any additional feedback, questions or concerns, feel free to reach out to us at [email protected]
Featured Resource

One thought on “WooCommerce FAQs”