
Common POD Design Mistakes (and How to Avoid Them)

You don’t need to be a graphic designer to succeed in Print-on-Demand. Despite that, there can be a learning curve when getting started & creating your designs. We’ve put together a list of the most common design mistakes we see & tips on how to avoid & resolve those mistakes. Let’s jump in!
Sizing Designs Incorrectly for Print
When you’re designing for Print-on-Demand, you should design your artwork differently for products that are significantly different in size (like mugs & apparel). The size we print your artwork is determined by the artwork positioning preset you choose when designing your product. Your artwork will be stretched to fit that space if it’s smaller than the actual print size, which will reduce the resolution of the file & crispness of the print.
How to Avoid this Mistake: We provide downloadable Art Templates for each of our dye-sublimation products that include the file dimensions in mm, pixel dimensions, & resolution (DPI or dots per square inch — more on that below). Using these files to design your dye-sublimation products will ensure your artwork is exactly the size it should be to print perfectly. For DIGISOFT® products, you can find the print dimensions for each garment type in the product listing on our website or in our Art Guidelines & Best Practices document here.
How to Resolve this Mistake: If you want to increase the size of your file, you’ll need to be sure to use a method that adds new pixels rather than simply stretching out the pixels that are already there. Two popular methods to address your “too small” artwork are to:
1) Convert your design into a vector image & resize it in a design program like Adobe Illustrator or Affinity. If you’re using Canva Pro, you can use their helpful Resizing tool to re-export your design at the correct size.
2) Use our Custom Positioning tool when building your product to print the design smaller than you may have envisioned, or
3) Start over, recreating your artwork at the size you intend to print. If you choose to do this, be sure your design elements are vector graphics or are larger than your intended print size before you implement them into your design.
Designing in Low Resolution
Resolution is what determines how many pixels are present in every square inch of your file. Functionally, this translates to the amount of ink our printers use when we’re printing your products. You’ll frequently hear this referred to as PPI (pixels per inch — this is used in design) or DPI (dots per inch — this is used in print). Both are calculated the same way: number of pixels divided by the number of inches. For instance, if you have a 10 inch wide design that’s 3000 pixels wide, your design will have a resolution of 300 PPI & we will print 300 dots of ink per inch (DPI). If your resolution is too low, not enough ink will be laid down to make your image appear crisp.
![]()
How to Avoid this Mistake: We recommend most designs are 300 PPI at print size (textiles like blankets only need to be 150 PPI). To make it easy to create your artwork at the appropriate size, our downloadable art templates for dye-sublimation products will outline the pixel dimensions, preferred resolution, & physical print dimensions. Adhering to those measurements will ensure your artwork prints at the correct resolution. For DIGISOFT® products, you can find the print dimensions for each garment type in the product listing on our website or in our Art Guidelines & Best Practices document here. DIGISOFT artwork should always be 300 PPI at print size.
How to Resolve this Mistake: As with correcting an issue with a design being the wrong physical dimensions for print, you’ll need to select a method that adds extra pixels to your artwork, rather than just stretching them to take up more space. If you simply change the resolution in a design program, additional pixels are not added to your design elements unless the file is a vector format (AI, SVG, EPS, or PDF).
1) Convert your design into a vector image & resize it in a design program like Adobe Illustrator or Affinity. If you’re using Canva Pro, you can use the pixel slider in the export menu to re-export your design with more pixels.
2) Use our Custom Positioning tool when building your product to print the design smaller than you may have envisioned, or
3) Start over, recreating your artwork at proper resolution. If you choose to do this, be sure your design elements are vector graphics or are larger than your intended print size before you implement them into your design.
Creating Artwork in Colors That are Not Print-Safe
In design, there are multiple “color spaces” that you can use to create artwork — some are intended to be viewed on screens only, while some are intended to be printed with pigment. RGB color spaces were intended for use on screens & use light to create color & vibrancy — when RGB color profiles are used to create designs intended for print, the colors may not be achievable & the “print-safe” conversion of that color will usually be much less vibrant. However, color spaces like CMYK are representative of how color works in print & will provide an accurate on-screen depiction of the color you can expect to print.
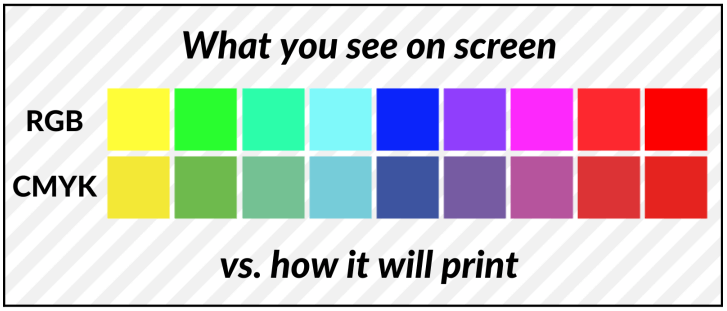
How to Avoid this Mistake: Always create your design with printing in mind. This means it’s ideal to use CMYK as your color profile in your design program. Keep in mind though that you’ll need to convert your file to sRGB when you’re finished in order to export is as a transparent PNG file, as PNG files do not support CMYK color profiles. If you’re using a design program like Canva, you won’t have control over the color profile used in your design. In this case, it’s important to avoid extra vibrant neon colors as these are not achievable in print & be mindful that the colors you see on screen may not represent the color of your printed product.
How to Resolve this Mistake: If you realize you created your designs using colors that are not print-safe, converting the color profile to CMYK in a design program will allow you to get a better idea what that design will look when printed.
1) If you’re unhappy with the color changes, it may be best to change the colors you’re using in your design.
2) If the changes work for you, it may be beneficial to update your mockups with the CMYK-version of your design to ensure your customers have accurate expectations of what their printed product will look like when it arrives.
Using Semi-Transparent Design Elements (Glow, Smoke, Fade)
You’ll often hear people refer to “opacity” or “transparency” in design. Designs with 100% opacity have 0% transparency, which means they are fully solid color & none of the surface of the garment or product should be visible behind the printed design. When opacity is reduced below 100%, it reduces the amount of ink that’s used when printing your design, which reduces how bold the color is. For dye-sublimation products, you can use reduced opacity elements like glow, smoke, or fade without any issues. However, DIGISOFT® printing requires a base layer to be put down below the ink in your image so the design can adhere properly to the garment. When less ink is used, that base layer can become visible. We recommend using 100% opaque design elements with DIGISOFT® printing for best results.
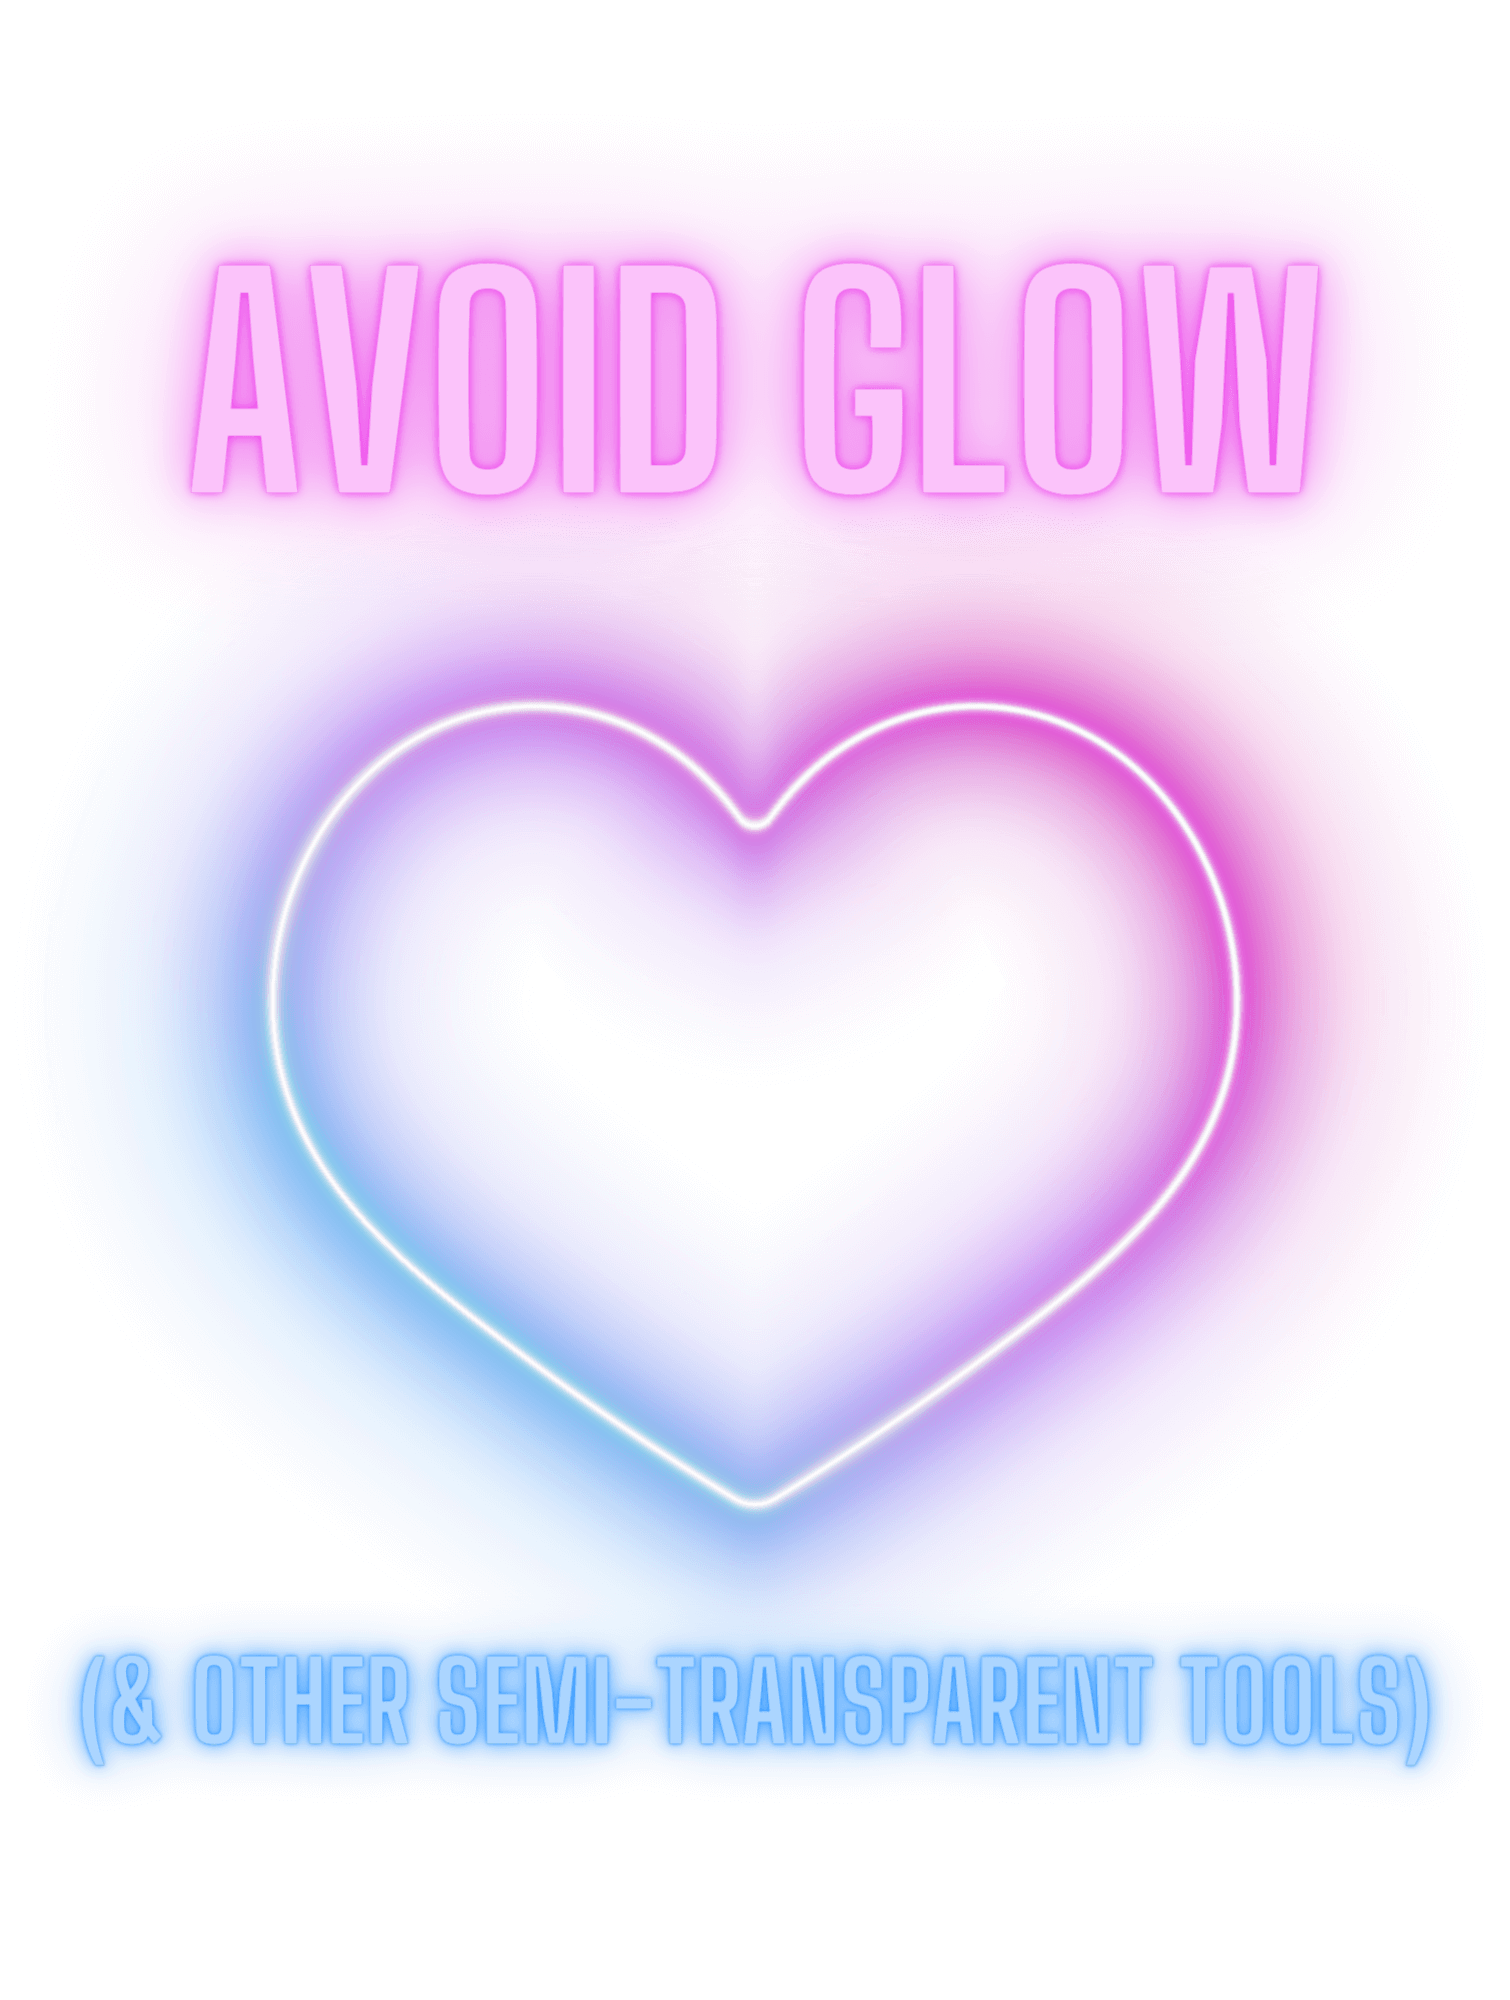
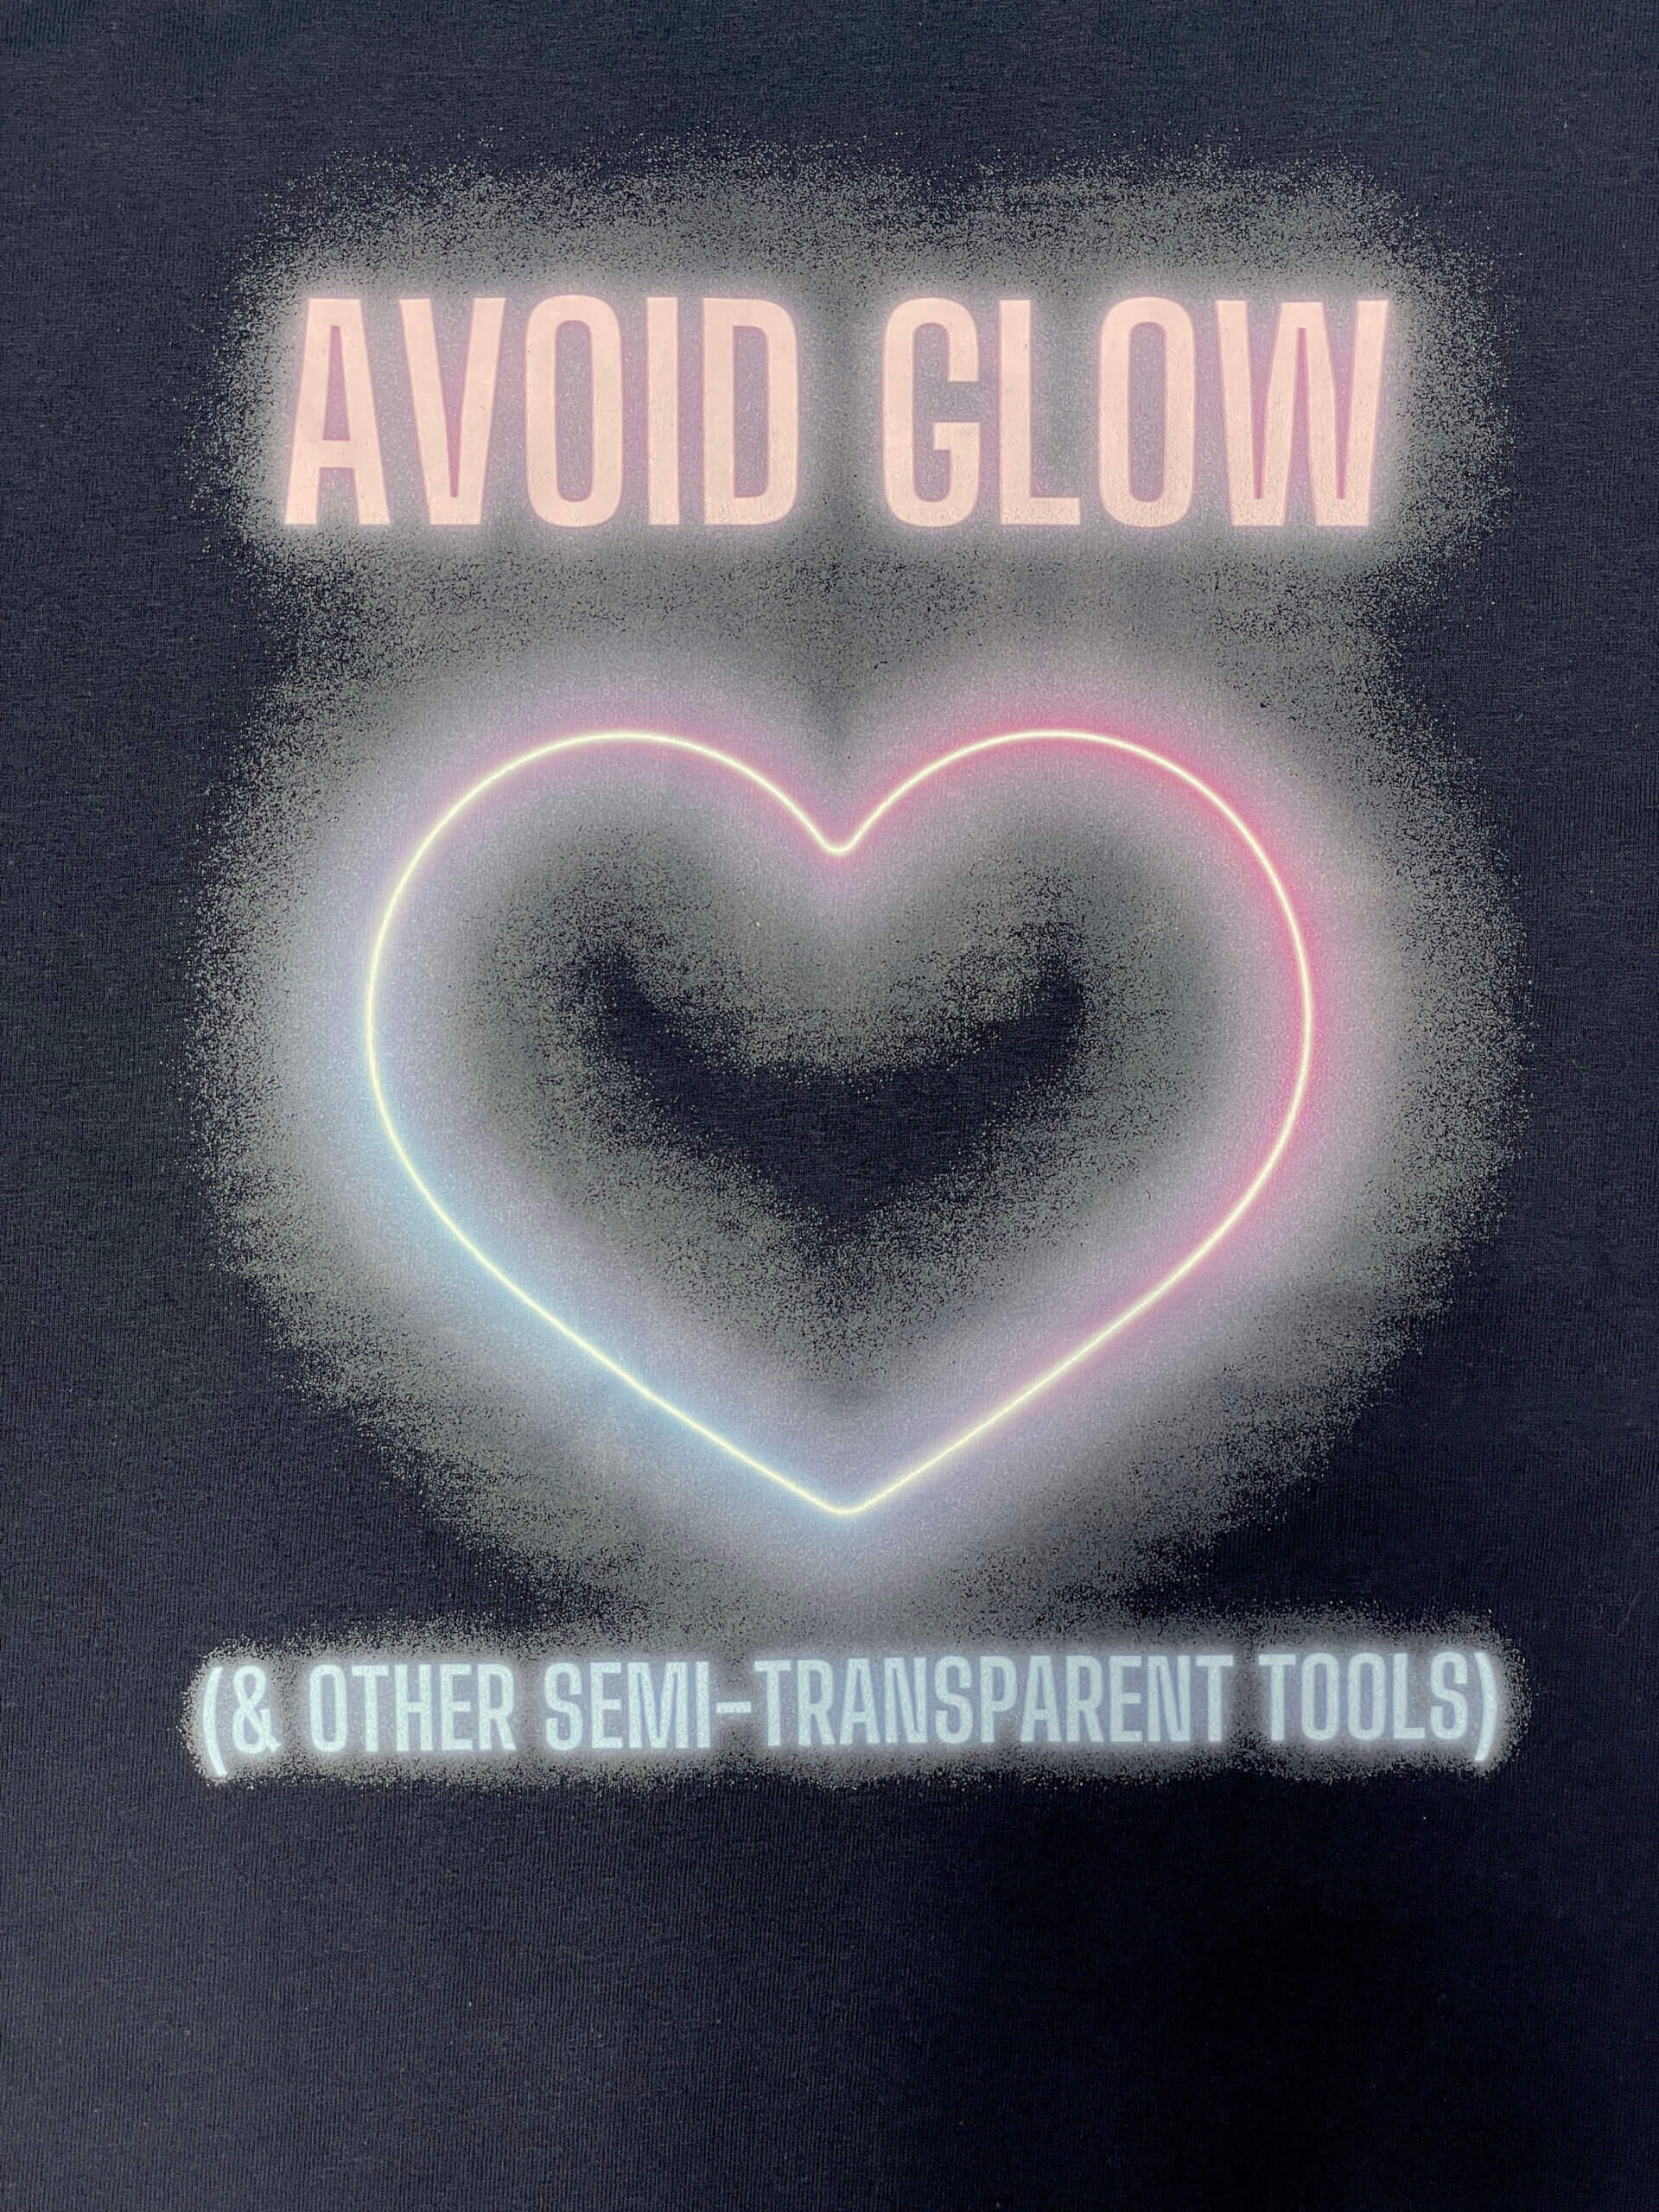
How to Avoid this Mistake: When designing for DIGISOFT®, make sure you avoid tools that rely on reducing the opacity of your design (like glow, smoke, or fade) unless they’re being applied on top of 100% opaque elements. Fading from one color to another is always okay, but fading from color to transparency can only work for dye-sublimation. Instead, apply halftoning to the outside edge of your design. Halftone borders use 100% opaque dots that gradually become smaller & further spaced apart as the design fades outward.
How to Resolve this Mistake: You’ll need to either remove areas of reduced opacity or add a background element behind anything that’s less than 100% opaque.
1) If you’re using a design program like Photoshop, you can select & delete any pixels that are less than 100% opaque.
2) You may need to apply a background shape behind your semi-transparent object.
3) If neither of those options work, you may need to recreate your design without the semi-transparent effects.
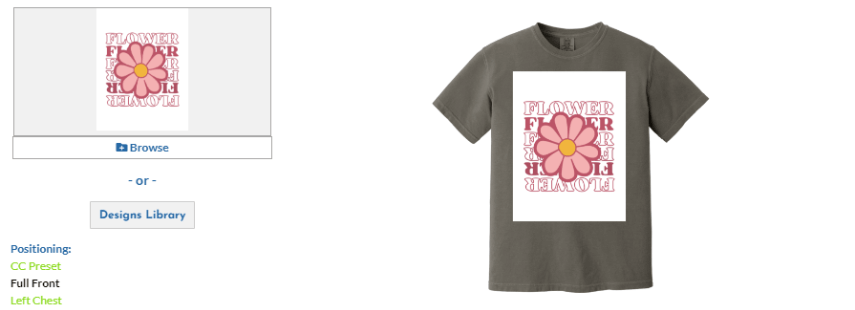
Forgetting to Remove Backgrounds
Every pixel in your design will print (with the exception of white elements on dye-sublimation products, as white ink does not exist in dye-sublimation). That means that submitting your t-shirt graphic on a white background will result in a large white rectangle being printed behind your design.
How to Avoid this Mistake: If printing a background around your design is not your intention, be sure to remove your background layer if you’re using Photoshop or equivalent program. If you’re designing on Canva, be sure to export your design with a transparent background.
How to Resolve this Mistake: If you have access to your original PSD or Canva file, you should re-export your file with a transparent background as mentioned above. If you need to remove a background from a raster image, you still have a few options for background removal. However, be sure to use a method that removes 100% of your background pixels, as any stray pixels around your design will print.
1) If you’re using Photoshop, you can utilize their Background Removal quick action,
2) Design tools like Canva also offer background removal tools.
3) If these methods result in incomplete removal of your background, you may need to use more advanced Photoshop methods or recreate your design to optimal print results.
Designing with printing in mind is the best way to set yourself up for success in Print-on-Demand. You don’t need to be a graphic designer to design a printable graphic!
Most common issues can be avoided by reviewing our Art Guidelines & Best Practices but if you have any questions about how to achieve the best possible print results, please reach out to our very helpful support team at [email protected].
Featured Resource