
Etsy Personalization Guide

UPDATED: September 2021
Some of the most successful Etsy shops are selling personalized designs, allowing customers to input their own text for a truly customized product. You’re probably wondering how you can incorporate this type of design into your print-on-demand Etsy shop.
With CustomCat & Etsy, offering Personalized designs to your customers has never been easier!
We offer our partners the ability to add personalized text to any of their designs. Using the process outlined below, text entered by your customer at checkout will be come seamlessly integrated with your design for automatic fulfilment.
Creating a Design with Personalized Text
You can turn any art in your Design Library into a personalized design within the CustomCat app.
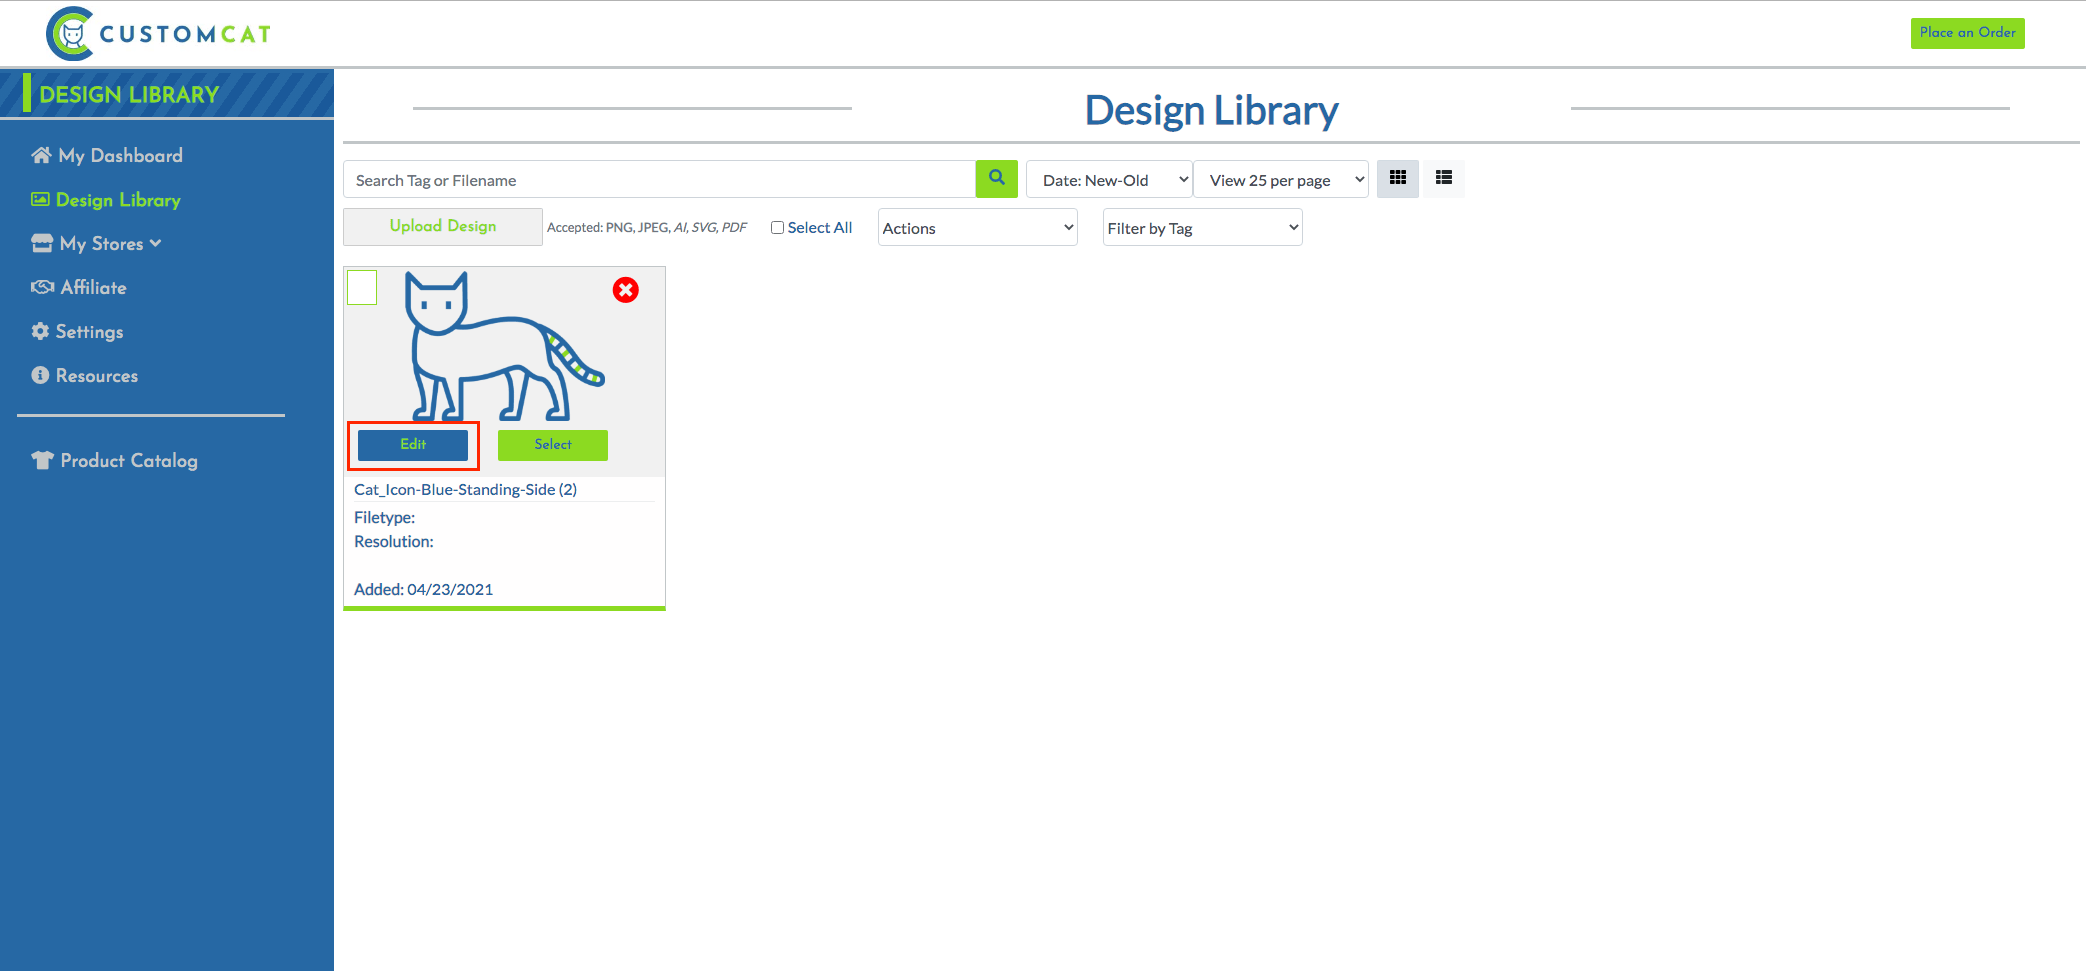
To do this, enter your Design Library, then click the “Edit” button over the image you want your customers to personalize.
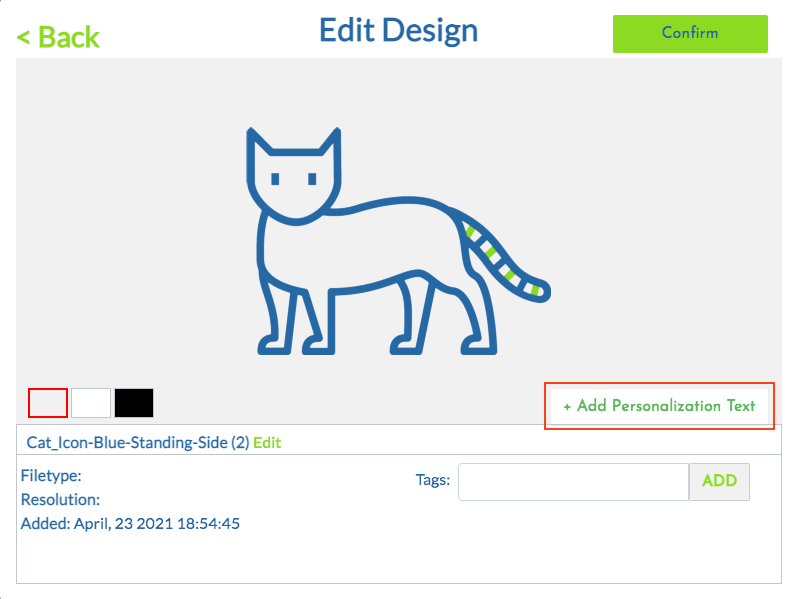
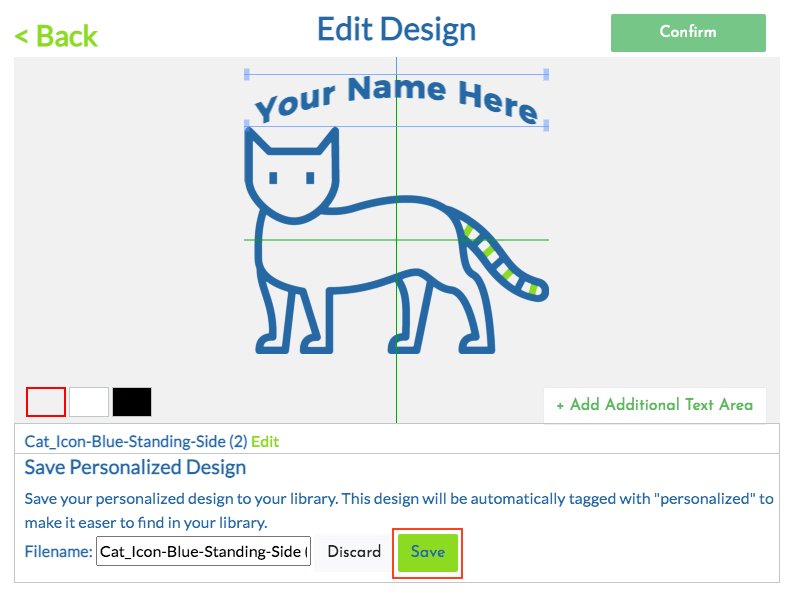
This will bring you to our Edit Design interface. Click “Add Personalization Text” in the bottom right corner of the design to open our Personalization tool.
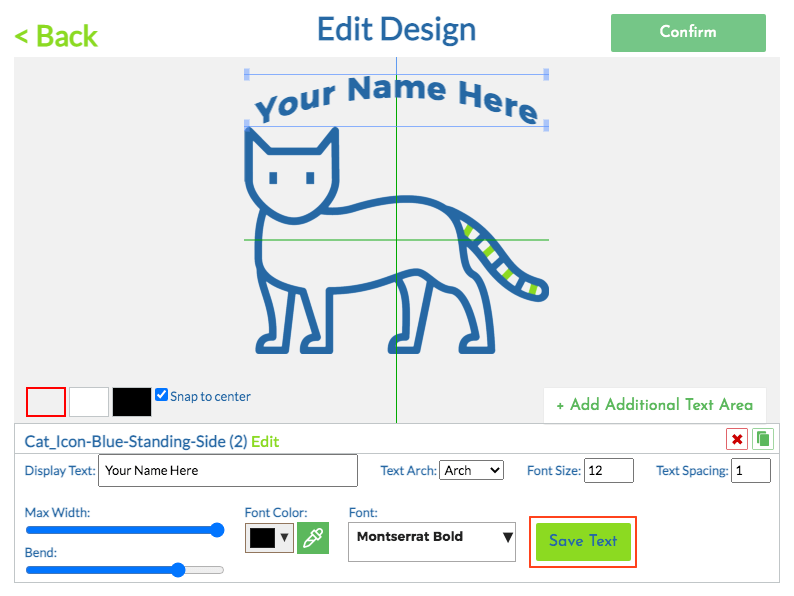
Within our Personalization feature, you can choose your text size, color, & spacing for more than 40 fonts. You can also customize the text that displays on your mockup in addition to the curvature of the text itself. The text you enter in the “Display Text” field will not be printed. Your customer will enter their personalization text on your shop to be printed in its place. The text entered in this stage is for demonstration of personalized text placement, font, & color only. If your customer purchases a personalized product without entering their personalization text, their product will be printed with the design only & no text.
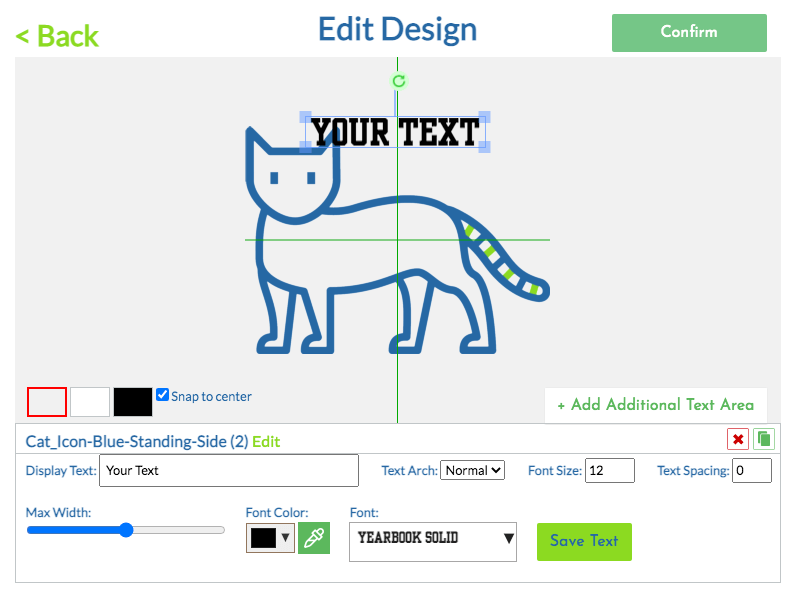
Once your personalization text looks exactly as you’d like, click the “Save Text” button in the bottom right corner.
Before saving, you have the option to rename your file. Your new personalized design will not overwrite the original design file, but instead create a new file tagged with “personalized.” Use the search function in your design library to quickly locate any personalized designs by searching the term “personalized”
*Please note: CustomCat’s personalization tool will allow you to add up to 4 lines of text, but only one line of personalization text is supported by Etsy. Please do not add any additional lines of personalization text if exporting this personalized design to an Etsy shop.
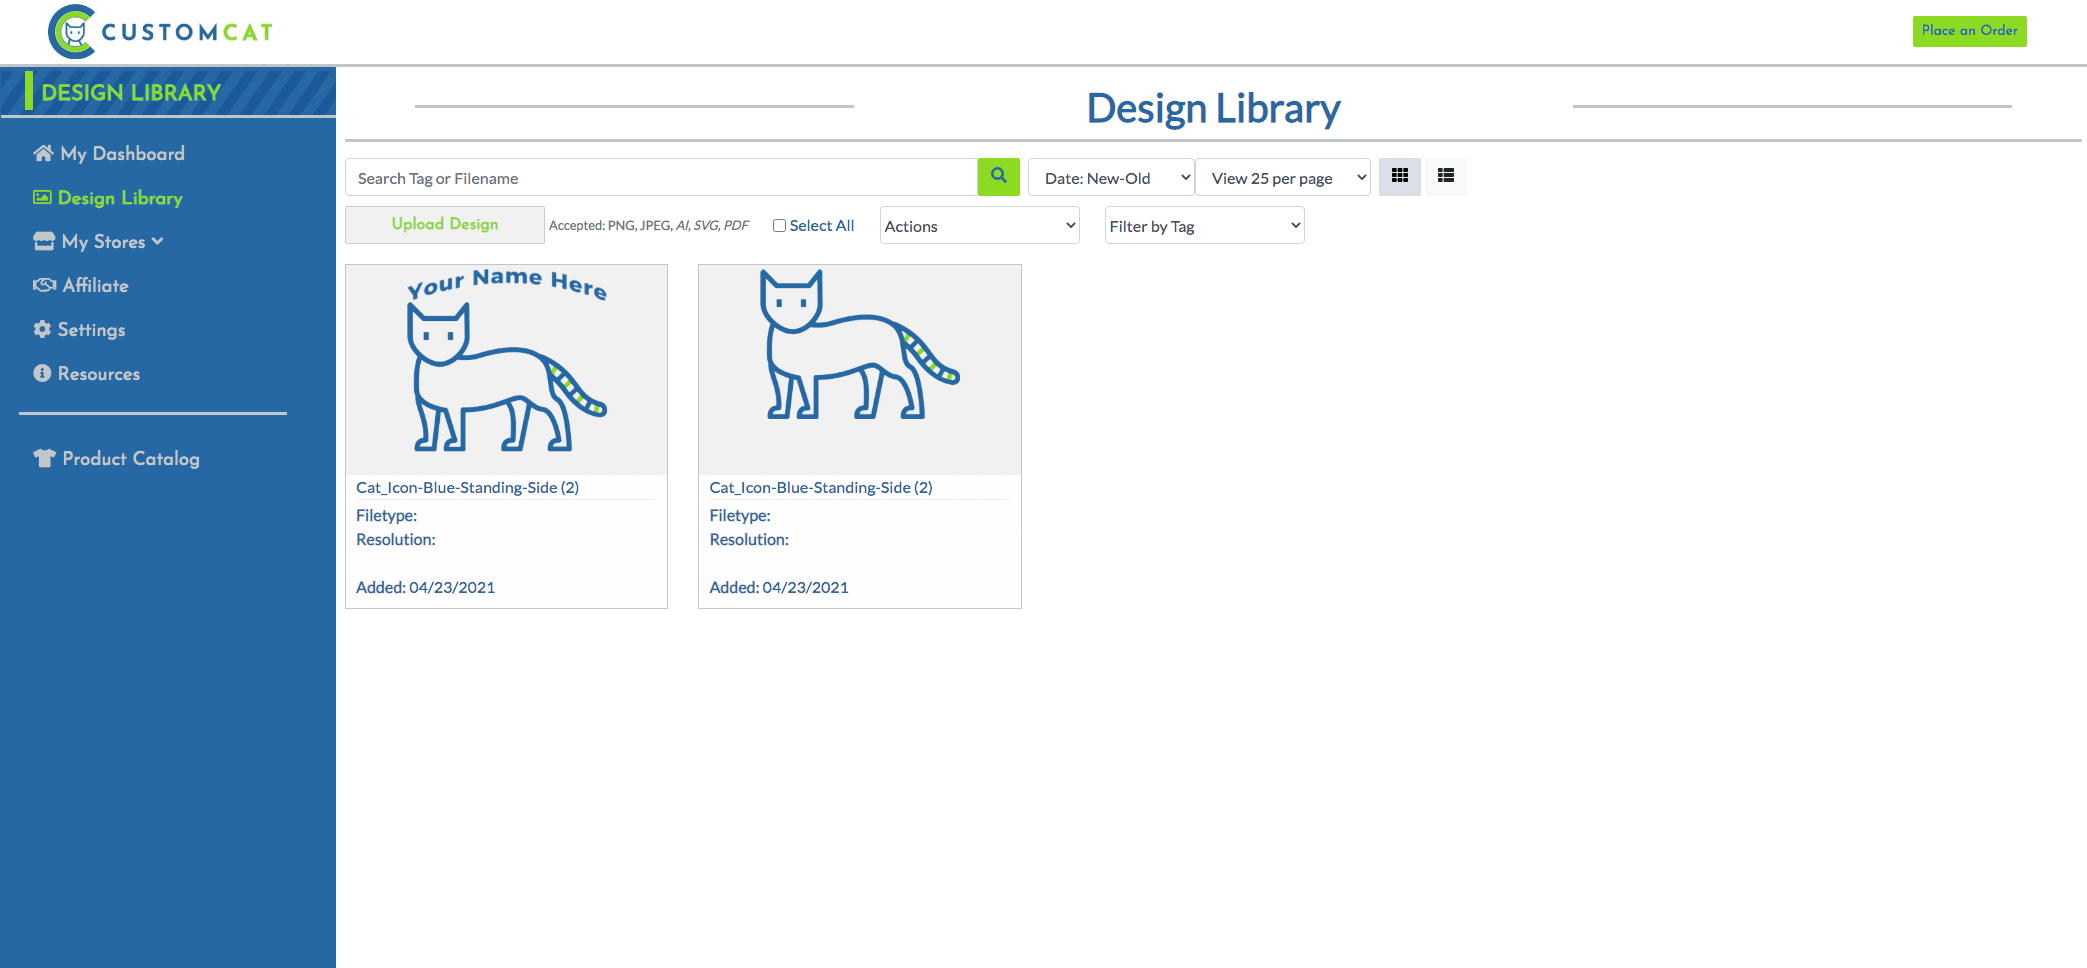
Once you save your design, you’ll be brought back to your Design Library, where you’ll see both your original design & your new personalized design listed.
And that’s it! You’ve now successfully created your first Personalized Design using CustomCat’s Personalization tool.
Exporting a Product with a Personalized Design
Exporting a personalized product to Etsy follows the same process as always. When creating your product, be sure to select your Personalized design. You can locate it quickly in your Design Library by searching the term “personalized”
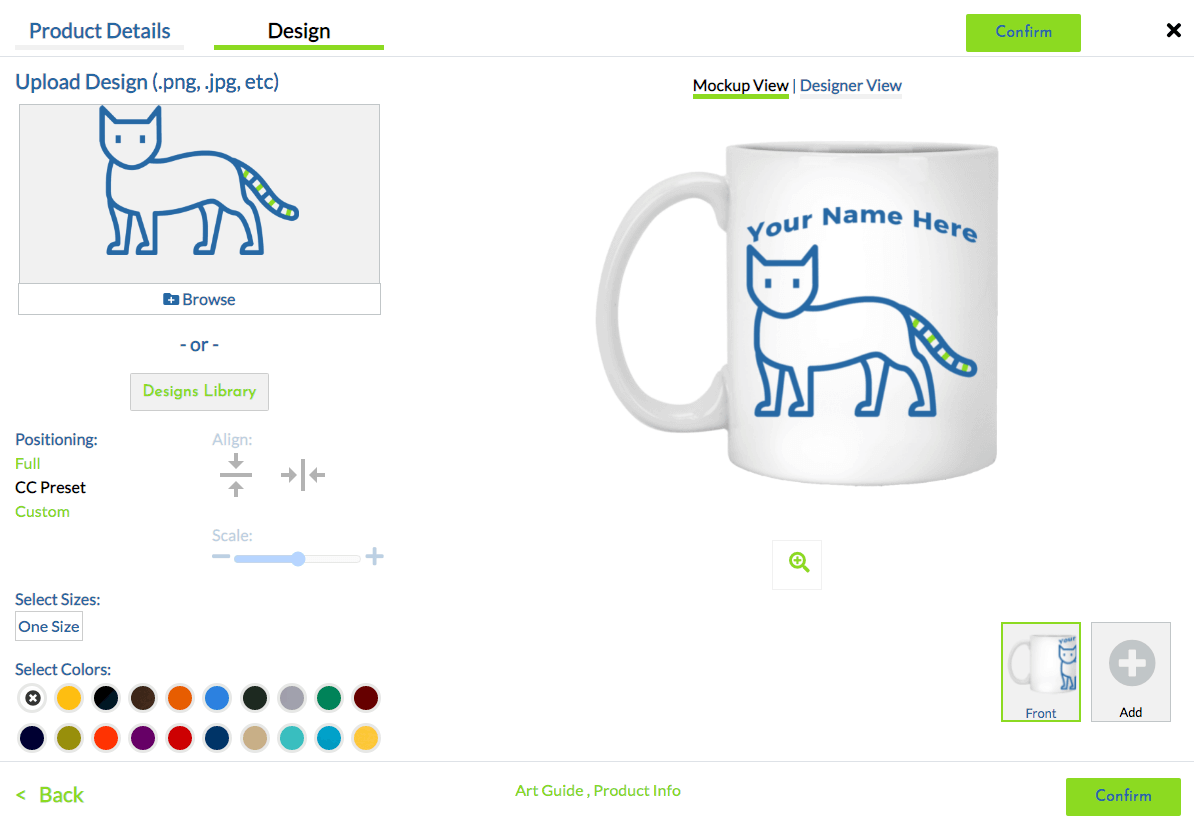
Once you’ve selected your product & positioned your artwork just the way you like it, click the “Confirm” button & Export your product to your shop.
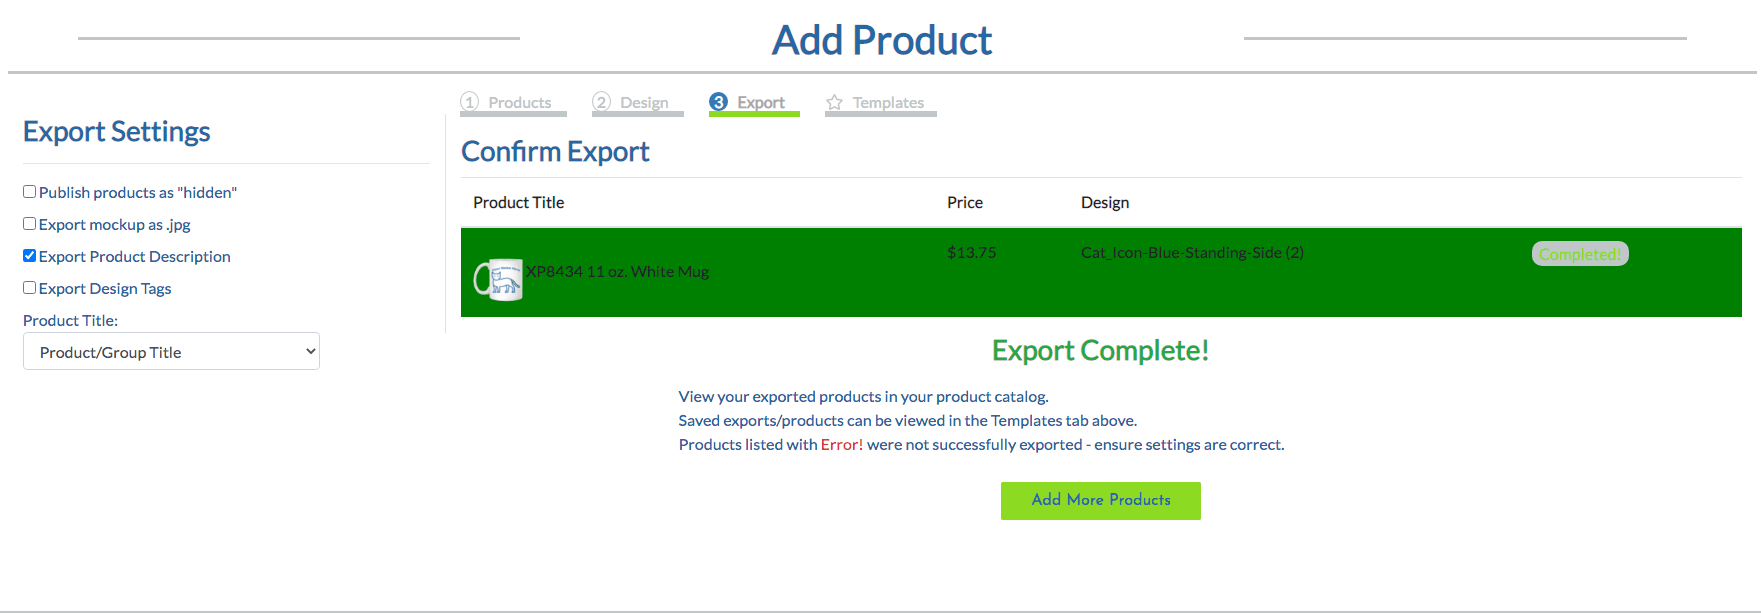
You’ll now see your personalized product listed in your Etsy Drafts folder.
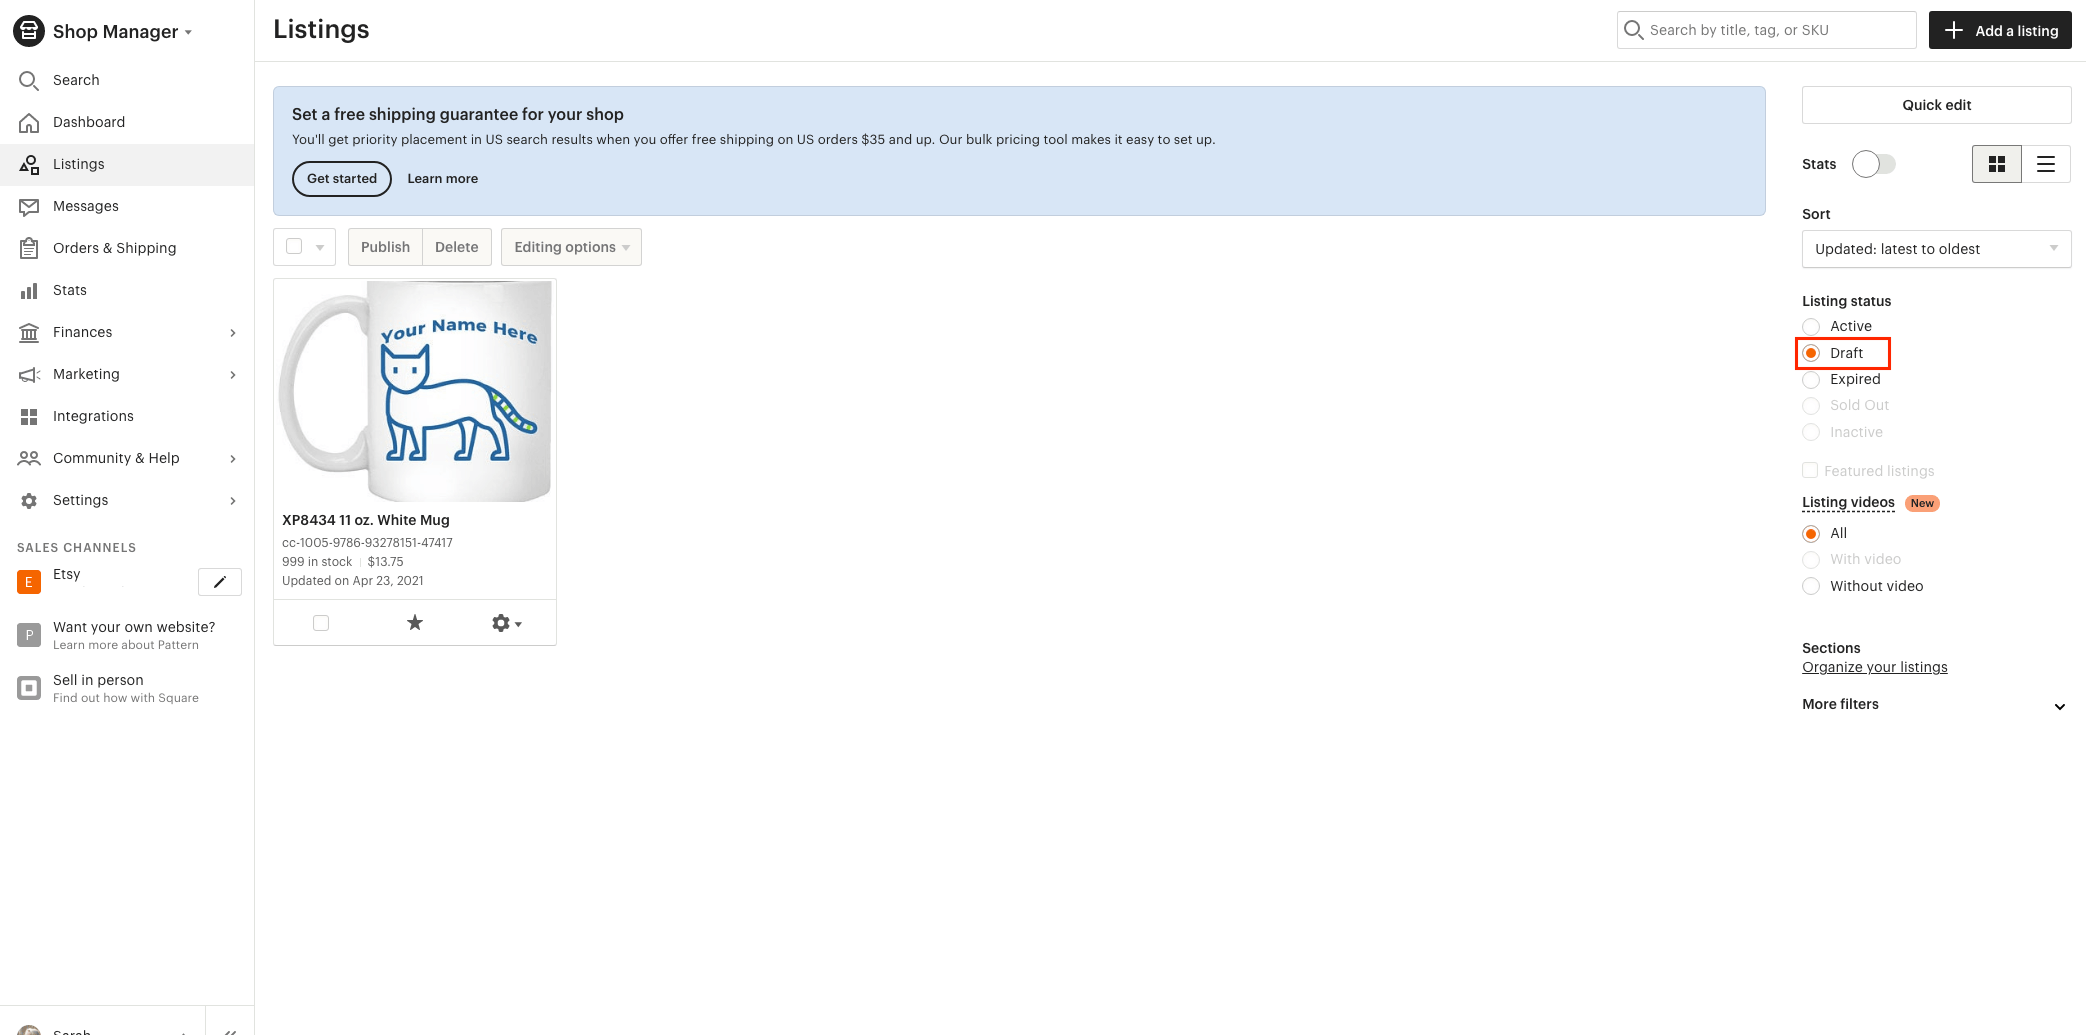
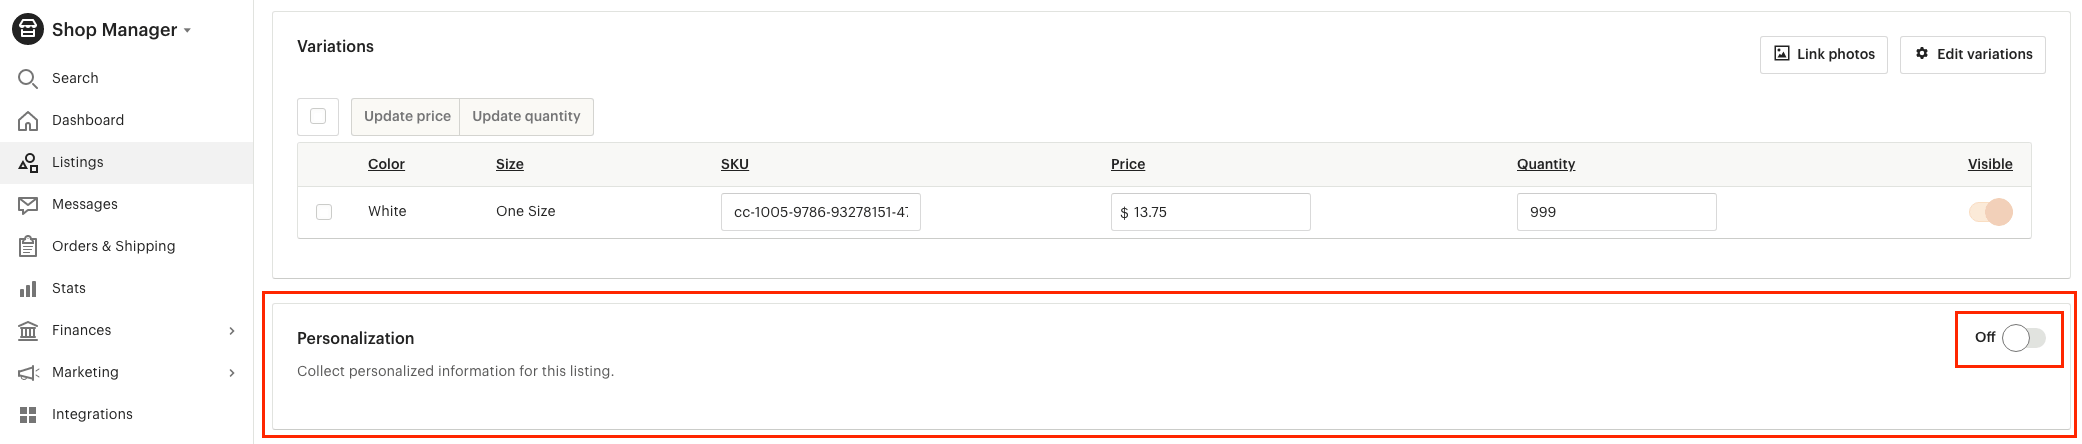
Before publishing your listing, it’s vital that you turn on Etsy’s Personalization feature. to do so, click on the product in your draft listings & scroll to the “Personalization” section of the listing details. Next, simply slide the On/Off button to the “On” position.
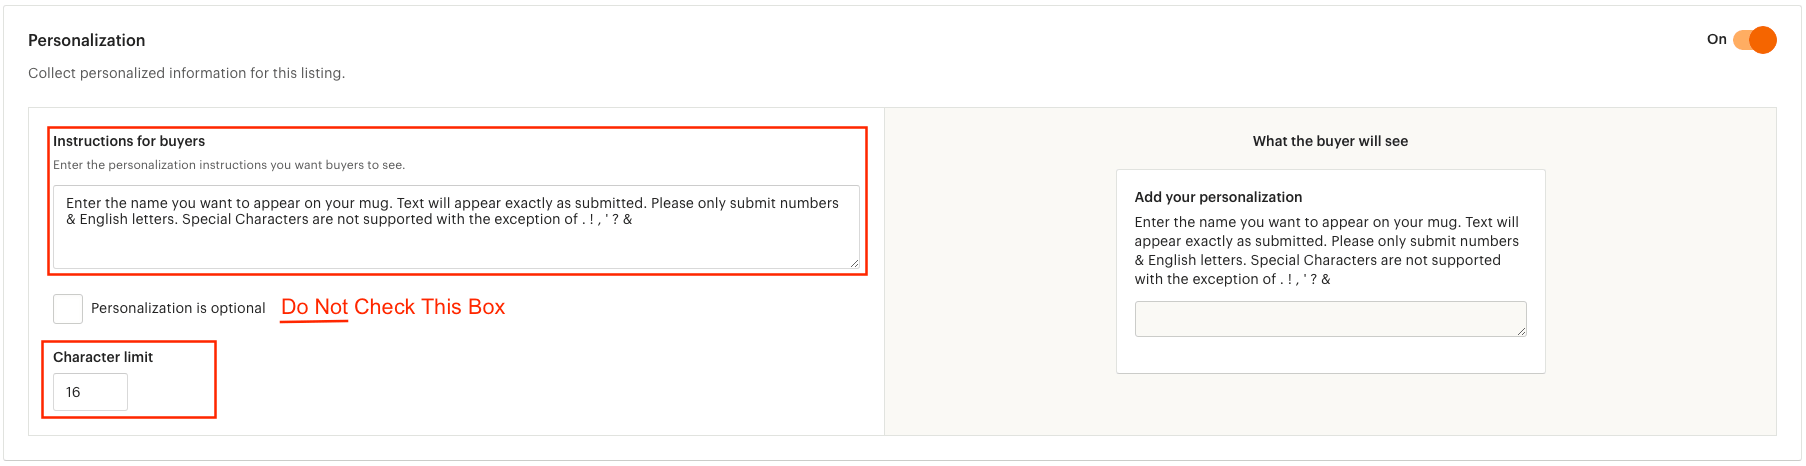
Next, you’ll customize your Personalization module for your listing by including instructions for your customers & customizing your character limit.
Please note that text will appear exactly as submitted — any typos will be printed. Additionally, we will only accept numbers & English letters. Special characters are not accepted, with the exception of . ! , ‘ ? &
You have the ability to customize your Character Limit. Etsy will allow you to accept up to 250 characters. However, the larger the number of characters submitted, the smaller your text will appear. For this reason, we recommend limiting the number of characters accepted based on the size you’d like your customer’s text to appear.
If you check the “Personalization is Optional” box & your customer fails to enter text for personalization, no text will appear on your final product.
Once your personalization fields look exactly the way you’d like, you can publish your listing. Your character limit & instructions will appear in your listing with a text field for your customer.
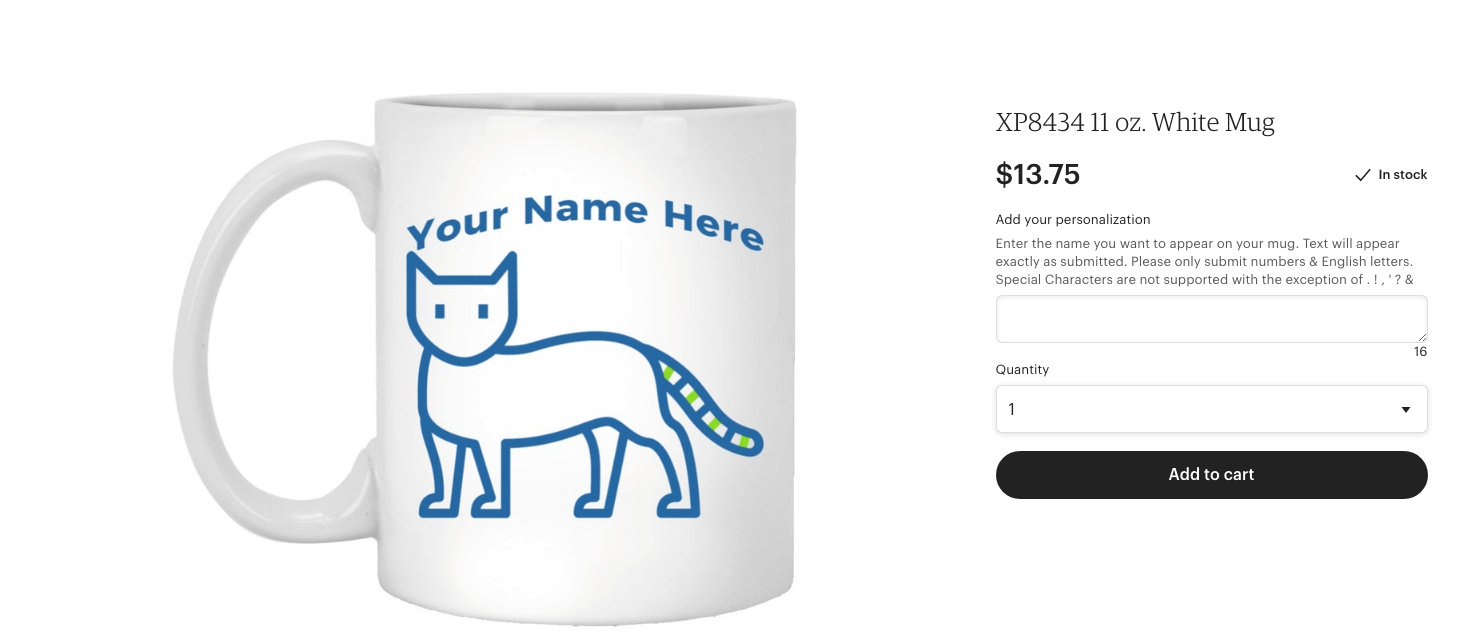
And that’s it! You’ve successfully created a personalized design for your Etsy Shop!
Upon placing their order, your customer will receive a confirmation email from Etsy that will include the text they entered on their design. This information will also be visible in the order details of your Etsy Shop Manager.
When your customer places their order, the order information will come directly to CustomCat for fulfillment & shipping. We will use your customer’s text with the font, color, shape, & positioning you designated when adding the personalization to your design. Your customer will soon receive a beautifully decorated custom product, ready to drop a 5 Star review in your shop!
Creating a Product with a Personalized Image
Thinking of allowing your customers to submit their own images to be printed on CustomCat products? We’ve made that a breeze as well, though things are less automated this time.
In order for your designs to be updated with your customers images, you must turn off Automatic Processing in your CustomCat account. Modifying the design before processing requires manual intervention by you, the merchant.
Create a Placeholder Design
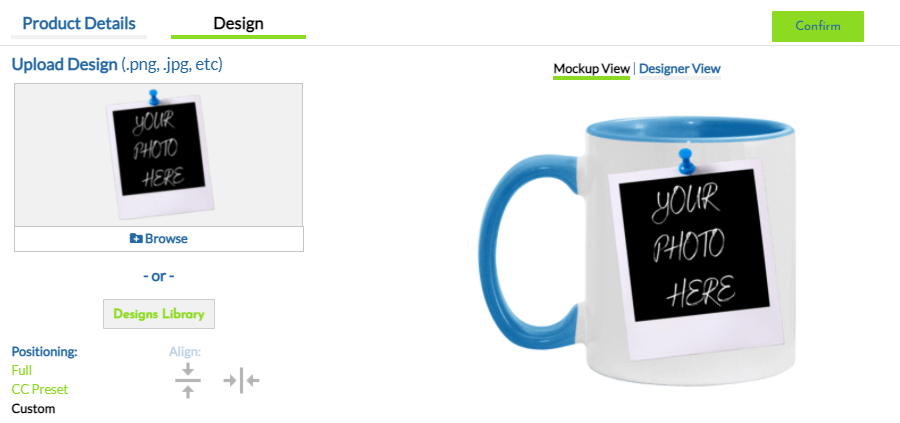
Create a design that will be used in your product listing to demonstrate to your customers that they can send you a photo to be printed on your product.
In the example below, we’ve created a design with a polaroid photo with the text “Your Photo Here” to illustrate to our customers that they can insert their photo in the photo frame. This graphic is a placeholder for the one you will submit to print.
Again, you must turn off Automatic-Processing in your CustomCat account in order to submit a custom image.
To do so, click “Settings” in the left navigation menu of the CustomCat app & select your store from the dropdown menu. Next, click “Orders” in the menu at the top of the screen. Make sure Automatic Processing is set to “No” if you will be offering a design you plan to personalize with a customer’s image. For more information about modifying your store settings, please see our video tutorial on the subject.
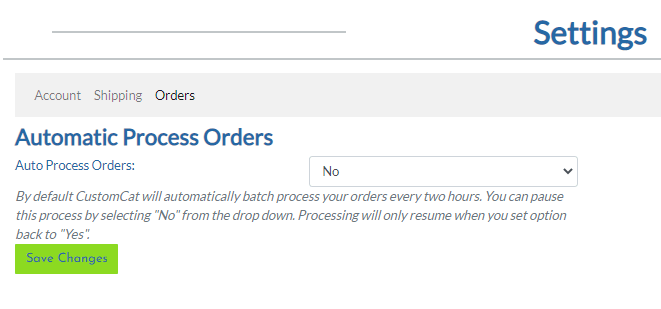
If you do not turn off Automatic Processing, your order will print with the Placeholder Design you exported to your store. We cannot modify your design after it enters production.
Enable Personalization in your Etsy Listing
To enable personalization for a listing:
- Sign in to Etsy.com.
- Click Shop Manager.
- Click Listings. (Please note, your newly exported CustomCat listing will be found in Draft Listings)
- Click the listing you want to add personalization to.
- Under Inventory and pricing, toggle Personalization to On.
- Next to Guidelines for buyers, add text to help the buyer know what details to add, like how to send you photos & whether you’re also accepting personalized text.
- Click Publish.
When your customer places an order for this product in your shop & sends you a graphic, you’ll now need to update the graphic in your design program before updating the order in your CustomCat “Pending Orders” list.
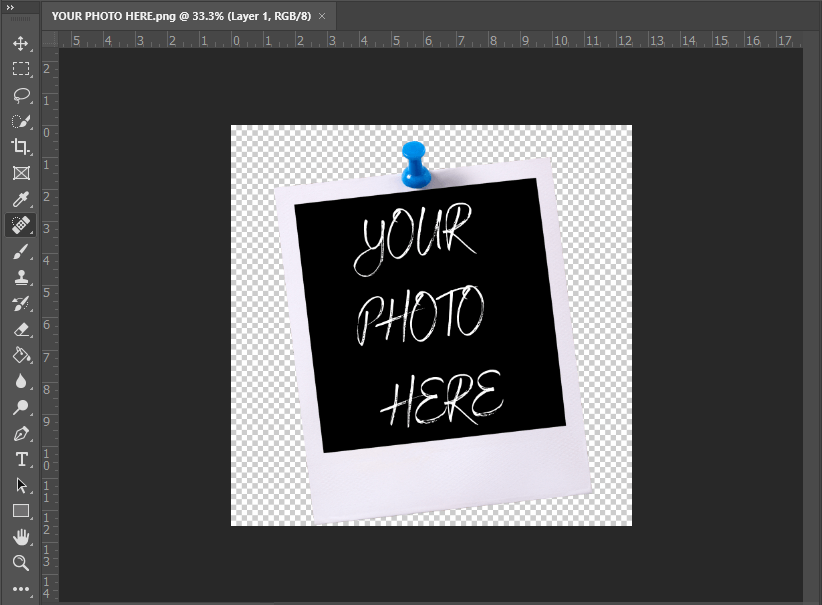
If you need to update the graphic in a design program, as in our example above, open your original file & modify as needed.
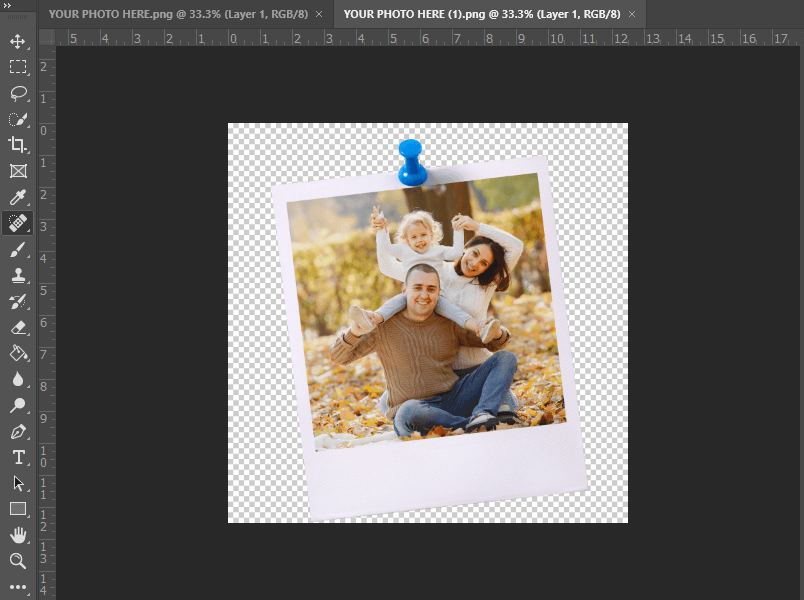
Next, save your image & head back to the CustomCat app.
Click “Orders” in the left navigation menu, then select your Etsy shop from the dropdown menu.
Next, you’ll click the “Pending Orders” tab from your order list & select the pending order you need to update.
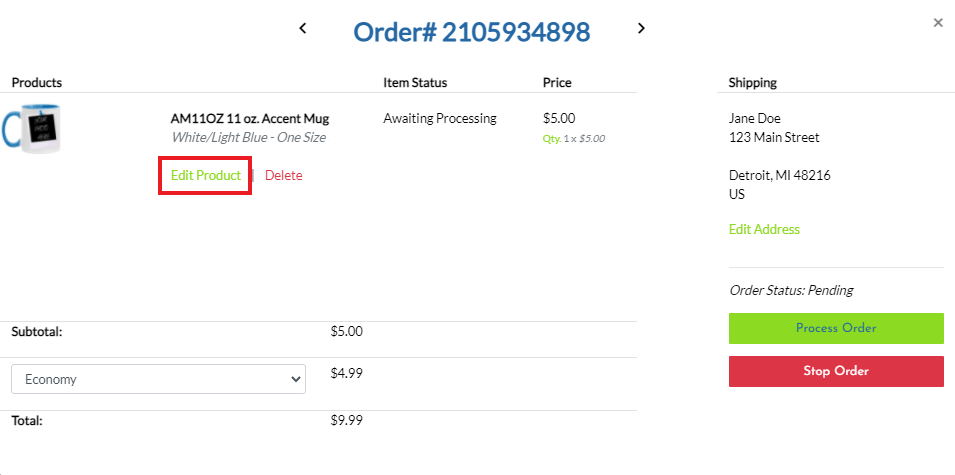
To update your graphic, click “Edit Product” below the product you need to update to view the product details.
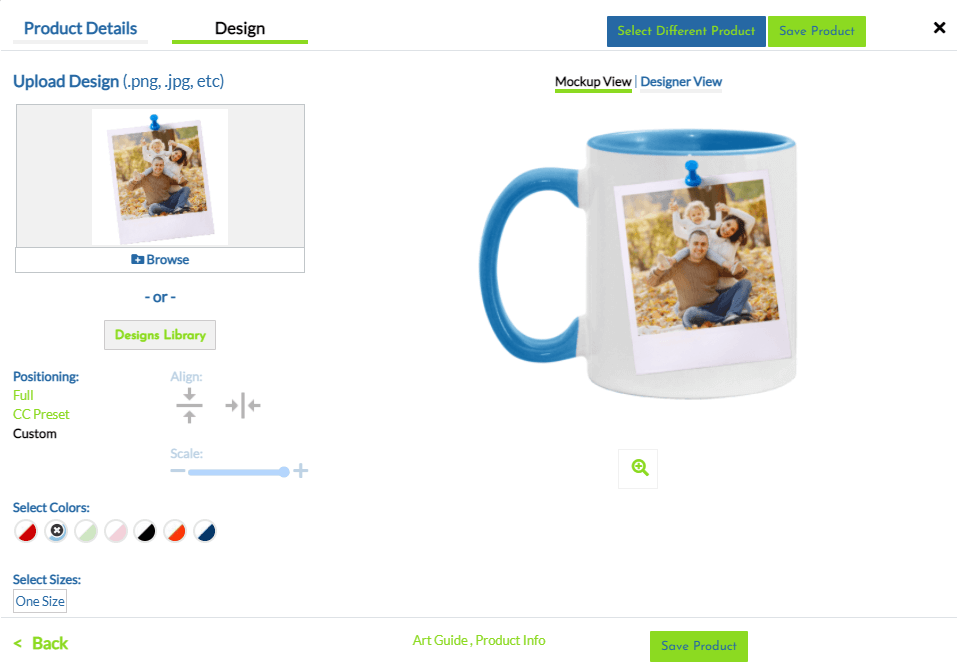
Next, click the “Design” tab at the top left area of the module & upload or select your updated graphic.

Once you’ve added your updated graphic, click “Save Product” to save your changes.
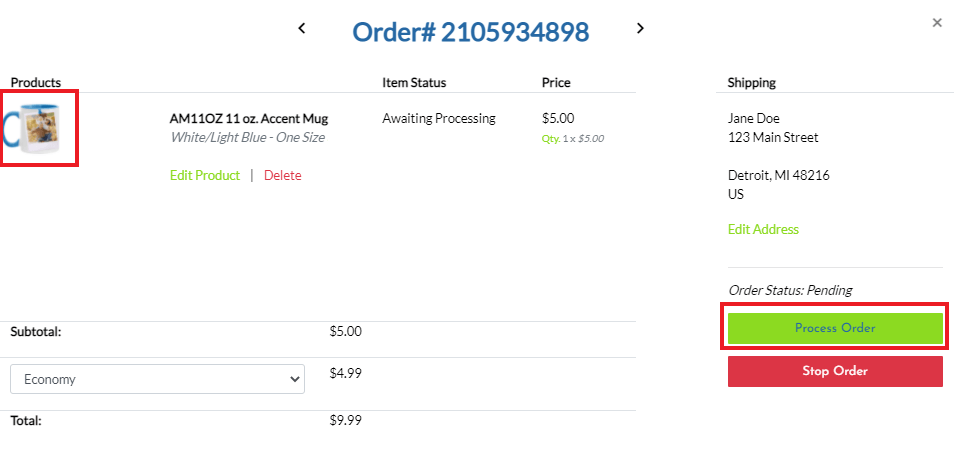
Your new image is now saved! You can now see in your Order Details that the image has saved properly. Once you’ve made all changes you need to make to your order, you can click “Process Order” to send it to production.
You’ve now successfully created & processed an Etsy order with a Personalized image! Your customers are only days away from receiving a beautiful custom product with their photo on it.
If you have any questions about creating a design with personalized text or modifying an image on an order in your Pending Order queue, please email our support team at [email protected] & we’ll be happy to help!
Featured Resource
2 thoughts on “Etsy Personalization Guide”