How To Upload Designs Into Your Design Library
Uploading Designs Into Your Design Library
After signing into your CustomCat account, click on the Design Library in the left navigation menu.

Click the Upload Image button within your Design Library. This will bring you to the uploader.
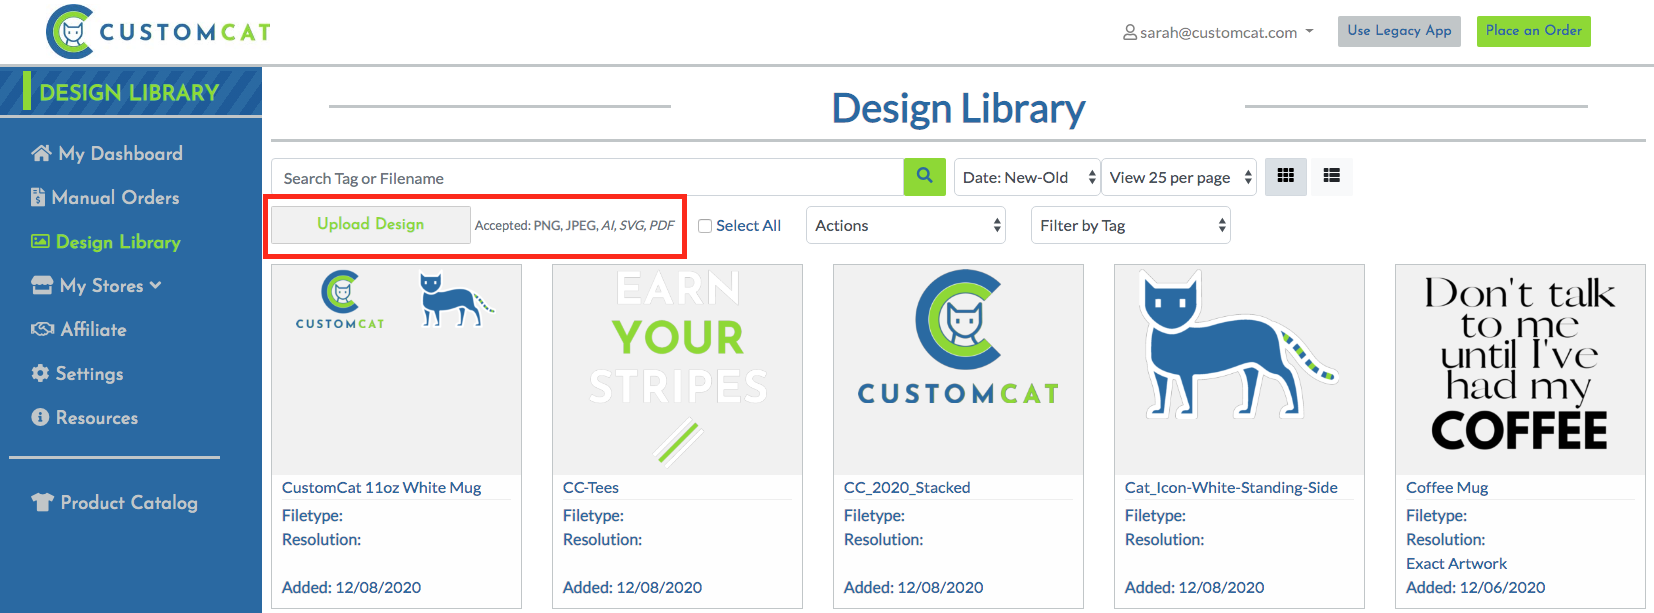
Click on the “Upload Design” or “Drag and Drop” icon to continue.
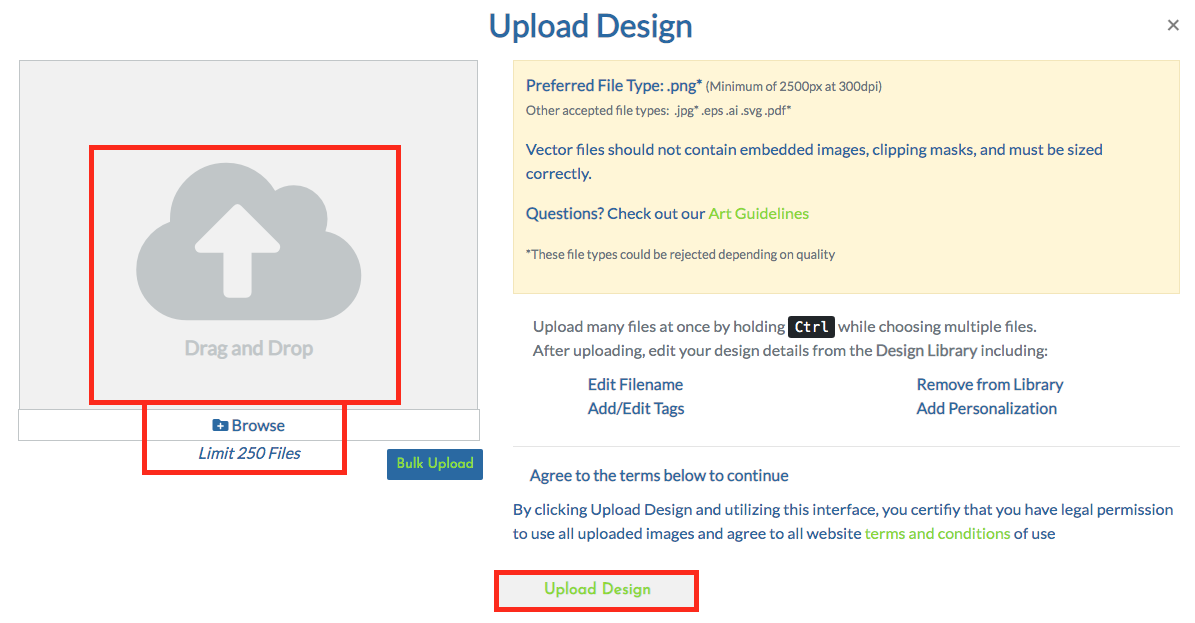
After clicking Upload Design, you will see the upload progress bar for each of the files you selected to upload. When all of your uploads have completed, you’ll be redirected to the Design Library, where you’ll see all of your new designs displayed!
Bulk Upload
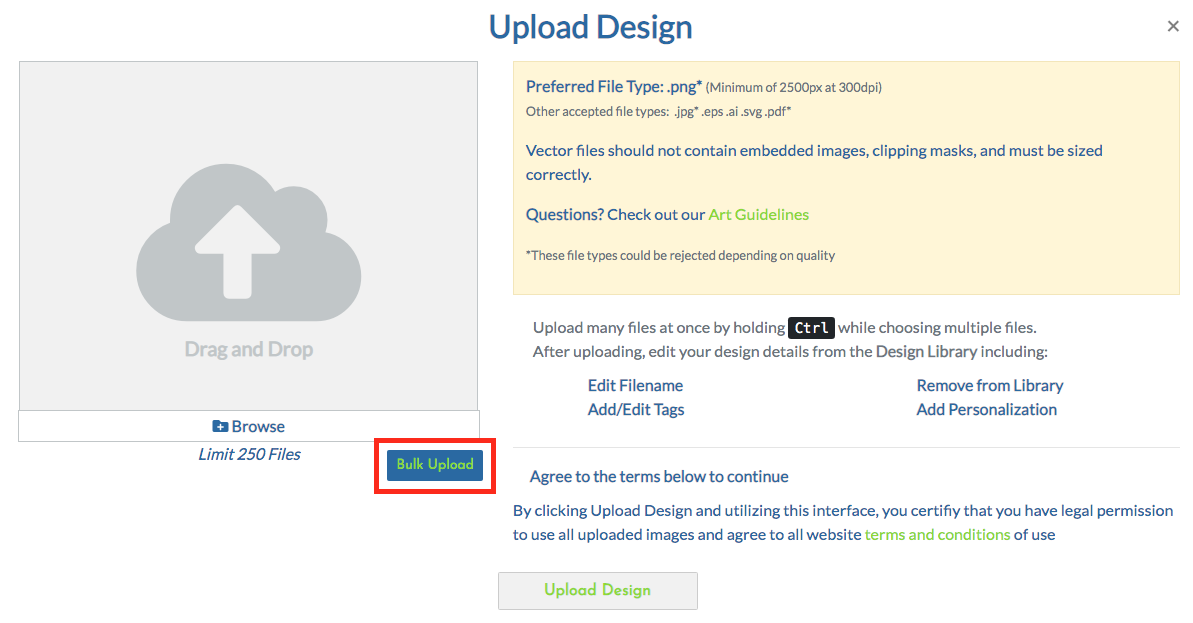
If you’d like to upload many designs at once, tag in bulk, or maintain excess transparent space within your design, you can now do so through our bulk uploader.
After following the steps above, click the blue “Bulk Upload” button the be brought to the bulk upload page.
Click the “Add Designs” button to browse your device for the the art files you’d like to upload.
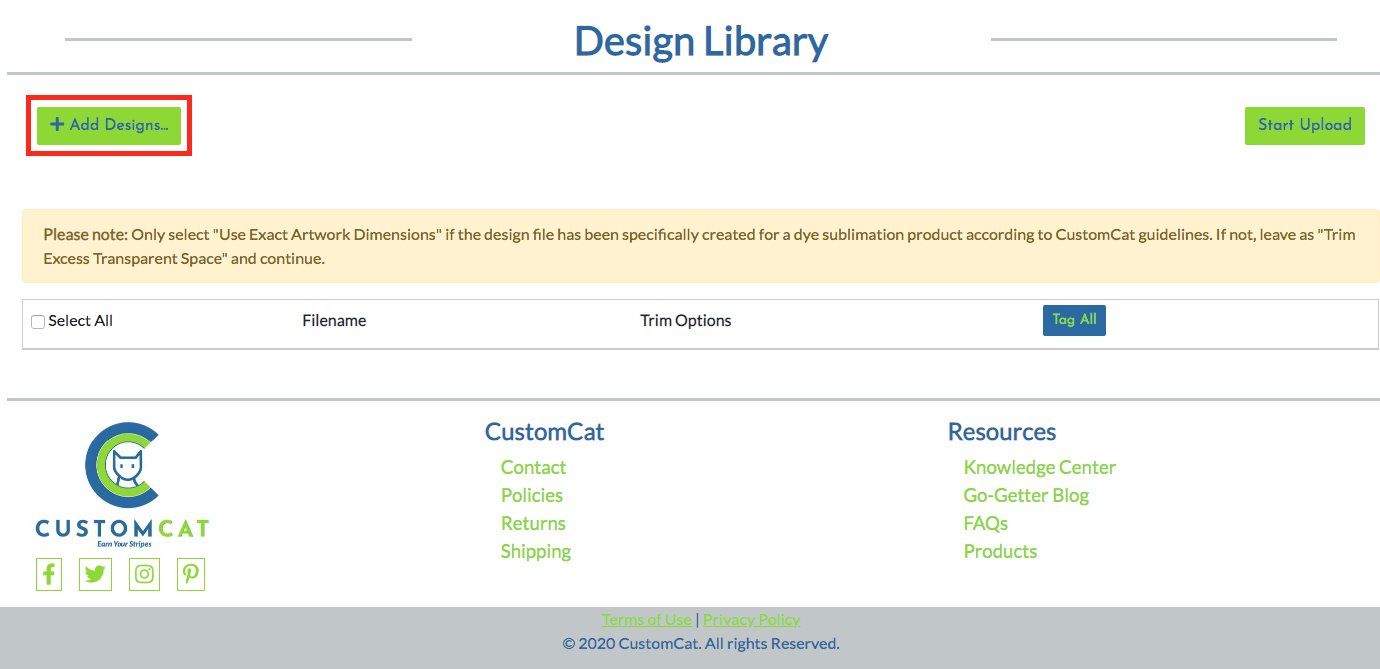
Next, you can utilize our bulk settings to select your upload settings. Selecting “Trim Excess Transparent Space” from the Trim Options column will trim transparency from the outer edges of your design to make it print most effectively with all decoration methods. If you select “Use Exact Artwork Dimensions” from the Trim Options column, the art will upload without any design trimming. Use this option only if you are uploading art specifically for a dye-sublimation product.
During this step, you can also apply tags to all these designs at once. This is helpful if you are uploading designs in batches for the same product. For the designs below, we would tag “Ornaments” so these designs come up when we search that term in our Design Library later.
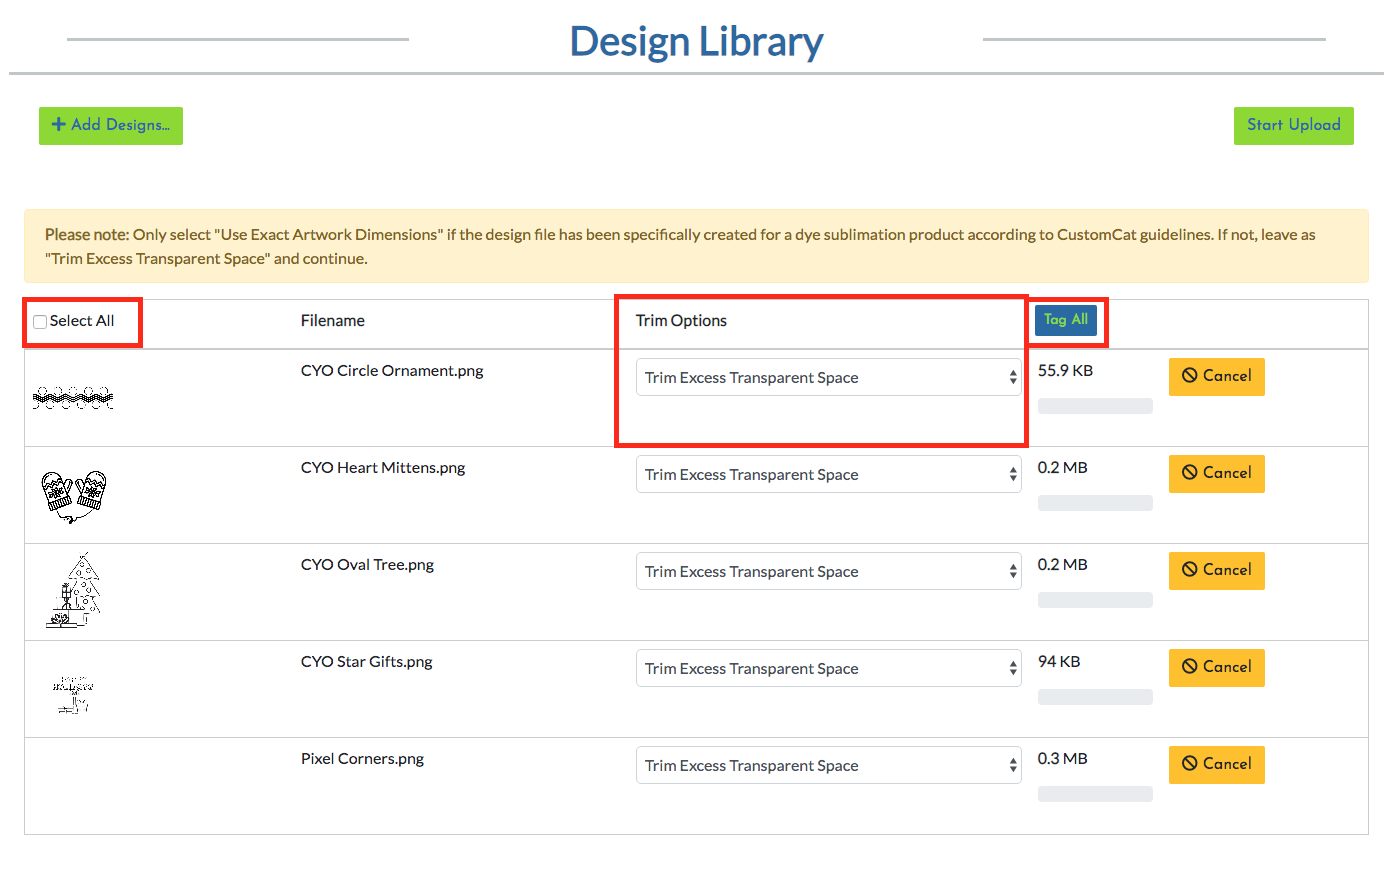
Lastly, click “Start Upload” & your upload will begin! You will be redirected to the Design Library as soon as your upload is complete.
For more information about our Bulk Upload feature, check out our video tutorial on YouTube.
Deleting Existing Designs
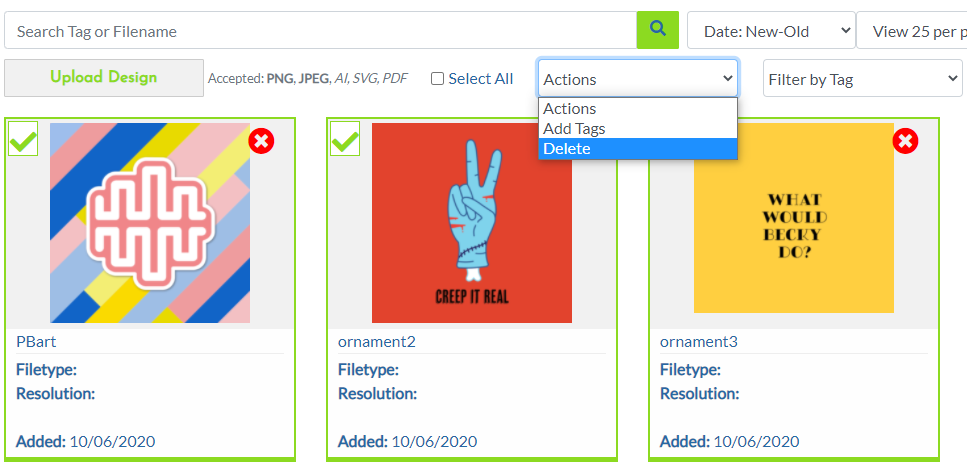
Uploaded a design you no longer need? To remove and existing design, select on the design(s) > Actions >Delete.
Please note: We were forced to remove the download design feature in your Design Library for security reasons. Scrapers were accessing Shopify admin centers & plucking designs. To remedy this, we have blocked that function and only allow our SKU numbers to be processed from the specific store URL it was initially exported to.
If you have an order ID using a specific file, though, our support team can access it email it over to you. Keep in mind that we don’t have access to the art unless an order has been placed for that design.
Modify Existing Designs
Editing designs has never been more straightforward. Click on the design you would like to edit.

You will be redirected to a pop-up page where you can make edits to the (1) Filename, and (2) Tags, & (3) Add Personalization Text.

Click on the Confirm icon to save changes.
How To Stay Organized
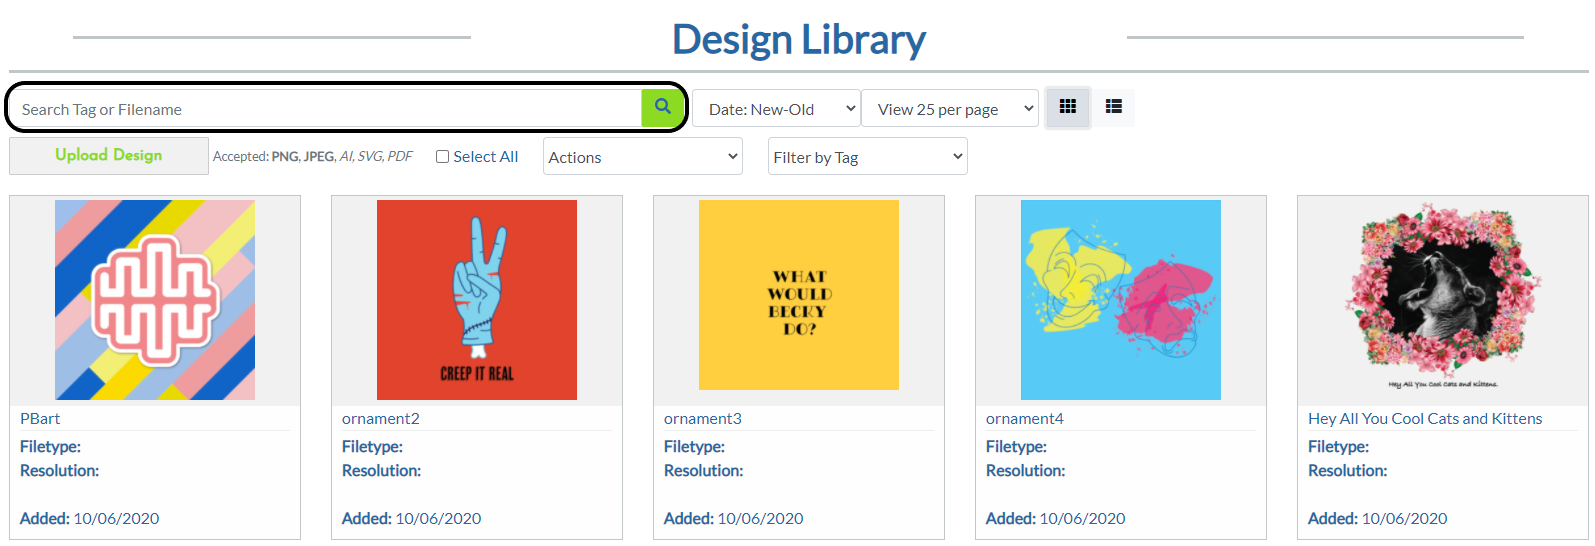
Stay organized with your designs by searching for the Tag or Filename assigned in the step above. No more page by page scrolling to find your designs. Also, you will be able to view your designs in two separate views – List & Title View.
Creating Personalized Designs from your Design Library
Start by going to the Design Library & selecting the design to which you’d like to add personalization. You will see the button labeled “Add Personalization Text Area.”
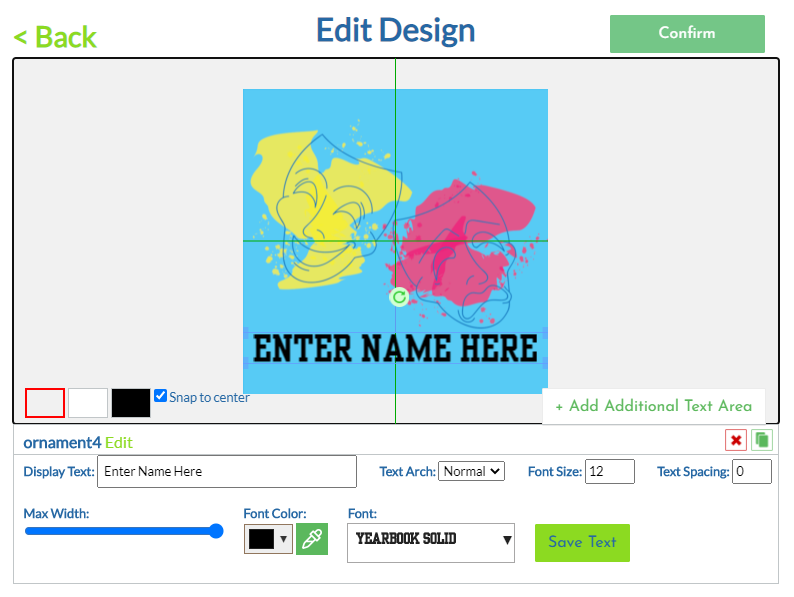
| Display Text | This is the editable field where your customer will be able to change the text within your design. You can change the default text to say anything you’d like! |
| Font & Font Size | Choose what font and size you’d like the custom text to be. |
| Font Color | Pick your text color. Use the eyedropper tool to match your design colors! |
| Max Width | This controls the width in which the custom text can be placed. Useful for managing multiple text boxes and making sure custom text stays within the design. |
| Text Spacing | Controls the spacing between each character. |
| Text Arch | Affects the bend of the text box. |
‘Save Text’ allows you to save the design using a different filename. When finished, click ‘Save’.
Grid View
List View
Congratulations! Now you are ready to start creating products for your new store.
Learn how to create and export products to your store here. You will not be able to export products until you have at least one design in your design library.



3 thoughts on “How To Upload Designs Into Your Design Library”