
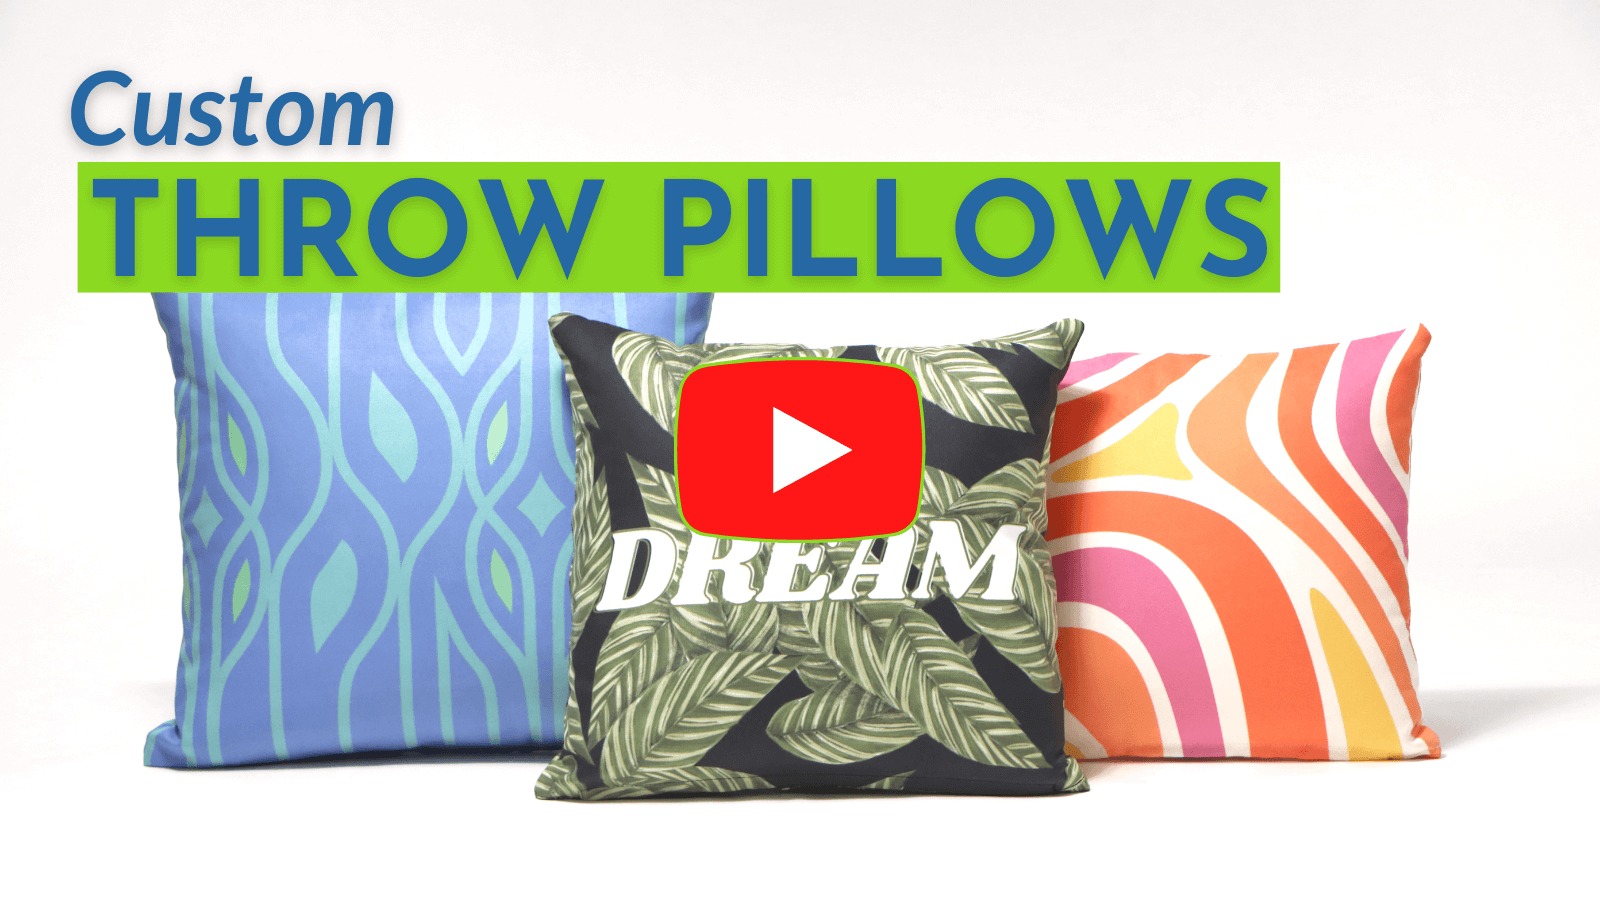
[Guide] Selling Custom POD Throw Pillows

If you’re looking to help your customers personalize their living spaces, a custom throw pillow is the perfect solution. Updating the throw pillows on a bed, couch, or an accent chair is the easiest way to update the ambiance of a room without spending a full week’s paycheck. In fact, many consumers update their throw pillows seasonally or to add a festive nod to an upcoming holiday. For this reason, a custom throw pillow makes the perfect gift — not only for friends & family, but also for yourself!
Keep reading for more details about CustomCat’s custom throw pillows, including available sizes, pricing, design guidelines, & marketing tips.
Product Pricing
– ZP14, Small Square Pillow:
– CC PRO: $12.48
– CCLite: $15.60
– MSRP: $25.99
– ZP16, Medium Square Pillow:
– CC PRO: $13.44
– CCLite: $16.80
– MSRP: $27.99
– ZP18, Large Square Pillow:
– CC PRO: $15.36
– CCLite: $19.20
– MSRP: $31.99
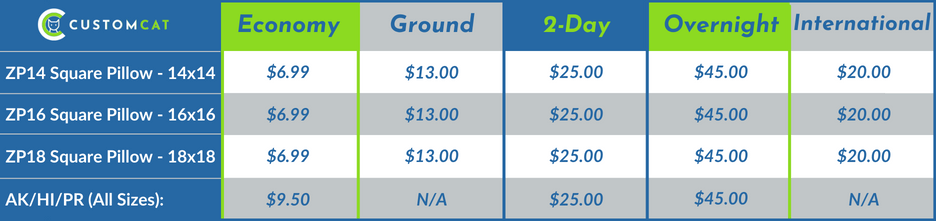
Shipping Price & Details
This item is single-ship, which means each of your custom pillows will ship individually in its own packaging. Shipping costs are in addition to other items in your cart.
- Vibrantly printed from edge to edge on both sides via sublimation
- Ultra soft 100% Brushed Face Polyester cover & polyester pillow insert
- All product components sourced & constructed in USA
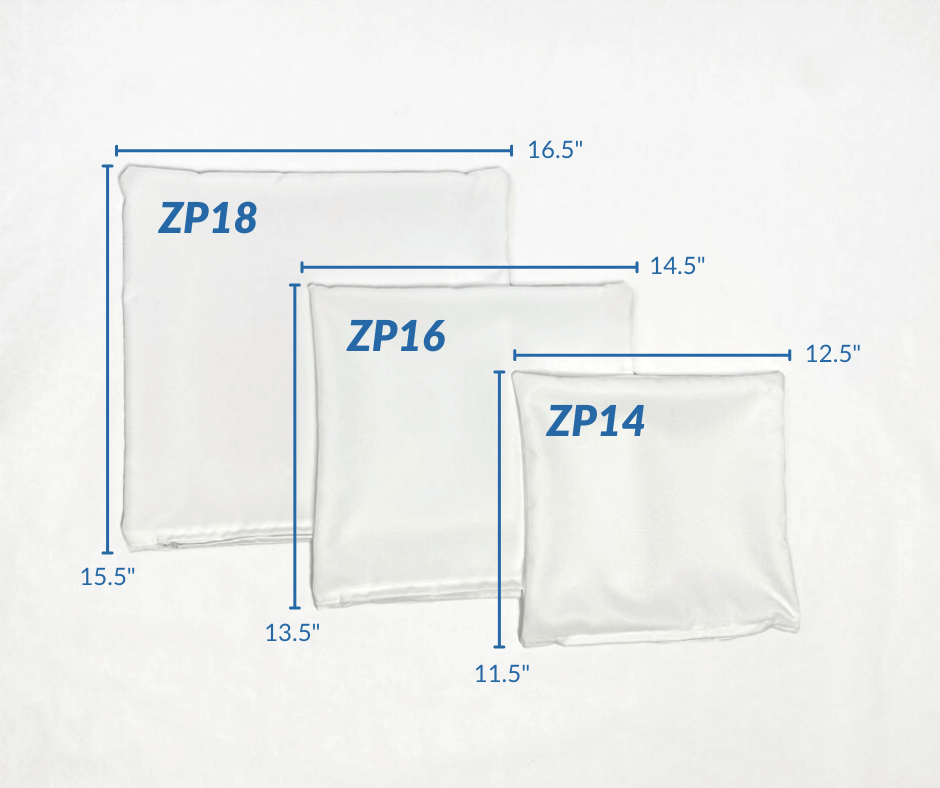
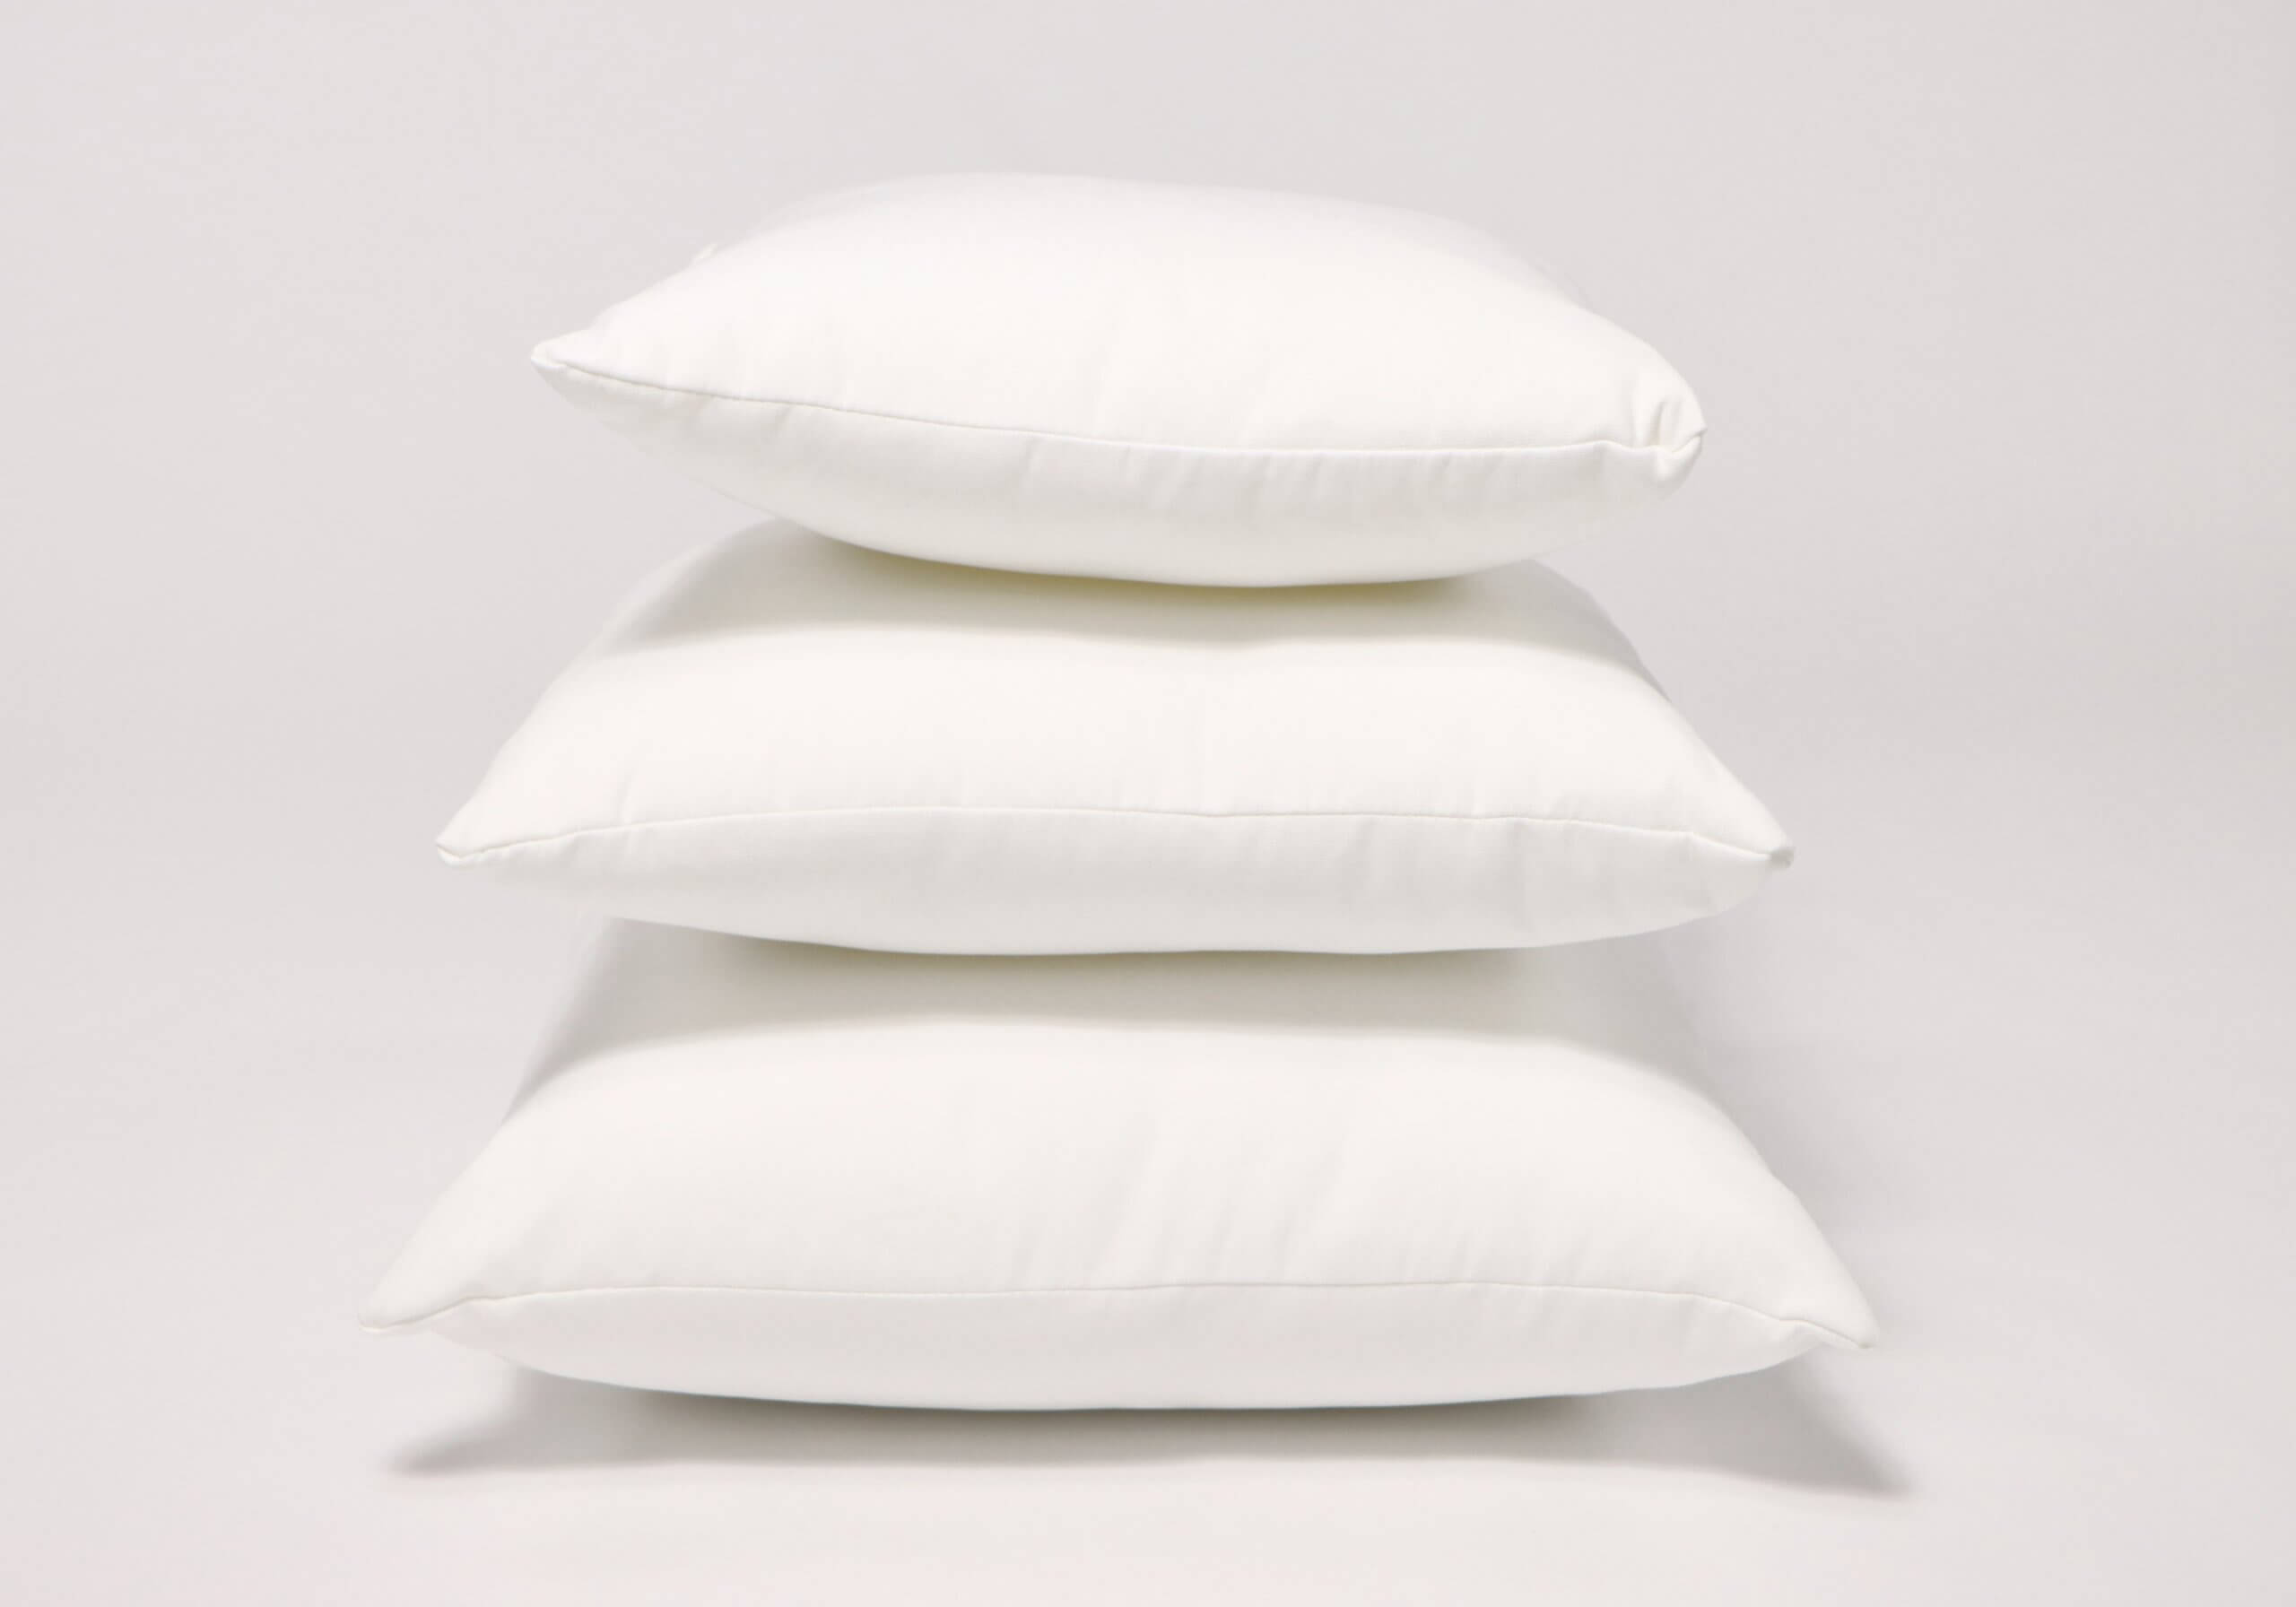
- Available in 3 sizes: fabric cut measurements 14″x14″, 16″x16″, 18″x18″
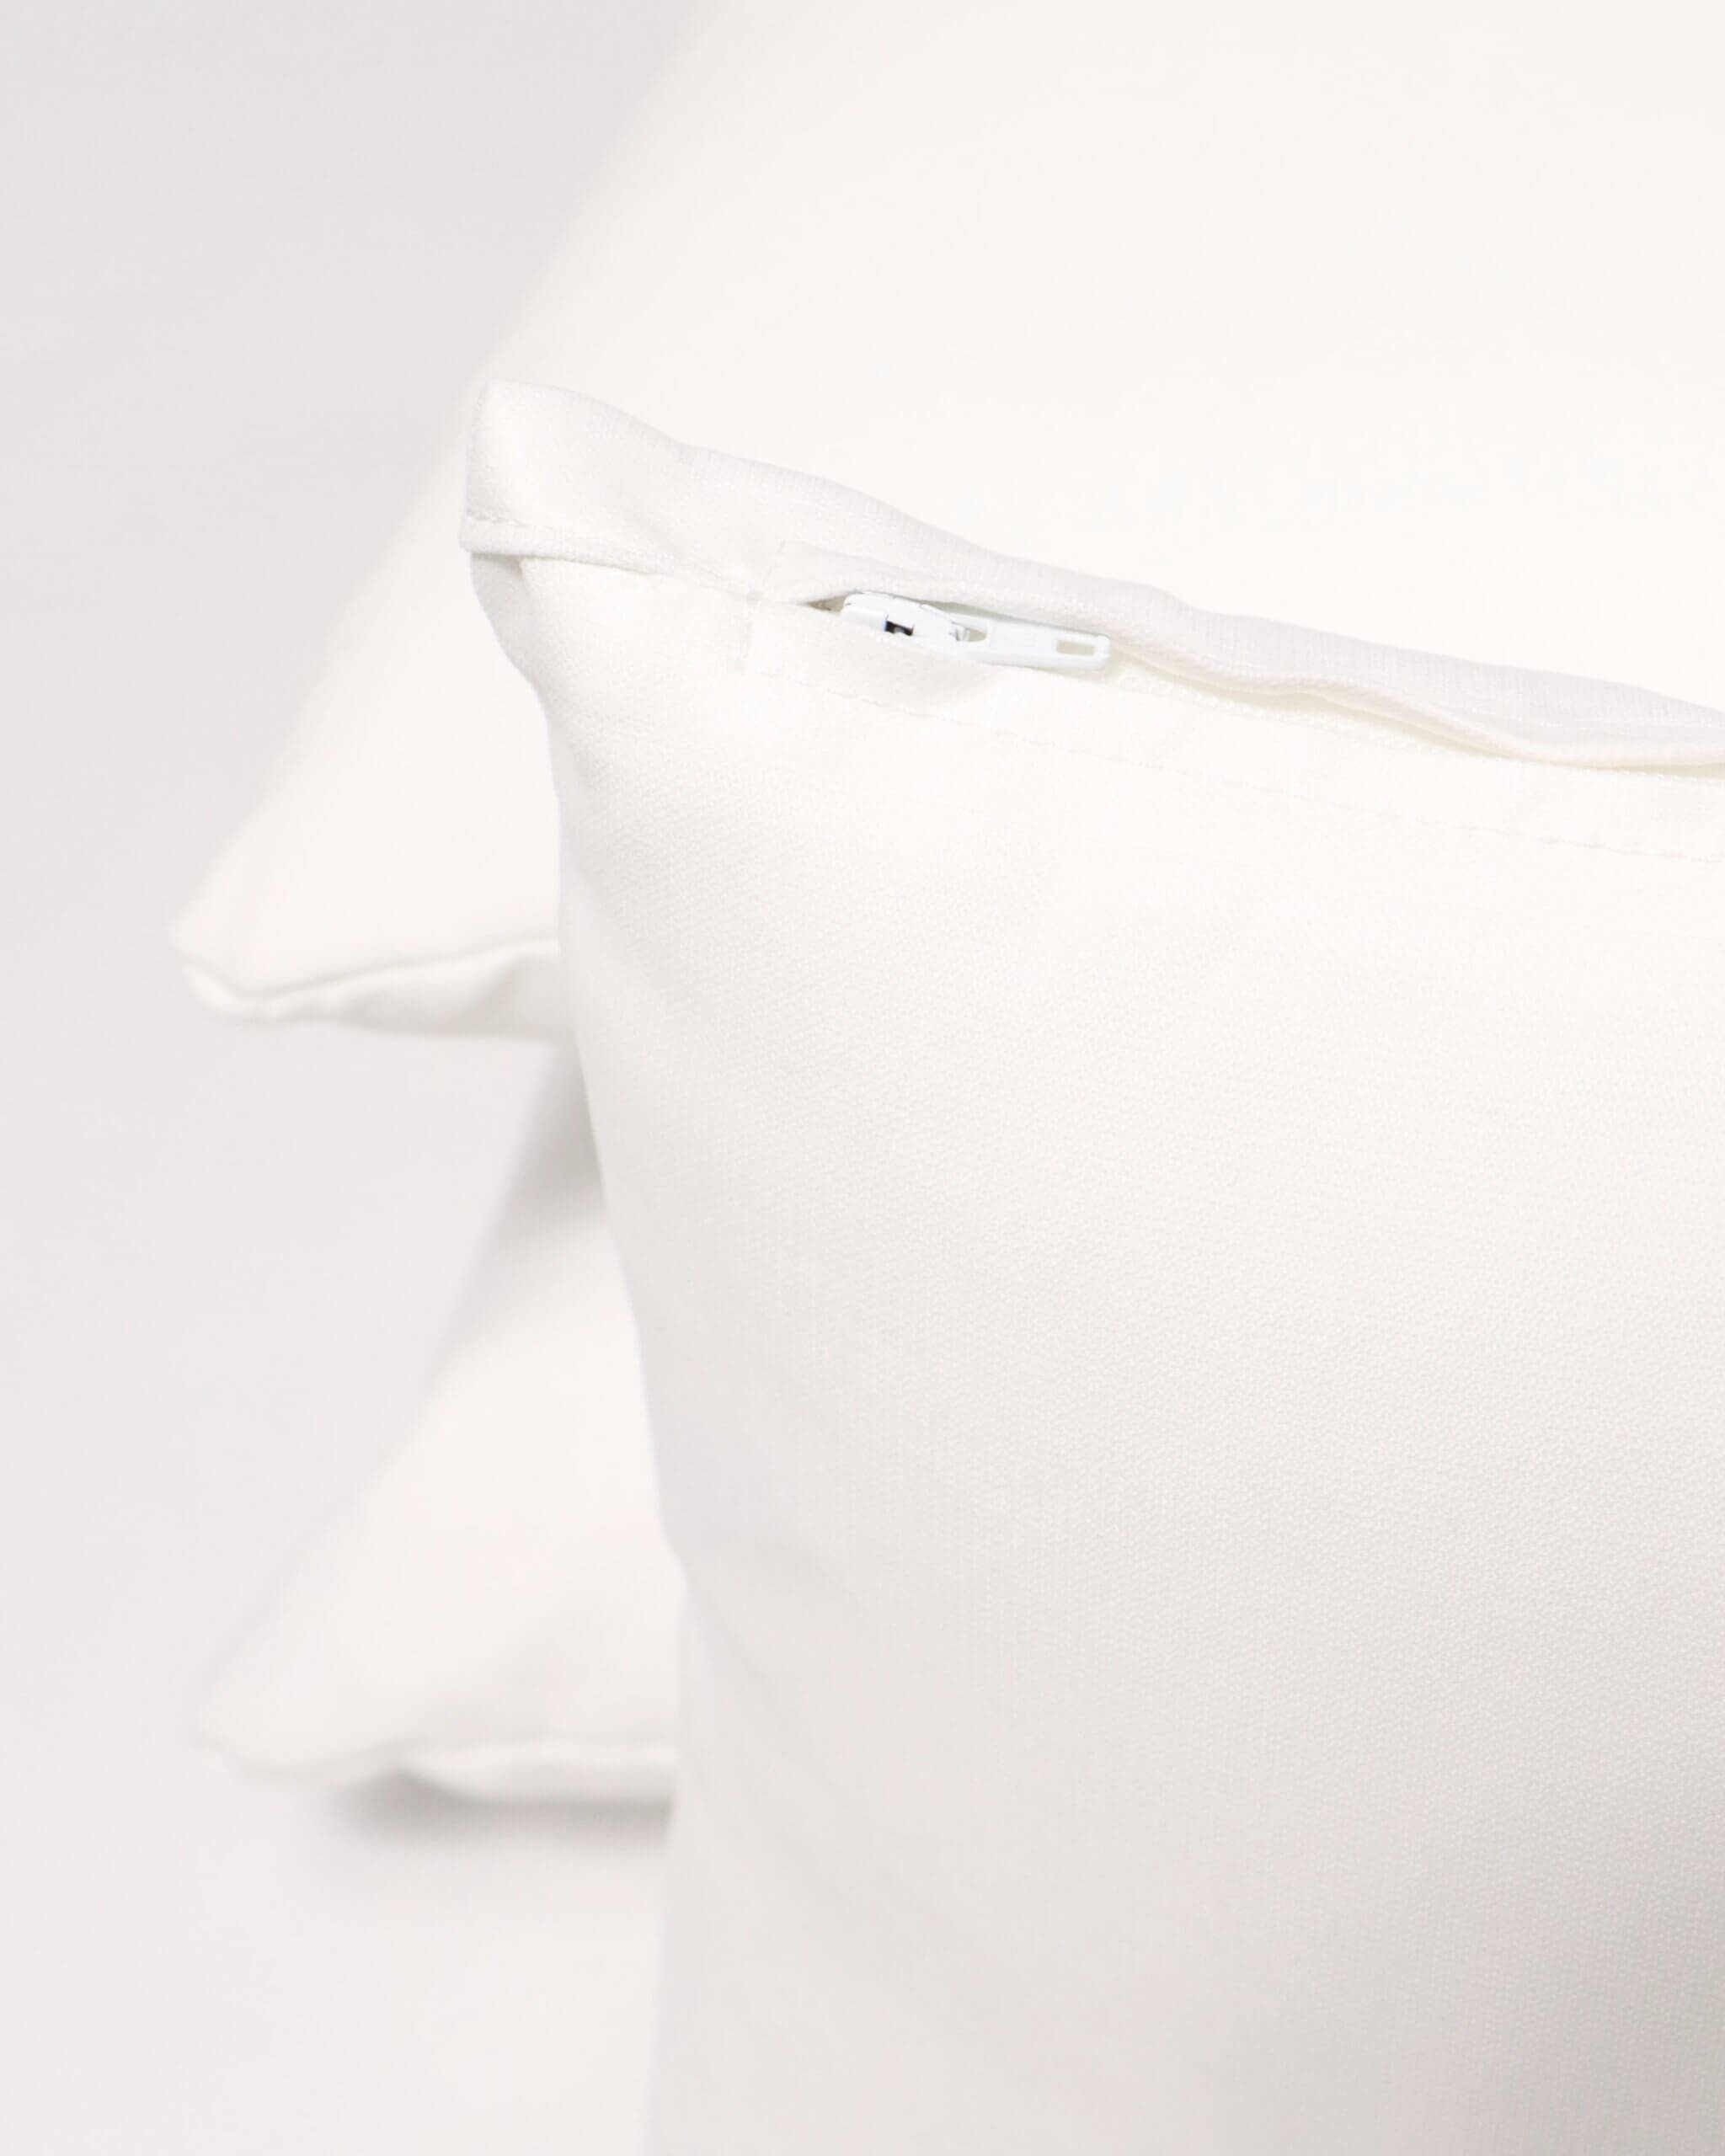
- Black or White zipper with 10.25” (small pillow), 12” (medium pillow), & 14.5” (large pillow) opening & 16mm zipper pull
- Care Instructions: Cover – Spot Clean & Air Dry; Insert – Spot clean only
*Please Note that pillow sizes represent fabric cut size & pillow insert size. The final product will be smaller than fabric cut measurements due to seam allowances. See image below for Finished Product measurements:
Design Positioning Presets:
When creating a custom pillow, you can use any of our Design Positioning Presets, but they each have their own advantages.
***Note: Designs meant to wrap around both sides of the pillow are not recommended due to seam allowance requirements. Slight variance in vertical design positioning between front & back panels may occur.
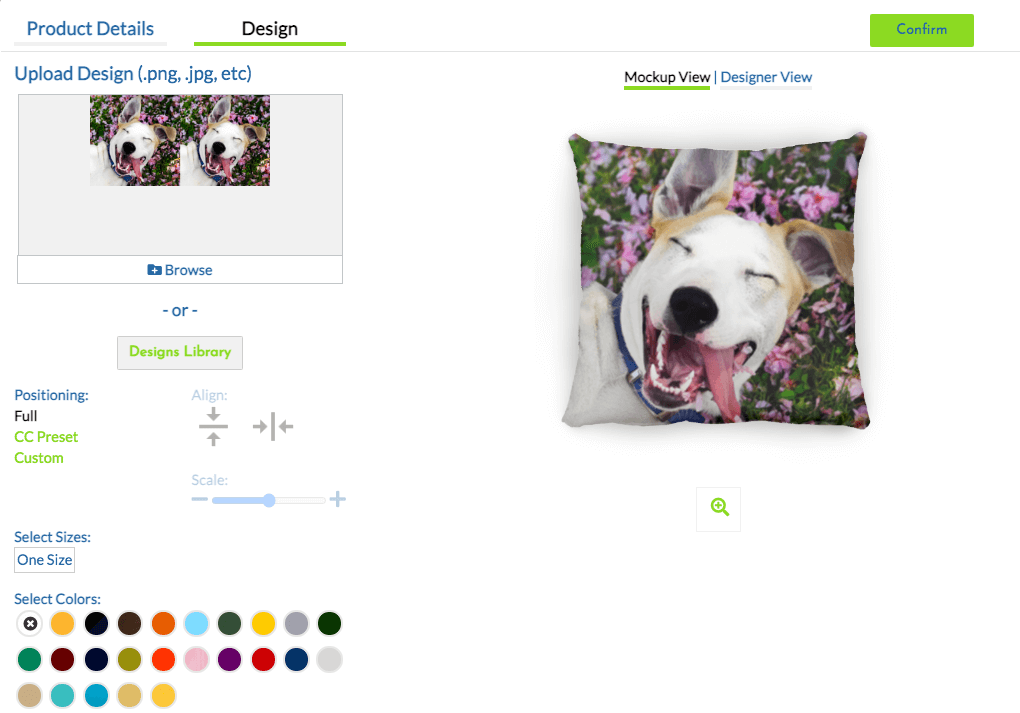
Full:
Select the “Full Front” design position if you’ve used our art template to create a design specifically for this product. As you can see, the design will display perfectly on the pillow mockup below as the design was created to the art template’s specifications. To check your design against the art template, select “Designer View.” If you’ve created your art properly, your design should be able to be positioned to extend to the red border of the art board behind your image.
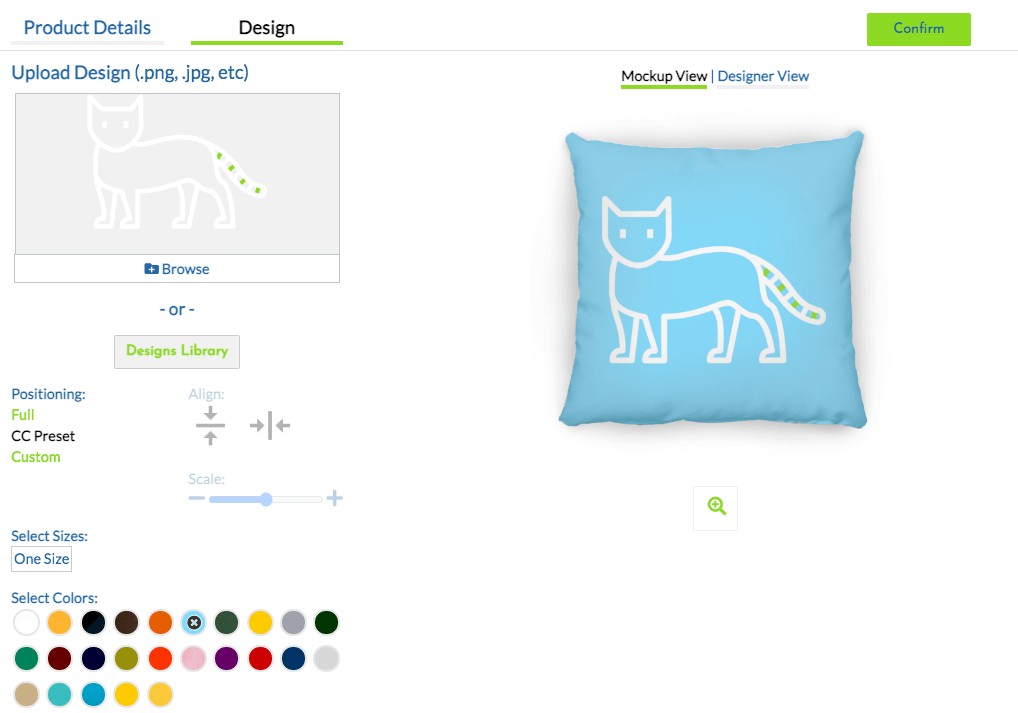
CC Preset:
Select this design position if you’re using a transparent PNG file & a CustomCat background color. This design position will center your design on your pillow & duplicate the image to both sides. Selecting a background color will fill all transparent areas of your design, ensuring no unprinted white areas will remain on your finished product. In the example below, we’ve uploaded a white design & selected a blue background color in the CustomCat designer.
Custom:
Using the “Custom” design position gives you full control over the placement of your artwork on your product. Use this setting if you would like to resize or reposition your design on your product or if you’d like your design printed on only one side of your pillow. In the example below, we’ve uploaded a photo that is not designed to the specification of our pillow Art Template.
We’ve resized the image within the CustomCat designer to ensure all the important parts of our design are within the Primary Design Area on the front of our pillow & we’ve selected a navy blue background color to fill the uncovered bleed area. Because we did not extend our design to the red edges of the bleed area, the selected background color will print on our finished product. If we had not selected a background color, white area would have remained on our pillow since we did not extend our design through the bleed area.
How to Use Pillow Art Templates:

Click the images above to download our Pillow Art Templates.
If you’re creating artwork you’d like to be printed from edge to edge or would like different designs on the front & back of your product, make sure you’re designing to the specs of the Art Template for that particular size pillow. The artwork dimensions & bleed area will differ based on the pillow size you’re selling. Failure to design in the proper dimensions may result in unprinted areas on your final product.
To use our Pillow Art Templates in Photoshop, use the following process:
- Open the Template in Photoshop
- Go to File > Open file & select your design
- Adjust your design so it’s aligned properly.
- Turn down the opacity on your design layers (temporarily) to ensure all important design elements are within the designated “Safe Area.” Once you’ve finalized your design positioning, turn the design’s opacity back up to 100%.
- When you are ready to save your file. Turn off the template layer by clicking the eye icon.
- Go to File > Save As, select PNG. Click ‘Save’.
Product Marketing:
Our AOP Cut-&-Sew Throw Pillows are made from incredibly soft polyester twill fabric that is both comfortable & durable. Double-sided edge-to-edge printing ensures that your beautiful designs are visible from any angle. Each custom product is printed & constructed in Detroit, MI with 100% USA-sourced materials. With vibrant photo-quality prints & 3 sizes to choose from, our AOP Cut-&-Sew Throw Pillow is a product you definitely won’t regret adding to your store!
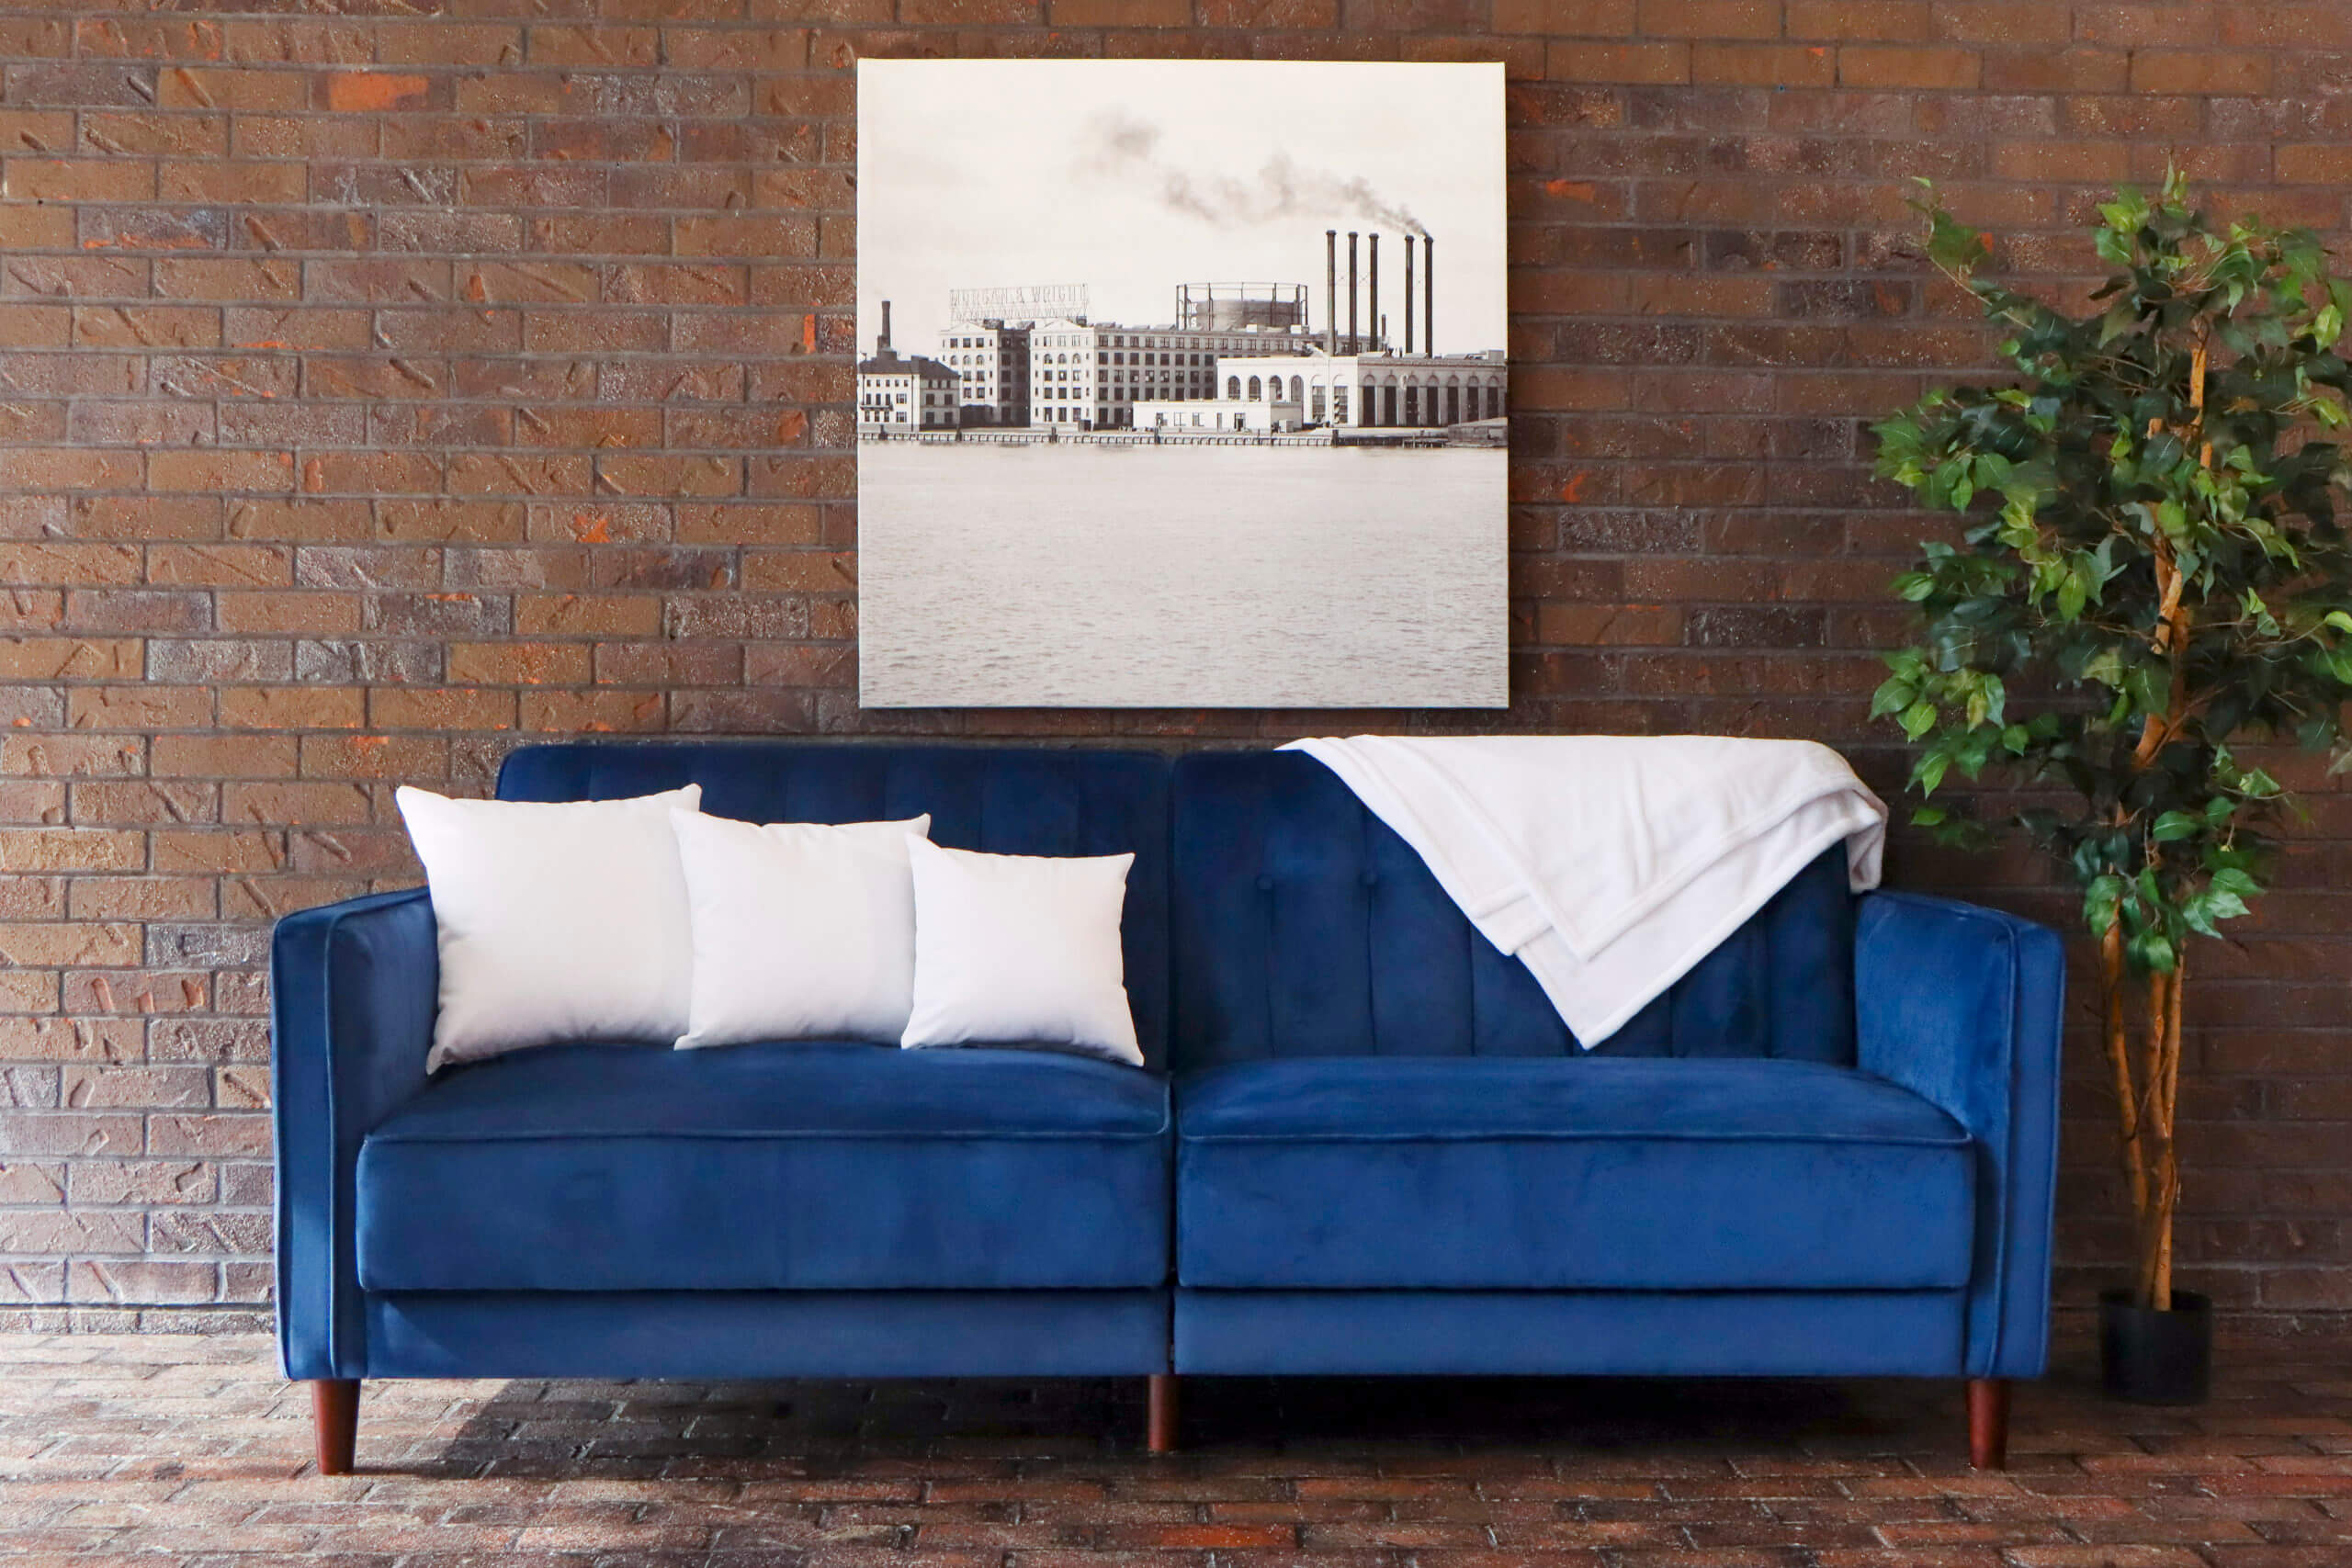
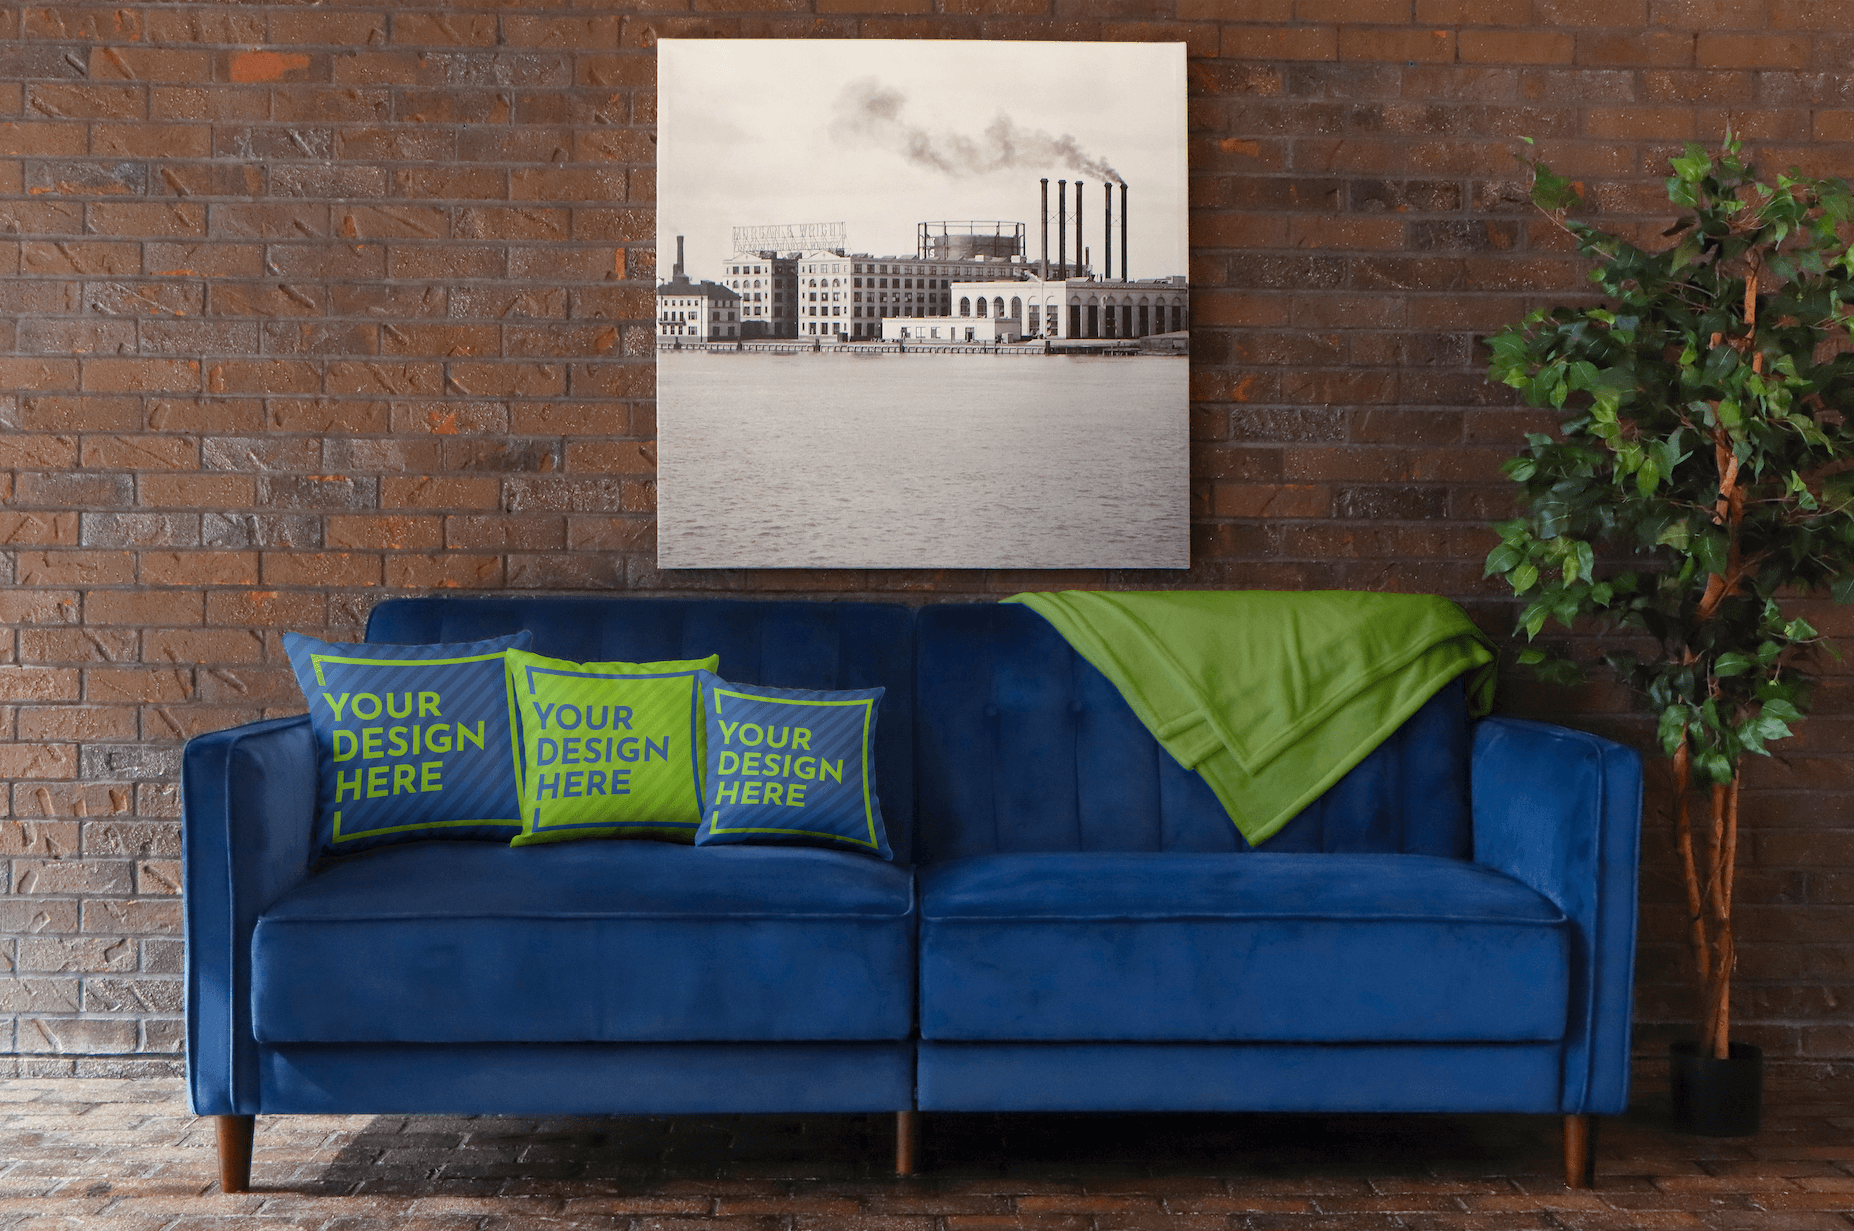
Stylized Pillow Mockups:
We put together a collection of stylized pillow mockups for your personal use. Click the link below to download 3 pillow mockup templates. Use these templates as desired.
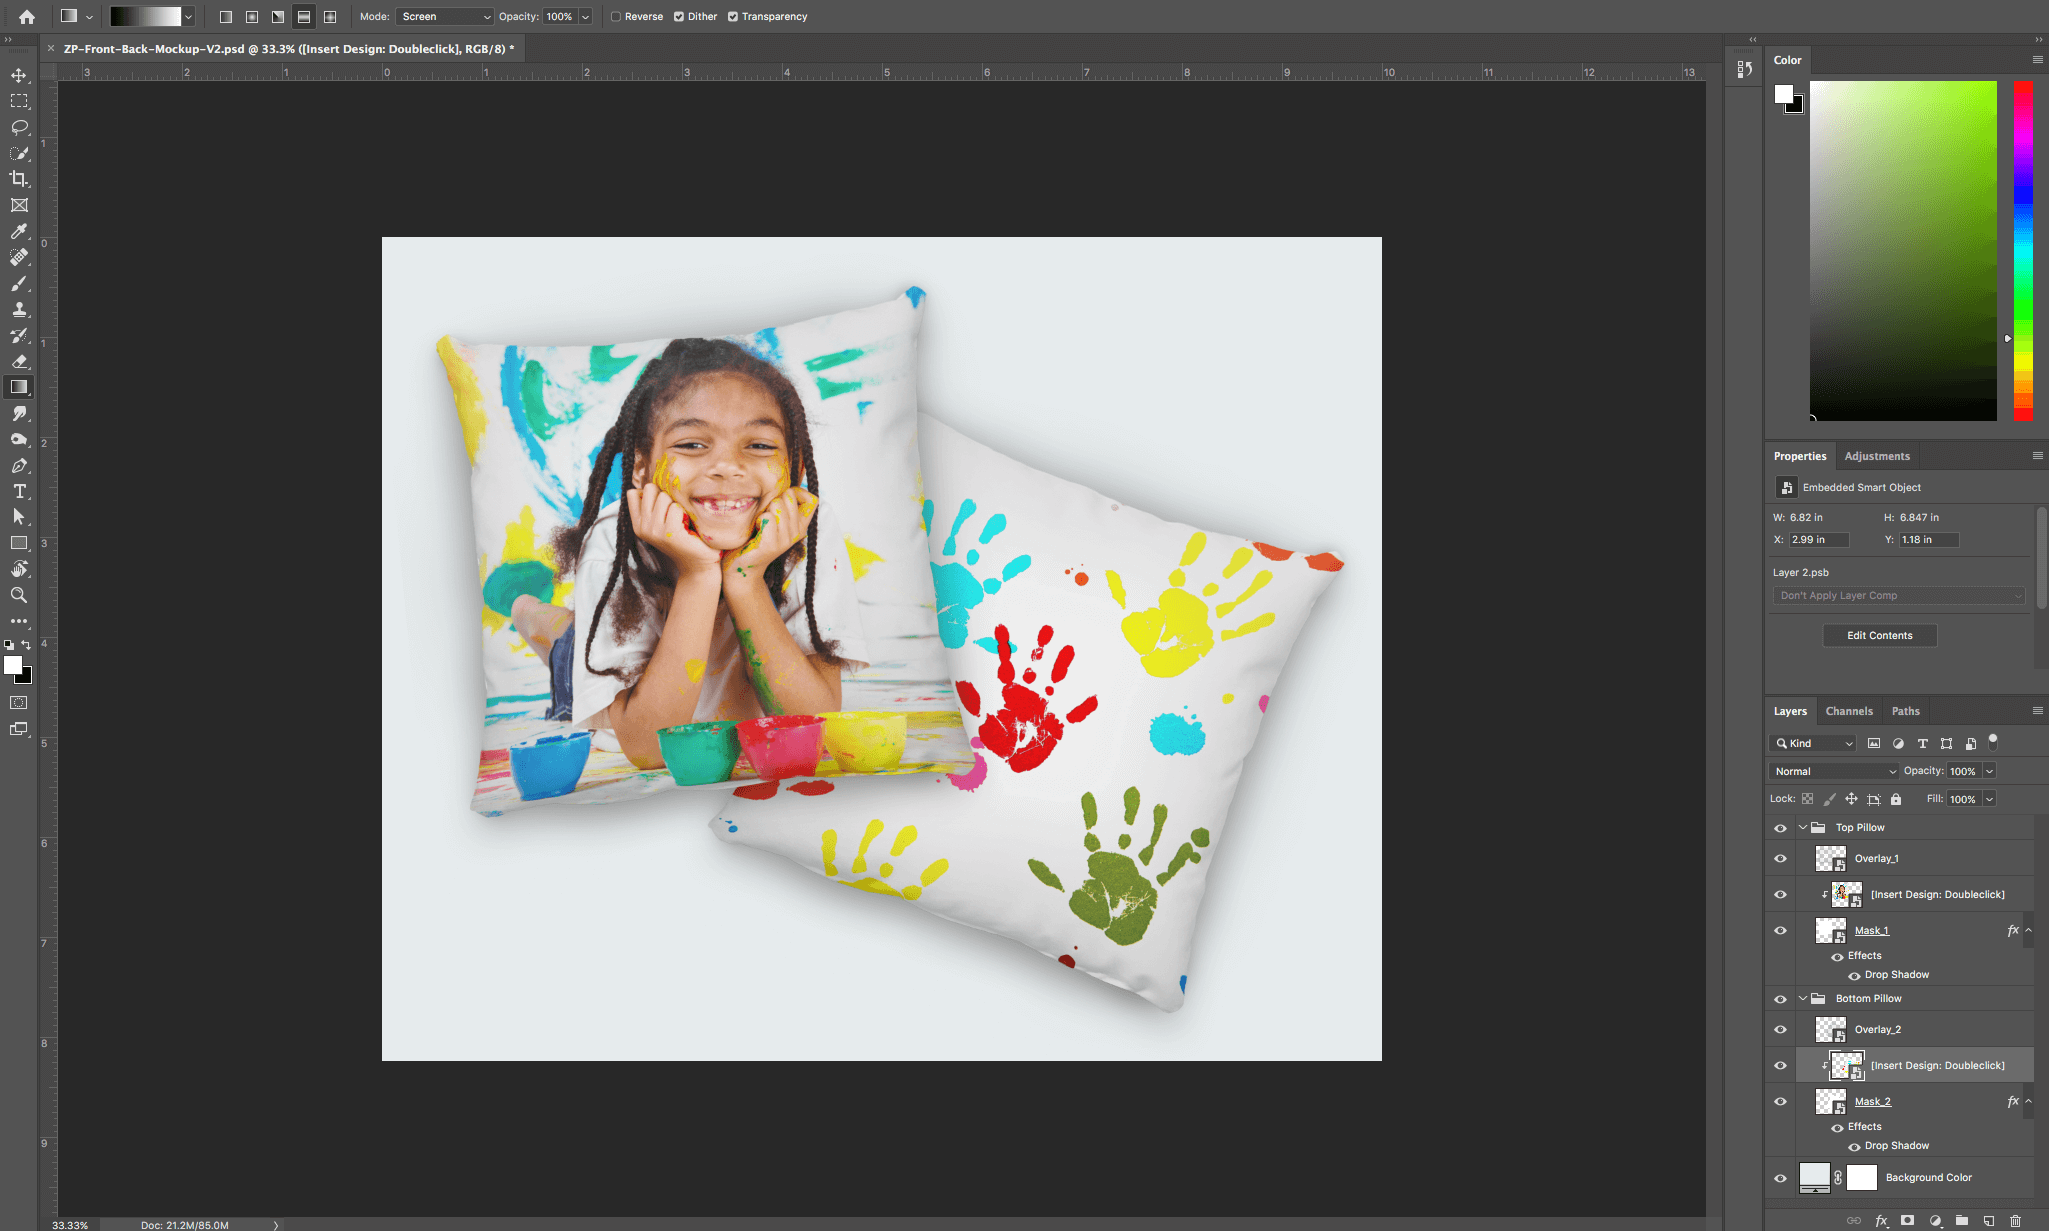
Creating Mockups Images for Your Pillows
1. Open the template in Photoshop. Make sure the layers panel is visible (Windows > Layers).
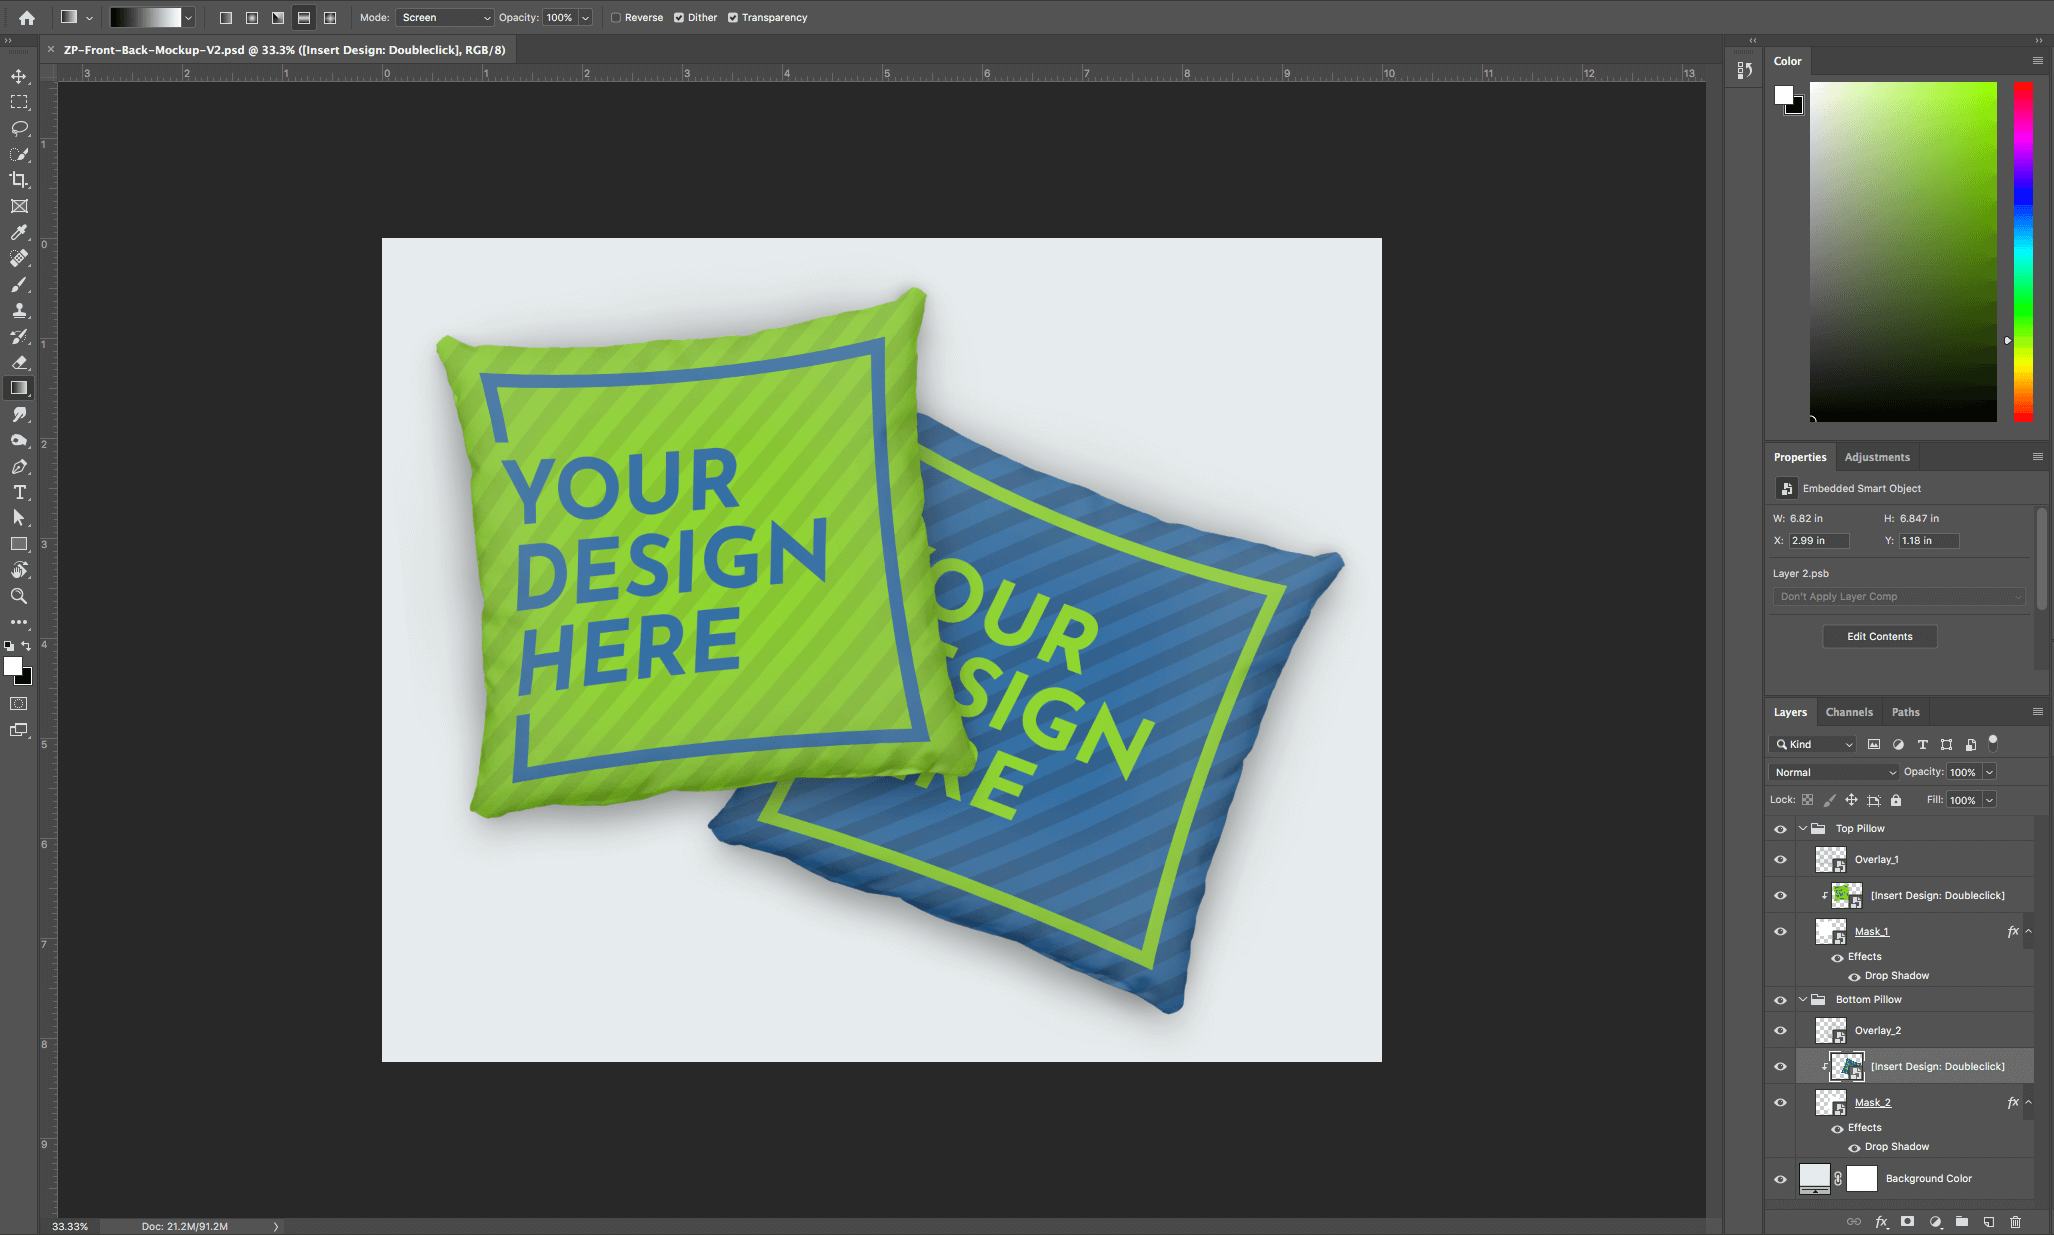
2. Double-click on the layer that’s named ‘[Insert Design: Doubleclick] under the “Top Pillow” layer folder .’ A pop up will appear automatically which enables you to add your artwork onto the mockup.
3. Add your design. Click ‘File’ > ‘Save’ and close the ‘Smart Object’.
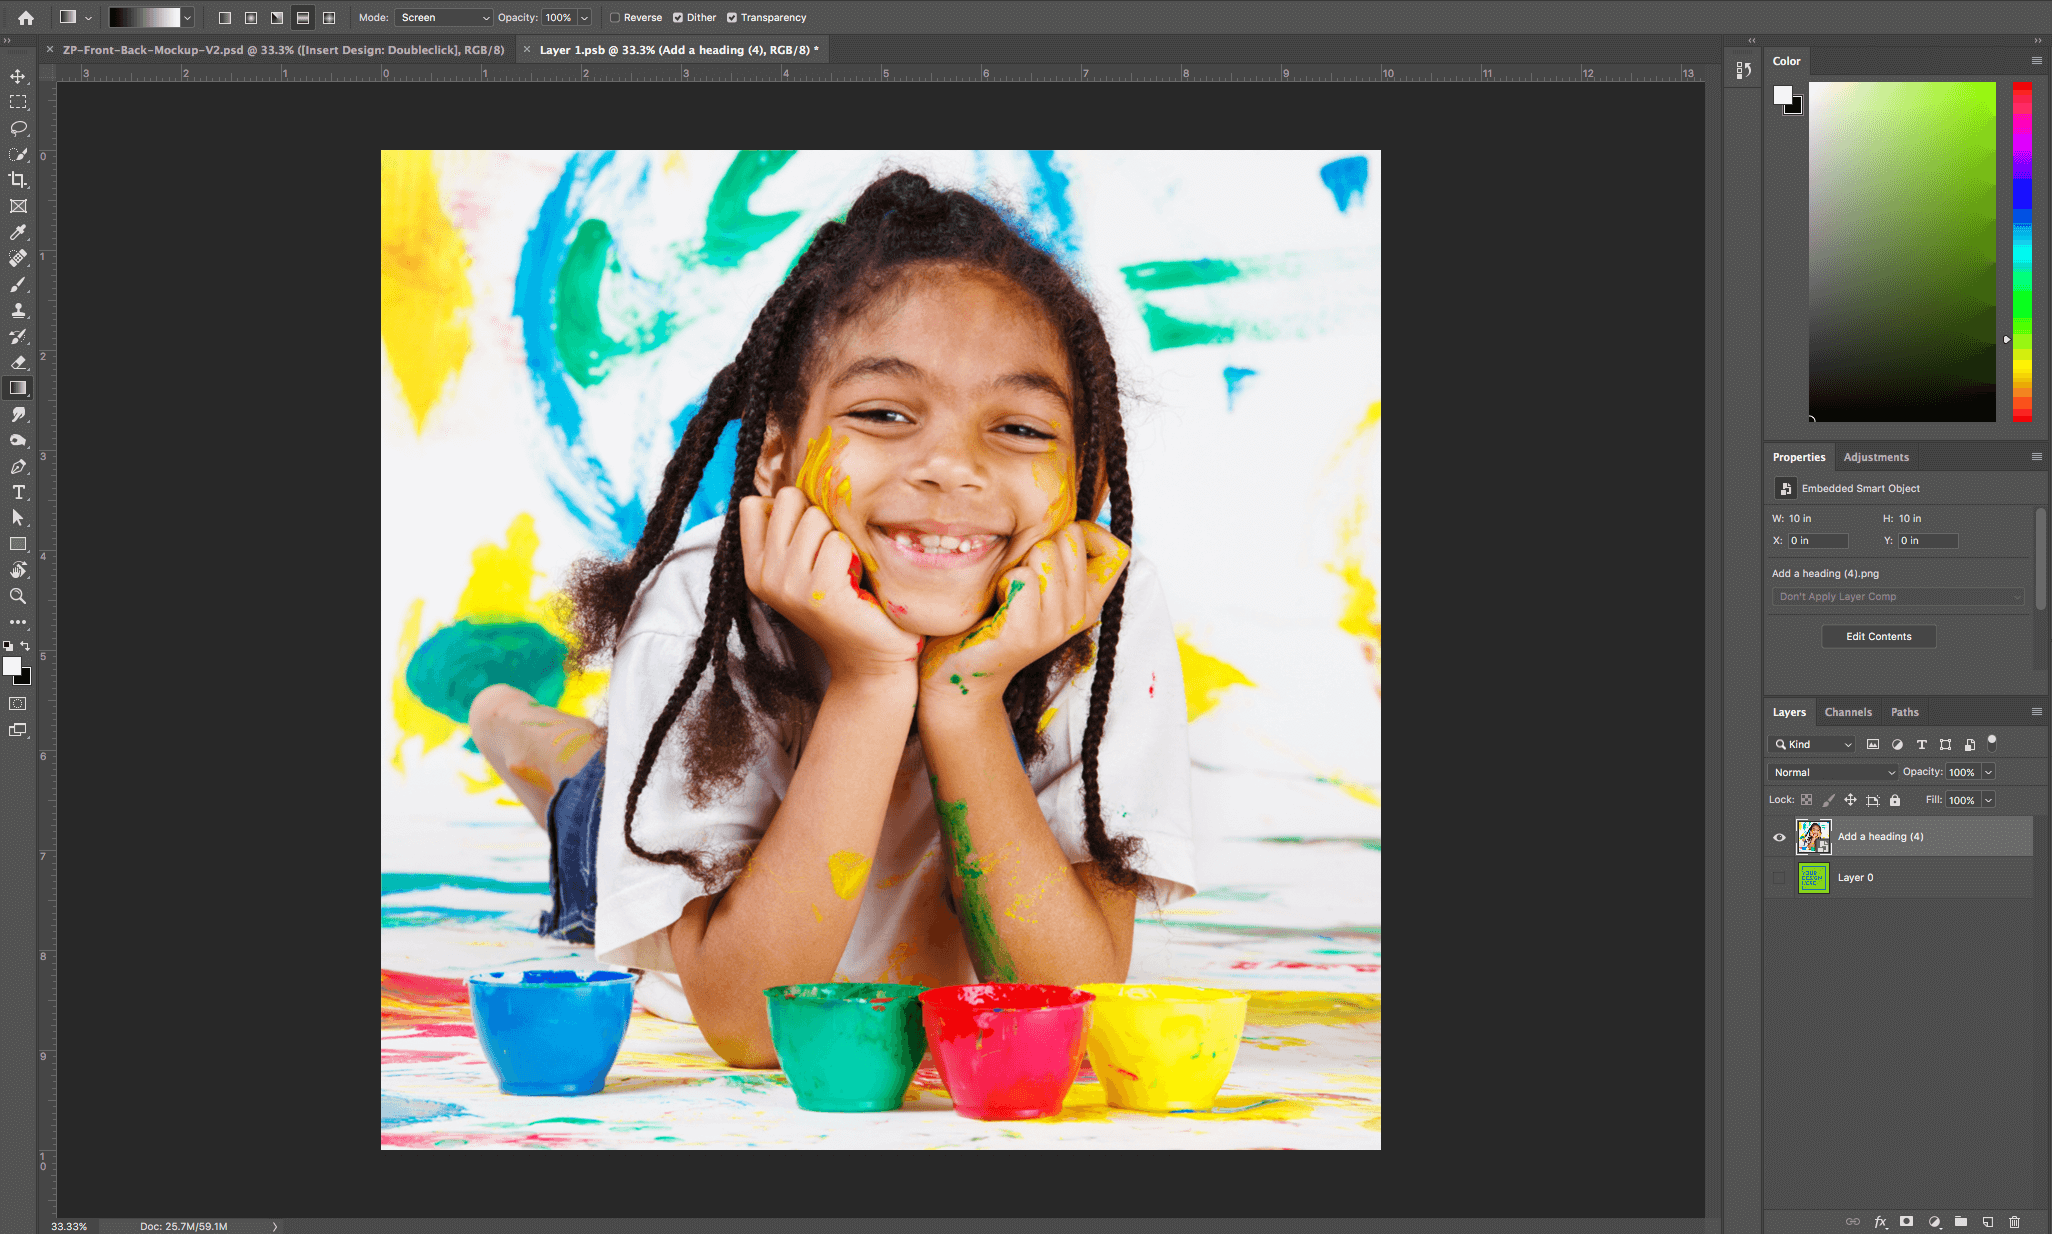
4. Repeat step 2 for “Bottom Pillow” layer folder.
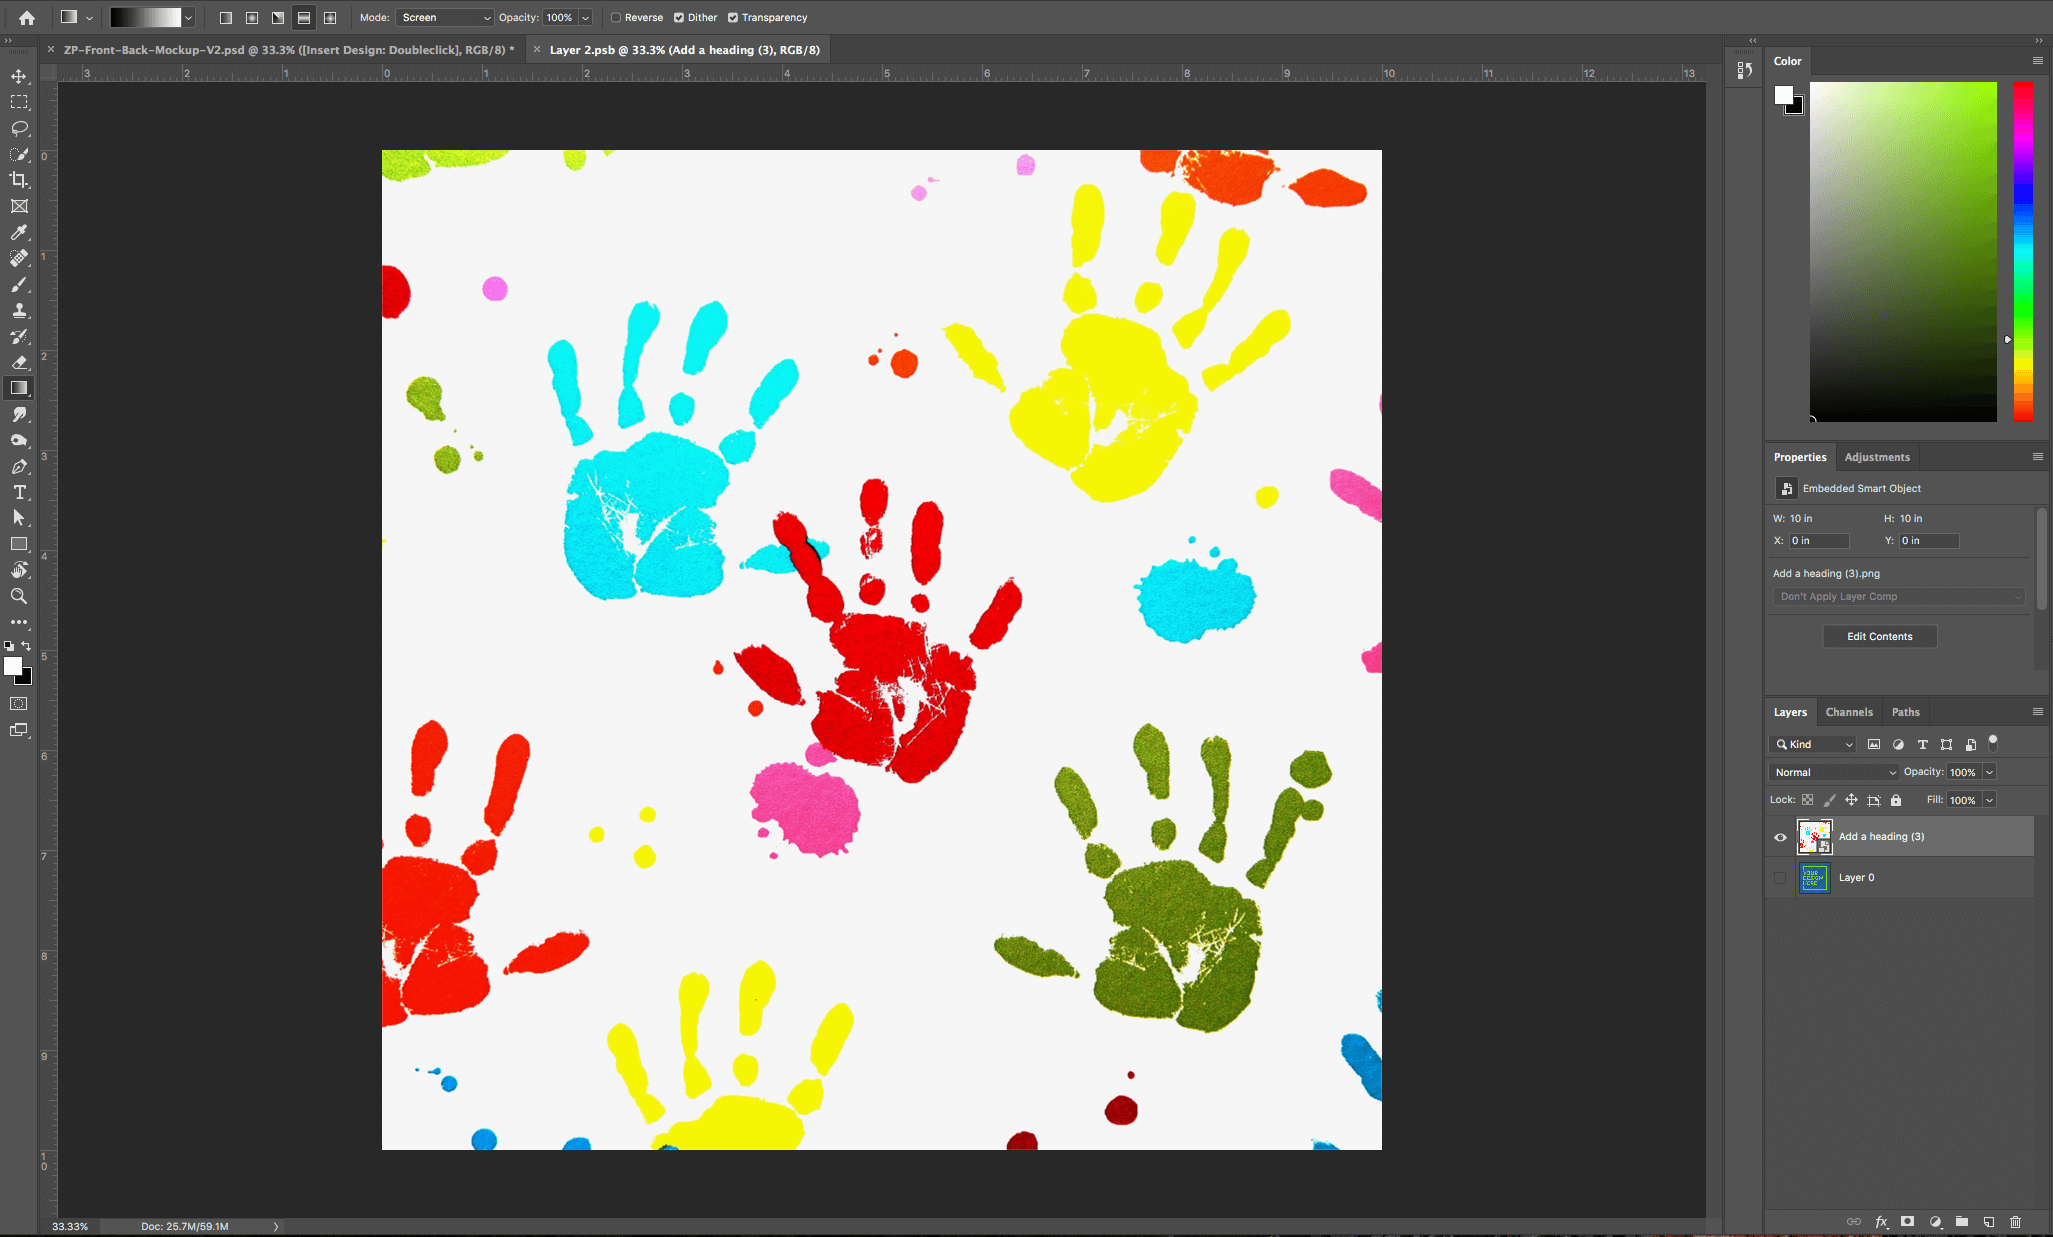
5. File > Export As > JPG
Design:
Target Market Audiences
Throw pillows can be found on just about any couch or bed across the world. Because throw pillows are so widely used, your target market audience is highly dependent on your niche. Custom throw pillows are purchased based on the appeal of the design itself — understanding the target market audience of your niche will be the best guide in identifying the target audience for your pillows.
Examples of design categories
- Geography (city/state/country)
- Sports
- Family Photos
- “World’s Best” Grandma, Mom, Father, Son, etc.
- Pet Photos
- Abstract Designs
- Decorative Patterns
- Jokes & Puns
- Animal Designs
- Holiday Themes
- Milestone Designs
- Personalized Pillows
- Inspirational Phrases
- Newborn Baby Photo, Name, & Birth Date
- Graduation
Featured Resource
One thought on “[Guide] Selling Custom POD Throw Pillows”